14 Installation and set-up manual 208668
3. Installing the unit CRANEX Novus e
7. Lift the top of the column and slide the packing
piece that supported it underneath so that you
can access the underside of the column.
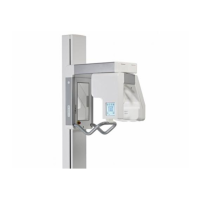
Attach the two connecting rods to the two
screws at the top rear of the column.
Attach the wall bracket to the connecting rods
with the washers and nuts.
3.2 Attaching the unit to the wall
CAUTION - HEAVY OBJECT
A minimum of two persons are required for
the following task.
1. Transport the unit to the place where it is to be
installed.
NOTE:
The transportation wheels (optional) are
attached to the base of the column with two
M10 screws. The transportation wheels can be
used to wheel the unit to the place where it is
to be used.
2. Mark the position of the two fi xing holes on the
wall according to the dimensions given in the
section 2.5 Unit and fi xing hole dimensions.
Alternatively, lift the unit into the position where
it is to be used and then, using the wall bar as
a template, mark the positions where the holes
must be drilled. Hold a spirit level on the side
of the column and then on the front to help
to position the unit so that it is as vertical as
possible.