4.6 Programming the device
To program the device, the device must be switched into a so-called DC mode. Before switching to DC mode, first
make sure power transfer is not active. The simplest way to achieve this is to either remove the receiver from the
transmitter or to power down the transmitter. To enter DC mode, connect a DC power supply to the VOUT pins.
This can be done by shorting the P11 jumper, which connects STWLC38’s VOUT to the USB VBUS. Alternatively,
an external power supply can be used. Voltage of the power supply should be higher than 3 V for this purpose.
The device can be programmed in three ways – by changing the register values directly in the GUI, by using a
Header file, which loads both Configuration and Patch files at once, or by loading the two memh files separately
using the GUI.
Note: The values written into the registers via the GUI directly are only stored temporarily and will be lost upon chip
reset.
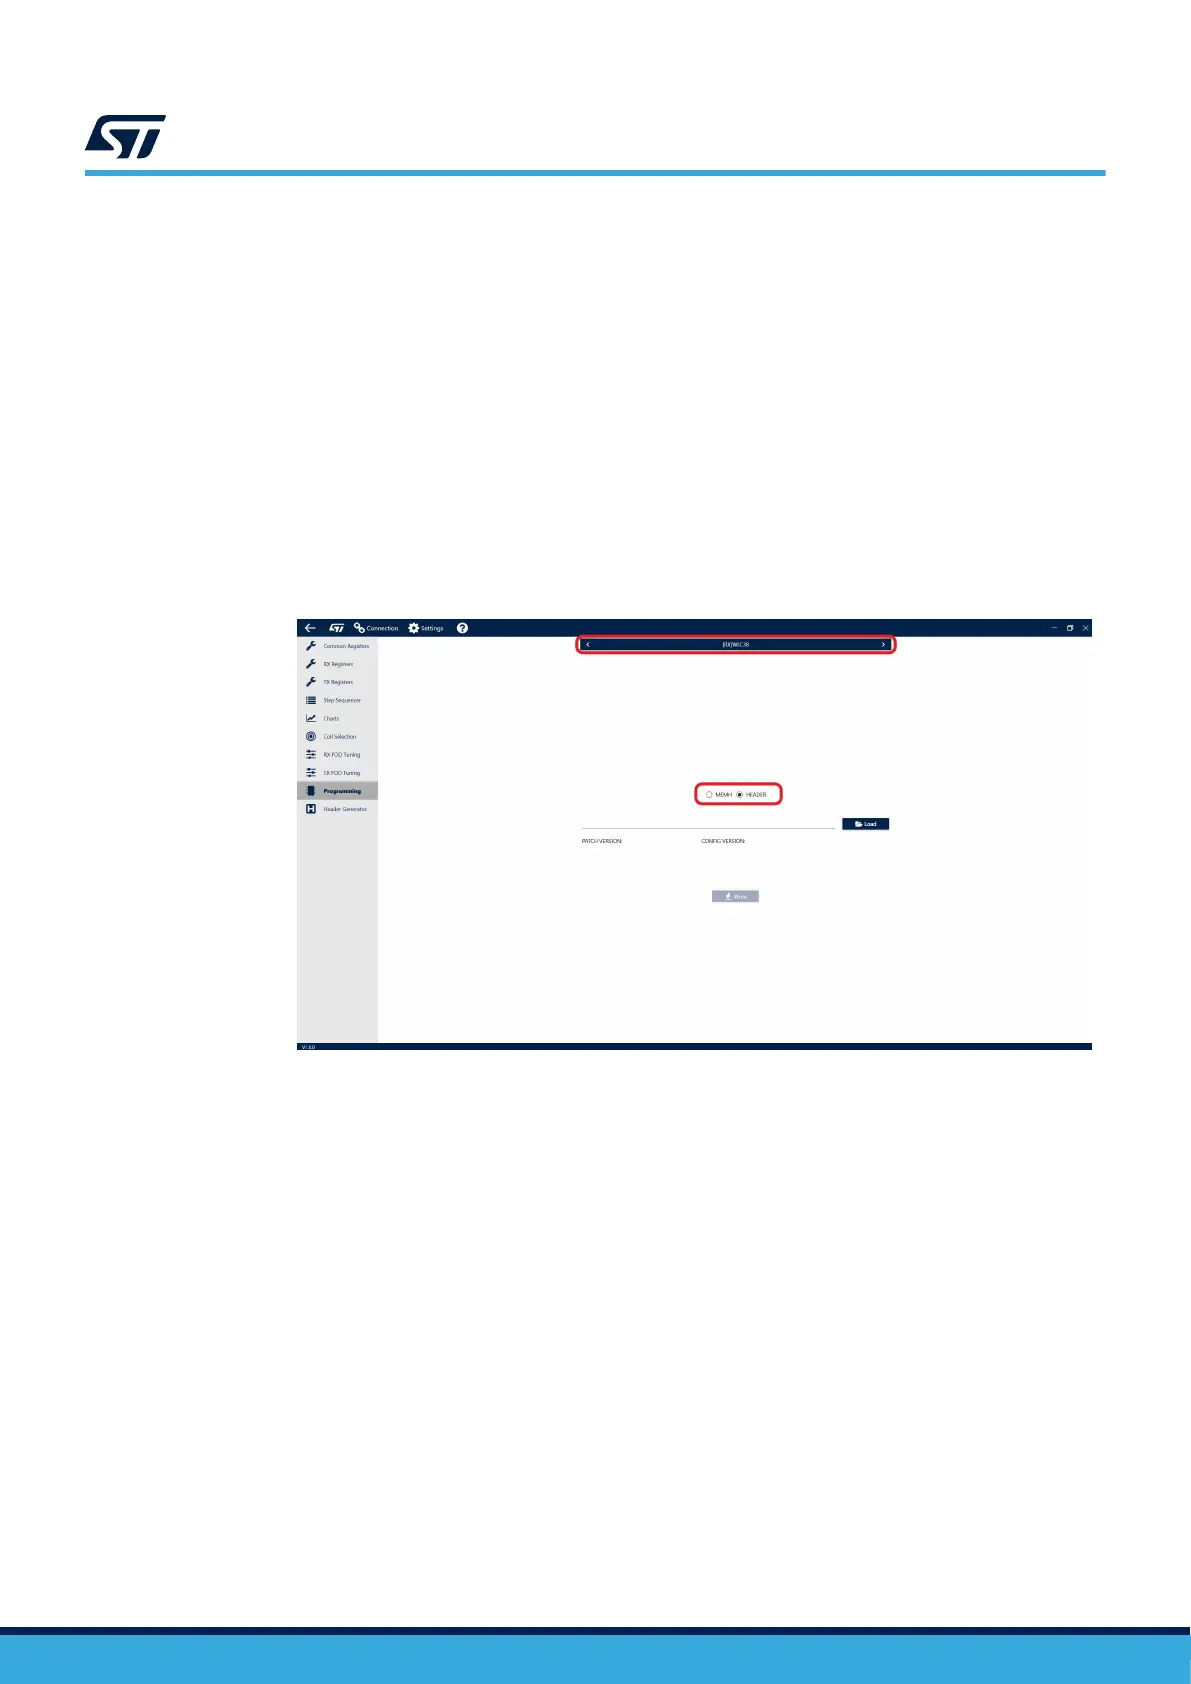
Step 1. To load the Header file using the GUI, navigate to the Programming tab in the side menu.
Step 2. Select WLC38 in the top menu and [HEADER] in the toggle selector.
Figure 13. Loading the header file
Step 3. Select the .h file you want to write.
The GUI will automatically identify the Patch and Configuration files included in the Header file.
Step 4. Press the [Write] button to load the Header file into the device.
Step 5. To load the memh files (patch and configuration) using the GUI, navigate to the Programming tab in
the side menu.
Note:
STWLC38 has 32 kB of RRAM, which allows for multiple erase/rewrite cycles up to 1000 times.
UM3154
Programming the device
UM3154 - Rev 2
page 12/81