20 1115 -10 9 - 0 01 R E V D www.stryker.com
Return To Table of Contents
Setup Procedures
If this unit is equipped with the optional electric lift/litter, the unit must reach room temperature prior to conducting
any setup and/or unit operations to prevent permanent damage to the unit.
Make sure that the unit is working properly before it is put into service. The following list will ensure that each part of
the unit is checked.
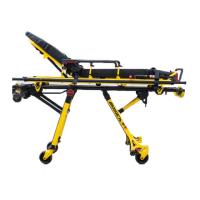
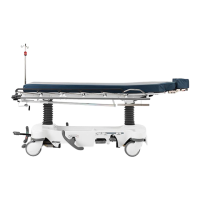
Stretcher checklist:
1. Depress the pedal at either end of the stretcher fully to set the four wheel brakes and verify that all of the four
casters are locked (page 21).
2. Raise and lower the hydraulic lift system (page 22 or page 23).
3. Raise the unit completely and activate the Trendelenburg function. Ensure that the head end lowers to the full
down position (page 25).
4. Raise the unit completely and activate the reverse Trendelenburg function. Ensure the foot end lowers to the full
down position (page 25).
5. Run through the operation of the Big Wheel to ensure that it is operating properly (page 26).
6. Ensure that the siderails raise and lower smoothly and lock securely in the full up position (page 27).
7. Raise and lower the fowler (head end) (page 31).
8. Raise and lower the gatch (foot end) (page 33).
If equipped with the optional electric lift/litter:
1. Check all items on the stretcher checklist above.
2. Plug the unit into a properly grounded, hospital grade wall receptacle and ensure that the LED lights illuminate on
the lockout keypad.
3. Raise and lower the hydraulic lift system (page 24).
4. Perform each function on the patient siderail controls to ensure that they are working properly (page 28).
5. Perform each function on the foot end nursing controls to ensure that they are working properly (page 29).
6. Raise and lower the fowler (head end) (page 32).
7. Raise and lower the gatch (foot end) (page 34).
If equipped with the optional scale - electric litter option (with or without chaperone option):
1. Check all items on the stretcher checklist above.
2. Plug the power cord into a properly grounded, hospital grade wall receptacle to charge the batteries.
Note: To charge the battery, see “Charging the Optional Scale System Battery Pack - Electric Litter Option (Not
Available With Prime X Option)” on page 43 or “Charging the Optional Scale System Battery Pack - Electric
Litter Option with Chaperone (Not Available With Prime X Option)” on page 45.
WARNING
This stretcher is equipped with a hospital grade plug for protection against electric shock hazard. It must be plugged
directly into a properly grounded three-prong receptacle. Grounding reliability can be achieved only when a hospital grade
receptacle is used.
CAUTION
• Do not modify this stretcher. Modifying the unit can cause unpredictable operation resulting in injury to the patient
or operator. Modifying the unit will also void its warranty.
• This stretcher is not intended for pediatric use or for patients under 50 lb. This stretcher is intended for use by
trained hospital personnel only.