30 1115 -109 - 0 01 RE V D www.stryker.com
Return To Table of Contents
Operation Guide
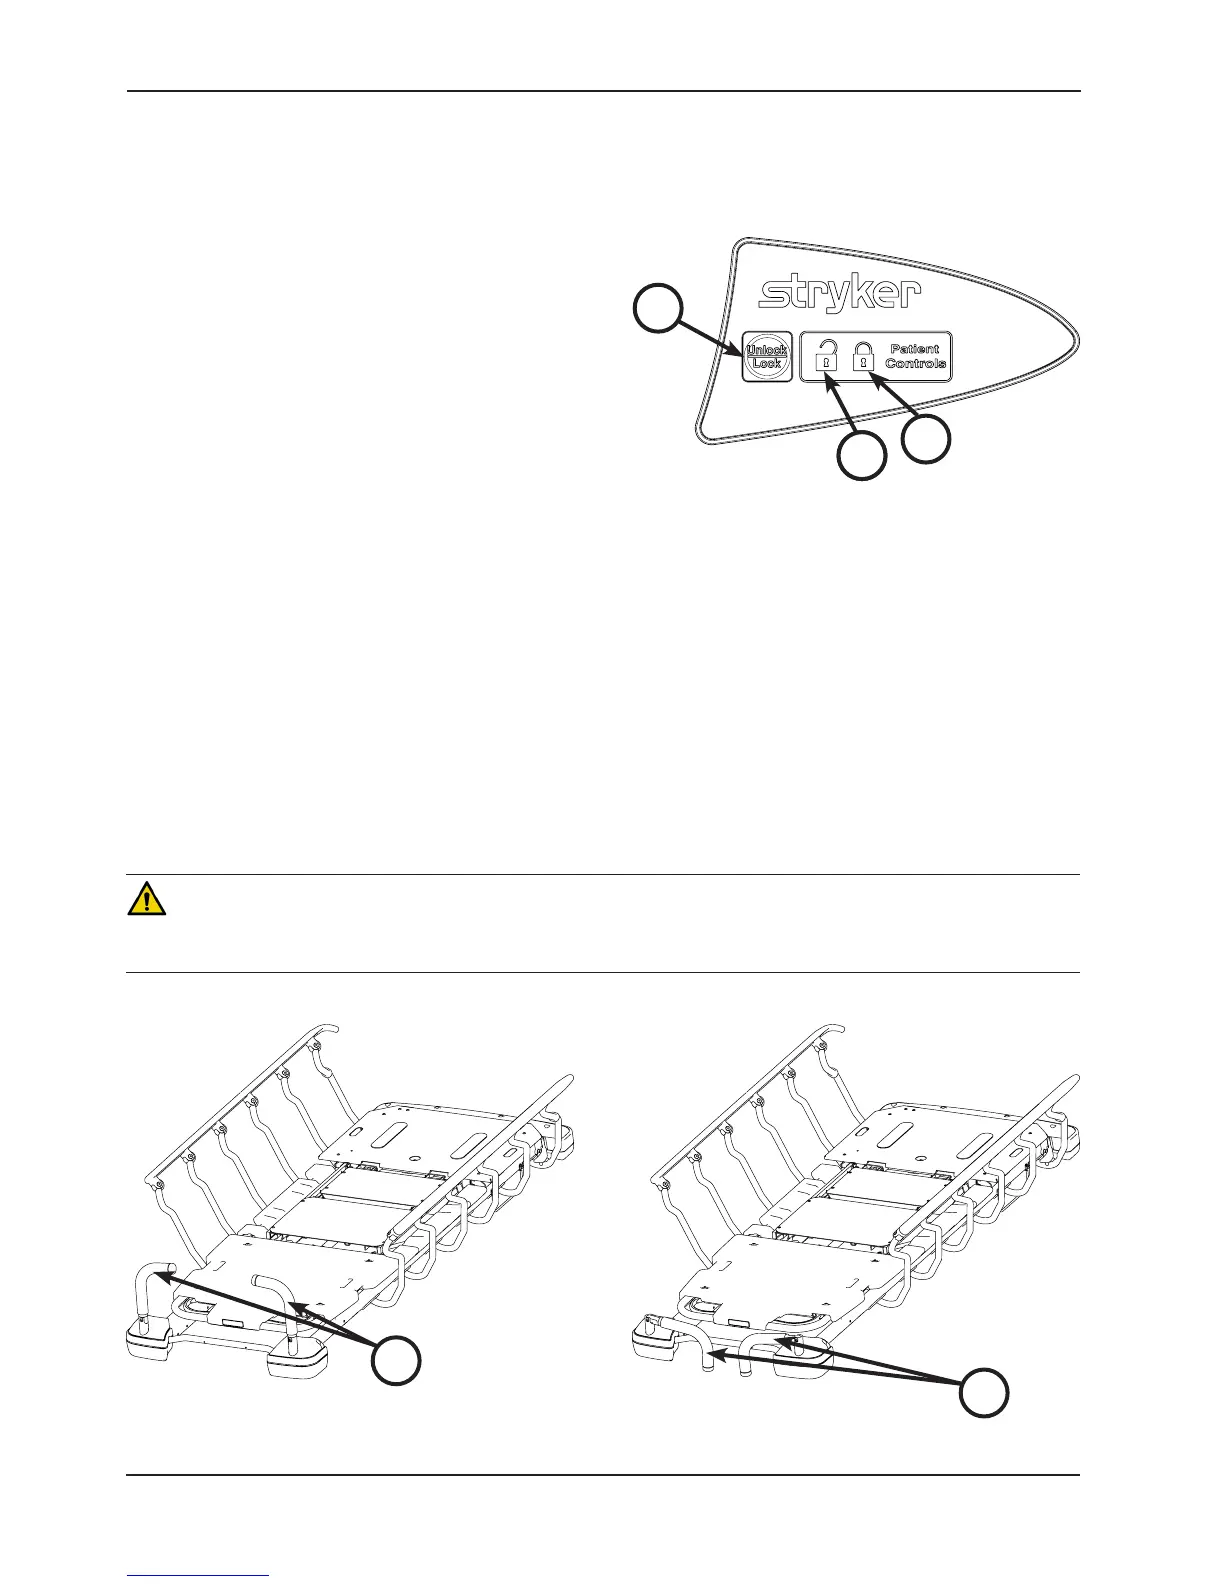
Figure 18: Push Handles Open
A
Figure 19: Push Handles Stored
B
USING PATIENT CONTROL LOCKOUT - OPTIONAL ELECTRIC LITTER (NOT AVAILABLE WITH PRIME X
OPTION)
Ensure that the power cord is plugged into a properly
grounded, hospital grade wall outlet before using the
optional electric litter.
You can press the patient control lockout button to prevent
the patient from using the siderail patient controls to move
the fowler and gatch. The patient control lockout button is
located at the foot end of the stretcher.
To lock the siderail patient controls, press the Lock/
Unlock (A) button as shown in Figure 17. The lock icon (B)
is illuminated amber while the patient controls are locked.
The foot end nursing controls are not locked.
Note: When the siderail patient controls are locked, the
siderail patient controls are not backlit.
To unlock the siderail patient controls, press the Lock/Unlock (A) button as shown in Figure 17. The unlock icon (C)
is illuminated green when the patient controls are unlocked.
OPERATING THE OPTIONAL PUSH HANDLES
To use the push handles, pivot the handles (A) up and push down until they are locked into position (Figure 18).
To store the push handles, lift the handles (B) up and pivot them down to store in the handle rests (Figure 19).
CAUTION
The push handles were designed for use while transporting the stretcher. Avoid using other parts of the stretcher as
push/pull devices because damage could occur.
Figure 17: Patient Control Lockout
A
AC
B