Maintenance, Service, and Repair
Brake Service
Page 6
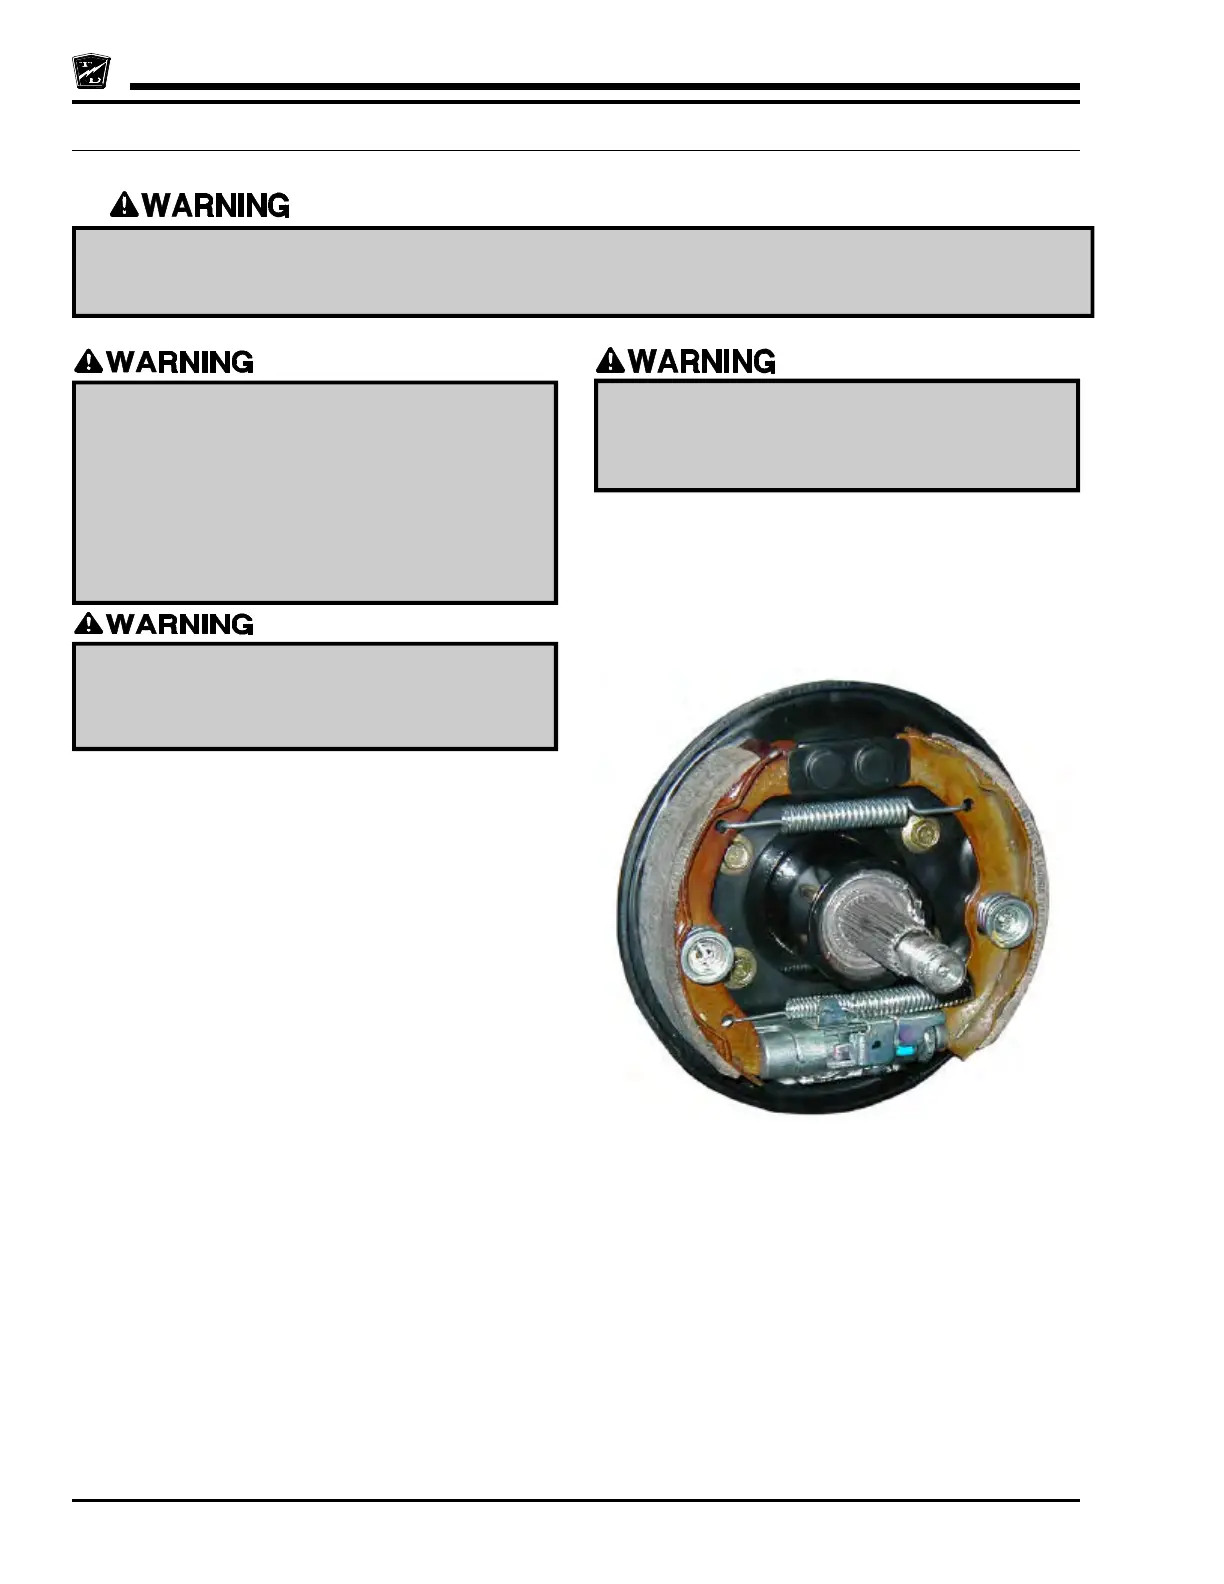
REPLACE BRAKE SHOES
6. Raise the rear of the vehicle and support with jack stands.
7. Using the appropriate procedure, remove the brake drum.
8. Release the park brake.
9. Remove the tension springs.
10. Remove the hold down springs.
11. Remove the auto-adjust lever spring.
12. Apply this procedure in reverse order to install the new
brake shoes.
NOTE: Be sure all the parts are thoroughly cleaned.
NOTE: Be sure that the anchor points on the brake shoes
are given a light coat of hi-temp grease.
13. Lower the vehicle and reconnect the main positive and
negative at the batteries.
15. Remove the blocks from behind the wheels.
16. Test drive the vehicle.
Brake Assembly
1. Make sure the start switch is in the “OFF”
position, then remove the key.
2. Place the forward-reverse switch in the center
“OFF” position.
3. Set the park brake.
4. Place blocks under the front wheels to prevent
vehicle movement.
5. Disconnect the battery.
Always use a lifting strap, hoist, and jack stands, of
adequate capacity to lift and support the vehicle.
Failure to use lifting and support devices of rated
load capacity may result in severe bodily injury.
Do not allow grease to contact any of the braking
surfaces. Braking surfaces contaminated with
grease may cause the brakes to fail resulting in
property damage and/or severe bodily injury.
Current Taylor-Dunn
®
brakes are asbestos free. However, there is the possibility that the original brakes were
replaced with aftermarket parts containing asbestos. Since this possibility exists, all brake parts should be
handled as if they contain asbestos. Refer to Appendix C for recommended handling precautions.