23
Questions? Call 1-866-44-TDSTV or visit tdstv.com.
Create a Favorites List
With a Favorites List, your Program Guide only displays the channels you’ve chosen (rather than listing all
the channels available in your TDS TV subscription). You can create up to five Favorites Lists per set-top
box. Create one for specific members of the family (Kid’s list, Mom’s list, etc.) or by channel type (sports
list, movie list, etc.). Here’s how to set up a new list or revise an existing list:
1. Press the MENU button or the LEFT ARROW buttons on your remote. The main menu will appear.
2. Use the DOWN ARROW to navigate to the Settings, then press the OK button.
3. Use the ARROWS to select Set up Favorites. Then, press the OK button.
4. Use the DOWN ARROW to select Set up favorites. Then, press the OK button.
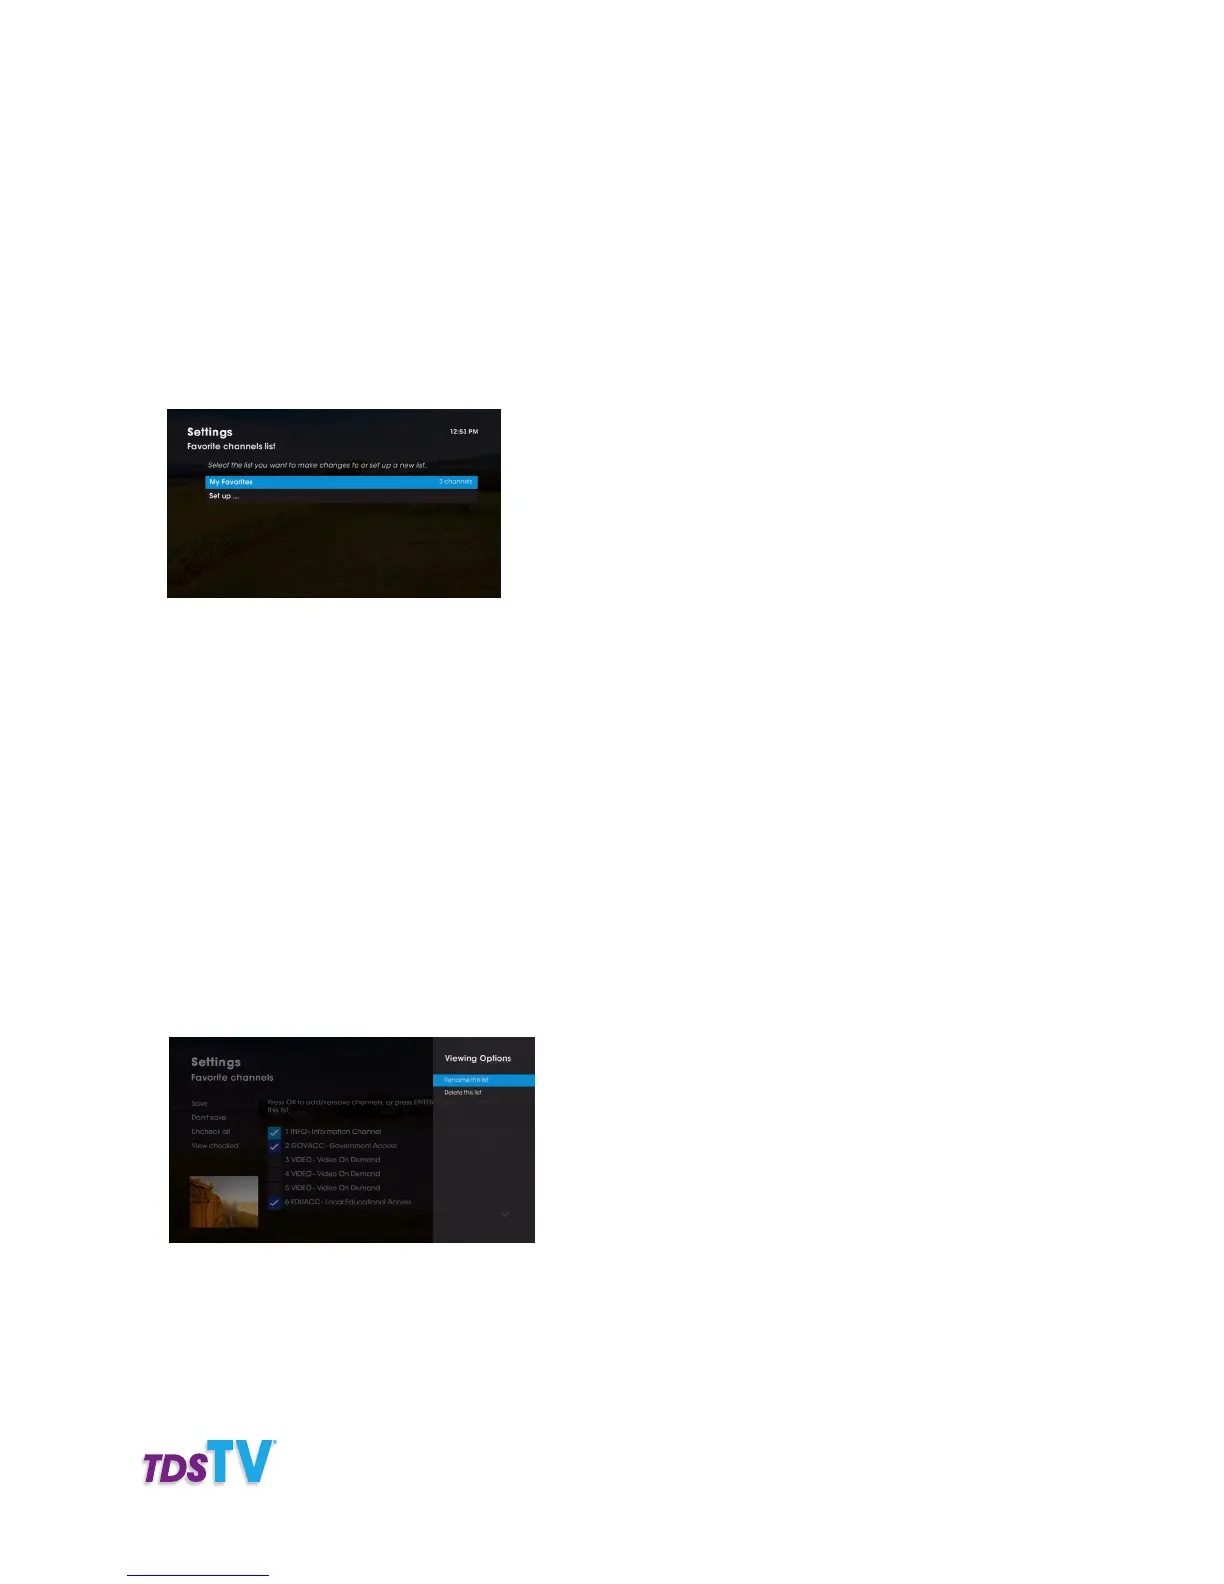
5. The Favorite Channels Settings screen will appear, showing all the channels available in your TDS TV
package or those in your favorite list (if you’re revising an existing list). Using the UP and DOWN ARROW
buttons as well as the OK button, choose which channels you want included in your favorites list by
checking or unchecking the box next to the channel name.
• A check mark in the box indicates you want the channel included in the favorites list.
• To uncheck all boxes and clear your favorite channel list, select Uncheck all from the left sidebar
and press OK on your remote.
• To see only the channels in your favorites list, select View checked from the left sidebar and press
OK on your remote.
6. Once you’ve selected the channels to include in your Favorites List, press Enter button on your remote.
The Viewing Options panel appears on screen. Select Rename this list to name your favorite list. Or,
choose Delete this to remove the list.
7. If renaming, you’ll be prompted to give your list a name. Use the ARROW buttons and OK to name it.
8. Navigate to the left side bar and select Save.
Repeat the process up to four more times.