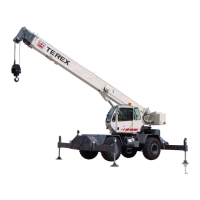
HYDRAULIC CYLINDERS MAINTENANCE
PISTON & HEAD GLAND
It is not normally necessary to replace the piston, piston
rings, or head gland.
HYDRAULIC CYLINDER REASSEMBLY
GENERAL
As cylinder components are reassembled, be certain all
rings, seals, spacers, and setscrews required in one step are
in place before proceeding to the next step. See Group 39 of
the Parts Manual for a complete listing of cylinder parts.
A teflon ring must be installed before the piston ring or wear
ring is installed since the teflon ring must first be “walked”
into the piston ring groove and then into its own groove.
Warm the teflon ring until reasonably flexible and oil the
piston ring or wear ring to aid in the installation.
Most piston ring breakage is due to careless or hasty assem-
bly at this point.
BOOM LIFT CYLINDERS
With the piston, piston rod, head gland, retaining ring, and
rod eye reassembled as a unit, slide the piston into the cylin-
der bore. Next, insert and seat the head gland. It may be nec-
essary to drive the head gland into place using a wood block
and hammer. In this event, cover the rod with rags or a rub-
ber tube to prevent damage from a glancing hammer blow.
The retaining ring is then spun in and tightened to secure the
head gland. Install socket head cap screws. The retaining
ring should be secured with Loctite Grade 242. Coat both
grooves around the thread ring as well as the bolt heads with
a “silstic” type silicon sealant to keep moisture out.
Note: When installing the piston ring nut on the piston rod,
torque to 400 ft. lbs and then secure with setscrew
lock. Use Loctite Grade 242 on ring nut and set-
screws.
BOOM EXTENDED CYLINDERS
With the piston, piston rod, head gland, and retaining ring
assembled as a unit, slide the piston into the cylinder bore.
Next, insert the head gland. It may be necessary to tap the
gland into place using a wood block and hammer. In this
event, cover the rod with rags or a rubber tube to prevent
damage from a glancing hammer blow. The head gland is
then spun in and tightened.
Note: Apply Loctite Gr. 242 to piston retaining rings at
assembly. Also apply to locking setscrews.
On cylinder, preset nylon plug with a 25 ft. lb. torque, using
a Grade 8 cap screw, and install setscrew and setscrew and
torque to 15 ft. lbs, three (3) places.
HYDRAULIC CYLINDER OPERATION
As soon as the cylinder is ready to be placed in operation, it
should be slowly cycled under no load conditions for several
minutes in order to allow the entrapped air within the cylin-
der to escape to the reservoir and, also facilitate the reform-
ing of the seals which may have temporarily deformed
during shipping, storage, or reassembly.
New cylinders may show a slight “drifting” tendency when
first used. This is natural, due to one or both of the following
causes:
1. Air entrapped in the oil.
2. Seals not yet fully reformed or seated.
“Drifting” should decrease with operation as piston rings and
seals “break in” to provide better sealing and the eventual
escaping of the trapped air in the oil.
SERVICE AND ADJUSTMENTS
Issued: August 20036 - 21RT700 Series