Portable Connector Chapter 7: Toolbar Functions
Page 35 TTN169162-D02
• New Logo: This button is visible only in “Edit Record mode”. Pressing this button will cause an Open File
dialog to appear, allowing you to navigate to any directory where your logo is located. Adjust directory
location as desired and press Open.
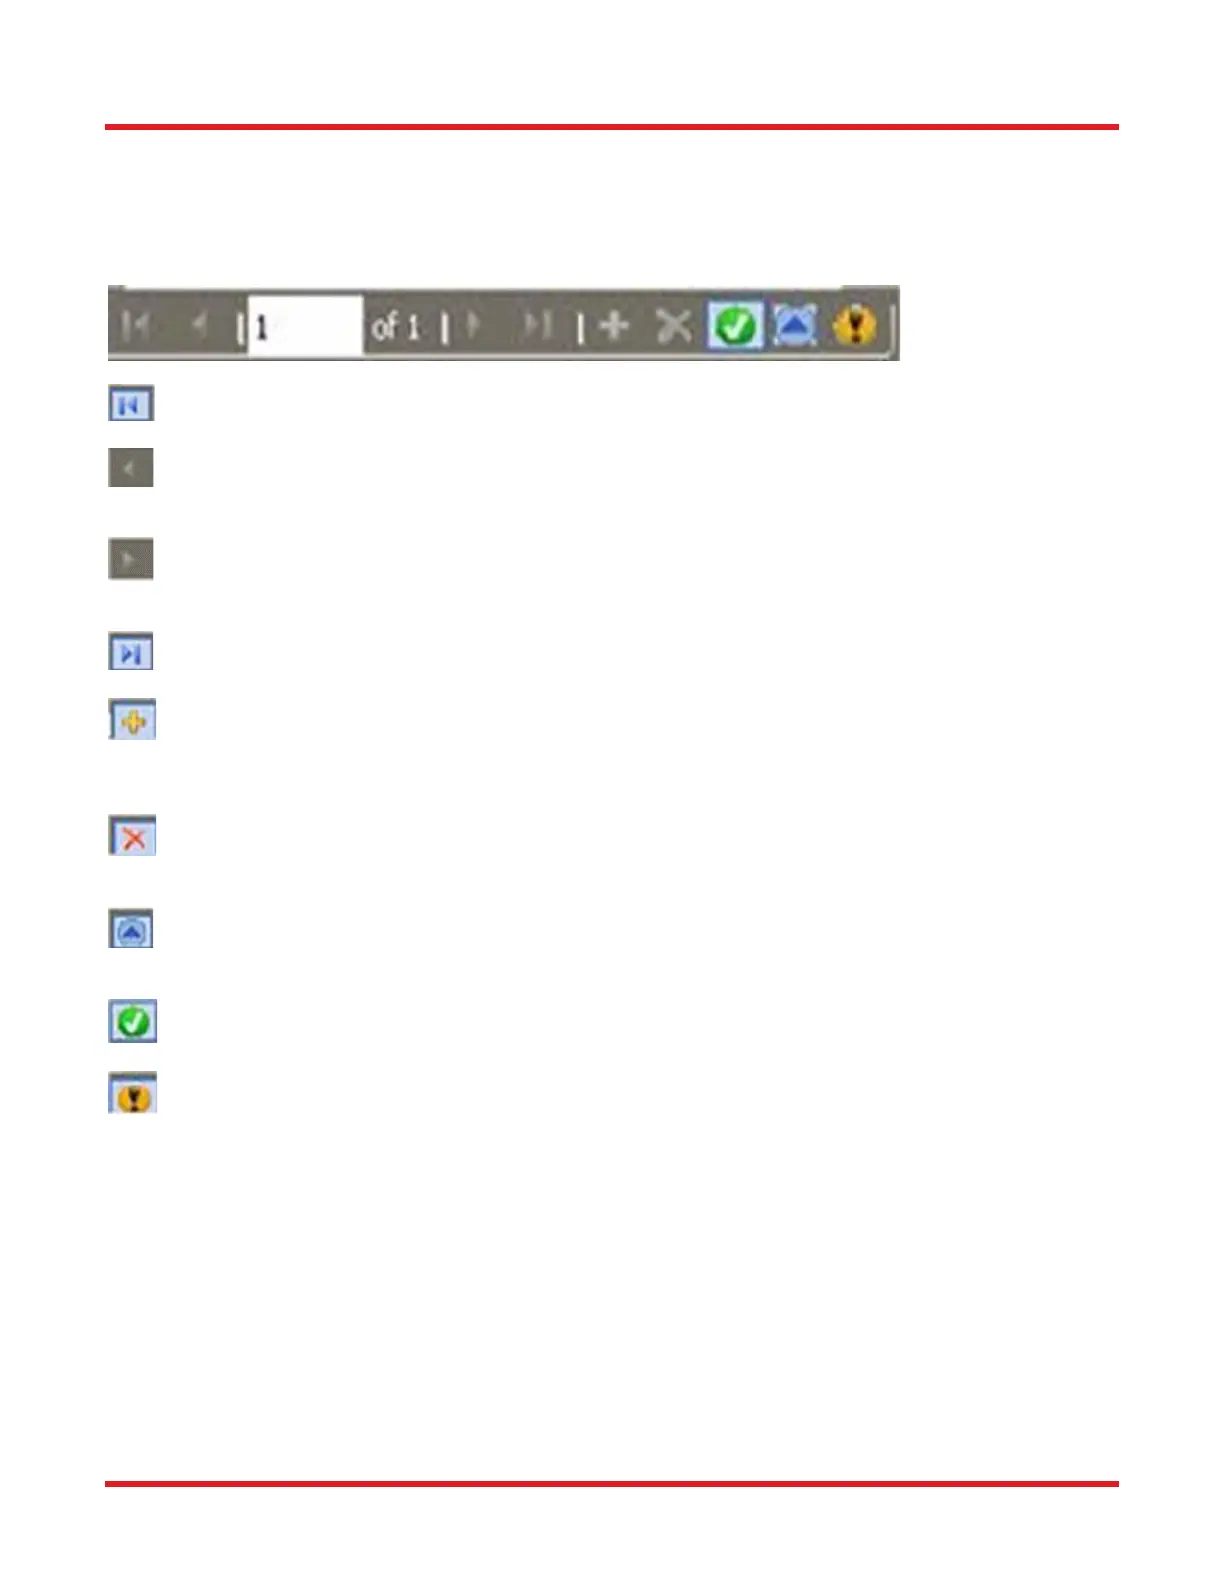
Navigation Tools: These tools allow you to view, add, and edit the Company Information records.
First Record: Pressing this button will bring you to the first saved choice of Company Information.
Prior Record: Pressing this button allows you to scroll backwards through the choices of saved Company
Informations.
Next Record: Pressing this button allows you to scroll forwards through the choices of saved Company
Information.
Last Record: Pressing this button will bring you to the last choice of saved Company Information.
Insert Record: Pressing this button will allow entry of a new record of Company Information anywhere
among the current set. Press Save Changes button after all information has been entered in order to save
the information.
Delete Record: Pressing this button deletes the Company Information that is in view. A confirmation dialog
will appear.
Edit Record: Pressing this button allows you to edit any CompanyInformation record. Press Save Changes
button after all desired changes have been made.
Save Changes: Pressing this button allows you to save all data entered.
Cancel Edit: Pressing this button cancels any changes made.
Scan Selection: Select reports to generate using the following criteria.
• Connector ID: Check this option to limit reports to those scans having particular Connector IDs (and/or IDs
containing a particular text string). Multiple selection criteria can be entered, using “,” to separate each
criteria. Wild card character “*” can also be used, for example ‘MyConn*’ to select all Connector IDs
beginning with the letters “MyConn”.
• Job ID: Check this option to select scans having particular Job ID. The same selection criteria entry method
applies as for Connector ID.
• Operator ID: Check this option to select scans having particular Operator ID. The same selection criteria
entry method applies as for Connector ID.