© 2013 Thorlabs GmbH54
DCx Cameras
3 Operation
This chapter explains how to connect the DCx camera and how to use the applications contained in the uc480
software package.
Quick start
Installation and connection
Installed uc480 programs
o uc480 Camera Manager : The central tool for managing all connected DCx Cameras.
o uc480 Viewer : A comprehensive viewer for exploring the camera functionality.
o uc480 Player : A small program for playing AVI videos captured with the uc480 Viewer.
o uc480 Hotpixel Editor : A tool to edit the sensor hot pixel list stored in the camera.
3.1 uc480 Quick Start
This chapter show how to quickly get started with your DCx camera. You will learn how easy it is to connect the
camera and explore important functions. For further steps of integrating the DCx camera into your own applications
please also see the First steps to uc480 programming chapter.
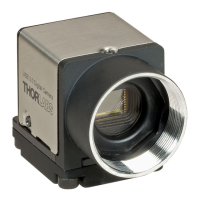
Install the latest version of uc480 software. Then connect the DCx camera with the PC. USB cameras
are automatically detected as new hardware under Windows. Check the status LEDs on your camera
to see if the camera has been correctly identified.
See also:
Installation and connection
Troubleshooting
Connection - Status LED
USB DCx Cameras are ready for use right out of the box. You can assign a unique ID to your camera
with the uc480 Camera Manager.
See also:
uc480 Camera Manager
Assigning a camera ID in the camera manager
Firmware and camera start
The uc480 software package includes many sample programs that you can use to try out the extensive
functionality of your DCx camera. We recommend starting off with the uc480 Viewer application. To
run the application, simply double-click the corresponding icon on your Windows desktop.
When you select "uc480 > Initialize" on the menu bar, the connected DCx camera will immediately start
capturing live images. The status bar at the bottom displays the frame rate and other important
information.
If you are using a high-resolution camera, you can click "View > Render mode" on the menu bar to
adjust the size of the rendered image to the application window.
See also:
uc480 Viewer
Camera basics: Operating modes
Customize the key camera properties
Select "uc480 > Properties…" on the menu bar to open the dialog box for modifying the camera
properties.
The "Camera" tab provides all the parameters for adjusting the camera's speed. You can increase the
pixel clock to run the camera at a higher frame rate. Reduce the pixel clock if transmission errors occur
too often. When you enable "Optimum", the optimum pixel clock will be set automatically.
On the "Image" tab, you find various sensor gain controllers. Use the "Master gain" controller to
increase image brightness if no longer exposure time setting is possible. Switch to the "AES/AGC" tab
to enable the Auto Exposure Shutter (AES) and Auto Gain Control (AGC) features.
54
56
67
75
119
123
127
56
499
61 501
67
71
46
75
17

 Loading...