3-21
■
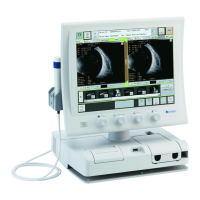
(Fig. 2)
3) Select the display area (4).The following caliper lines will be displayed.
Axial length : Front of cornea, retina
Anterior chamber dept / lens : Front of cornea, front of crystal lens, back of
crystal lens
Corneal thickness : Front of cornea, back of cornea
4) Touch the “Switch” button (5) of the active caliper line to select the caliper line
to be changed. The selected caliper line is displayed in red but the other lines
are displayed in yellow.
5) Use the selection buttons (6) on the right of the scanned image to change the
waveform to be displayed. Select the position where the peak of the
waveform to be callipered can be best confirmed.
6) Touch the caliper line movement buttons (7) to change the caliper line position.
The changed measurement data is displayed in the edit data display field (8)
along with the movement of the caliper line.
The distance between the cornea caliper line and the retina caliper line is
displayed in Axial length, the distance between the cornea caliper line and the
caliper line for the front of the crystal lens is displayed in ACD, and the distance
between the caliper line for the front of the crystal lens and the caliper line for the
back of the crystal lens is displayed in Lens.
7) If you have edited it mistakenly, touch the “Initial Position” button (9) to cancel
the changes made, and the caliper line will return to the position before the
editing.
8) When you touch the “Apply” button (10), the changes made are applied, the
measurement data is overwritten with the edited measurement data, and the
caliper screen is closed. Touching the “Cancel” button (11) will discard the
changes made, and the caliper screen is closed.
(5)
(7)
(8)
(4)
(9)
(10)
(11)
(6)

 Loading...