6-8
6 SPECIAL MODE (Menu Mode)
6.1.3 Setting Z Coordinate of Occupied Point
Occupied point coordinate data and known point actual measuring data are utilized, z coordinate of
occupied point is calculated and reset again.
Known point data and coordinate data can use the coordinate data file.
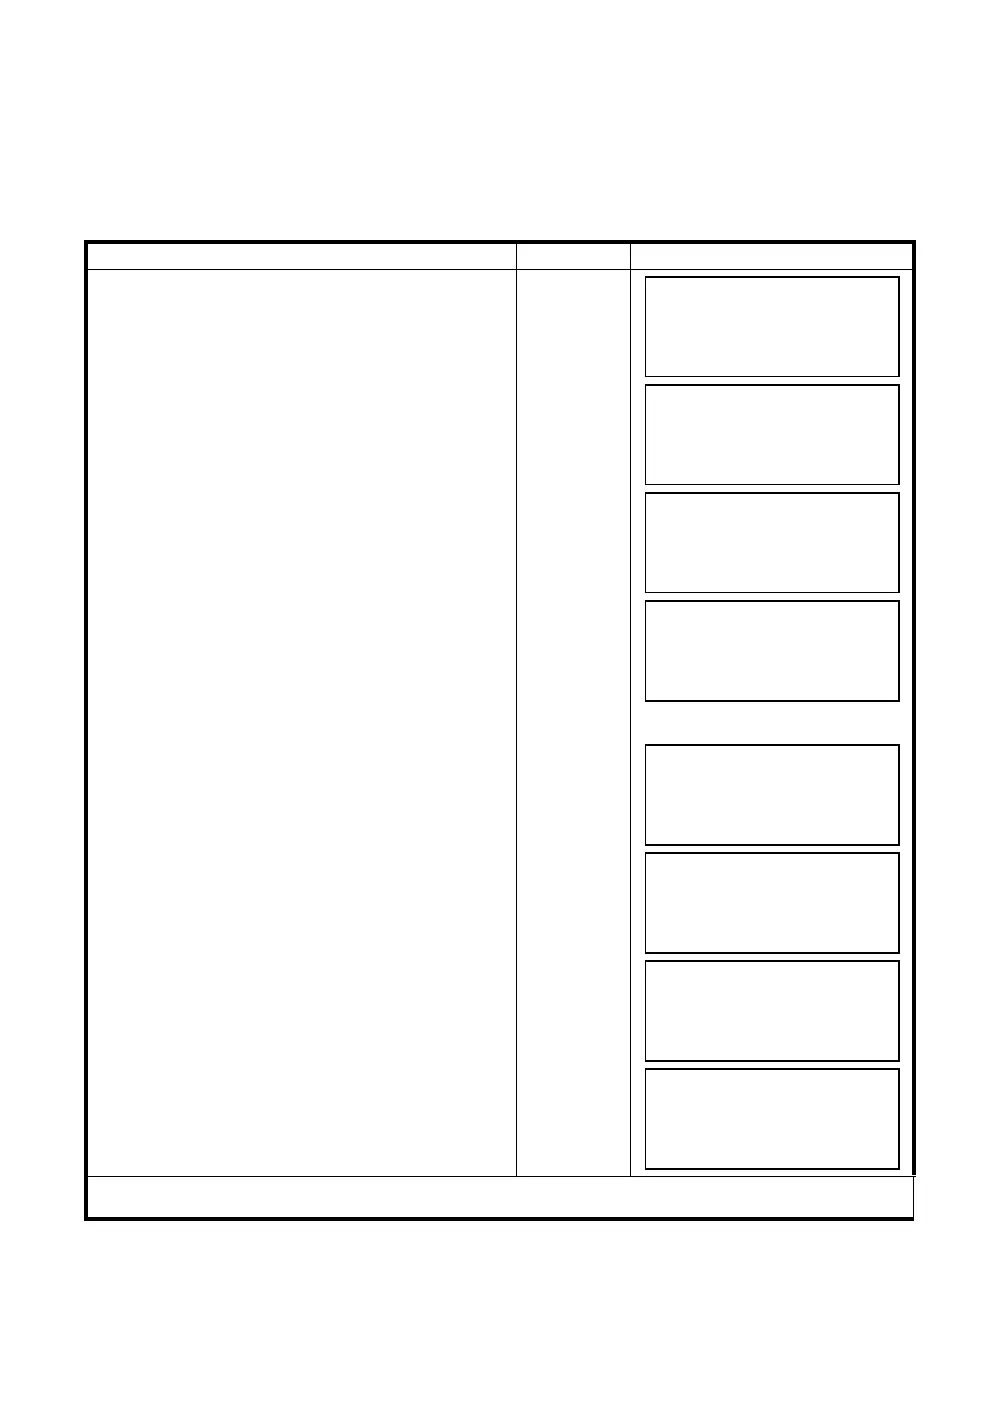
1) Setting occupied coordinate
[Example setting] Using coordinate data file.
Operating procedure Operation Display
1
After pressing [MENU] key, press [F4](P
↓
) key to
get the menu on page 2.
[MENU]
[F4]
2
Press the [F1] key.
[F1]
3
Press the [F3](Z COORD.) key.
[F3]
4
Press the [F1](USE FILE) key.
5
Press the [F1](INPUT) key and enter the File
Name.
[F1]
[F1]
Enter FN
[F4]
6
Press the [F1] key.
[F1]
7
Press the [F1](INPUT) key and enter the Point
number. Instrument height setting display will be
shown.
[F1]
Enter PT#
[F4]
8
Press the [F1](INPUT) key and enter the height.
The display returns to Z coordinate menu.
[F1]
Enter HT
[F4]
● For more information about data file, see Chapter 9 “MEMORY MANAGER MODE” .
MENU 2/3
F1:PROGRAMS
F2:GRID FACTOR
F3:ILLUMINATION P
↓
PROGRAMS 1/2
F1:REM
F2:MLM
F3:Z COORD. P
↓
Z COORD.SETTING
F1:USE FILE
F2:DON’T USE
SELECT A FILE
FN:_________
INPUT LIST ––– ENTER
Z COORD.SETTING
F1:OCC.PT INPUT
F2:REF.MEAS
OCC.PT
PT#:_________
INPUT LIST NEZ ENTER
INSTRUMENT HEIGHT
INPUT
INS.HT: 0.000 m
INPUT ––– ––– ENTER
Z COORD.SETTING
F1:OCC.PT INPUT
F2:REF.MEAS
 Loading...