thechemicalstodryorthickeninthelines,cloggingthe
pumpandothercomponents.
1.Emptythesprayertank;refertoEmptyingtheSprayer
Tank(page40).
2.Fillthesprayertankwith19L(5USgallons)ormore
ofcleanwaterandinstallthecap;refertoFillingthe
SprayTank(page39).
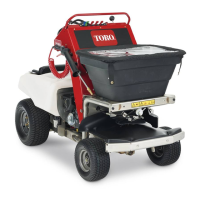
3.Starttheengine(Figure46)andensurethatthe
motion-controlleverinNEUTRALposition;referto
StartingtheEngine(page24).
Figure46
1.Ignitionswitch
5.Choke
2.Agitation-pumplever6.Throttle
3.Narrow-spraypatternlever
7.Sprayer-pump/tank-agitation
switch
4.Wide-spraypatternlever
4.Setthesprayer-pumpswitchtotheONposition,and
settheenginethrottletoFASTposition(Figure46).
5.Movethetank-agitationlevertotheONposition
(Figure46).
6.Pullbackbothnarrowandwide-spraypatternleversto
theONposition(Figure46).
Note:Thesprayernozzleswilltobeginspraying.
7.Allowtherinsewaterinthetanktospraythroughthe
nozzles.
8.Checkthatall3nozzlesaresprayingcorrectly.
9.Removethesprayerwandfromtheholder,pointthe
wandinasafedirection,andsqueezethetrigger;refer
toSpray-WandTriggerandTriggerLock(page18).
Note:Allowtherinsewatertodischargefromthe
wandfor1to2minutes.
10.Releasethetriggerforthewandandreturnittothe
holderonthemachine(Figure8).
11.Movethespray-patternleversforwardtotheOFF
position,setthesprayer-pumpswitchtotheOFF
position,andshutofftheengine(Figure46).
12.Cleanthestrainer;refertoCleaningtheStrainer(page
41)
13.Repeatsteps2through12usingcleanersand
neutralizersrecommendedbythechemical
manufacturers;refertoFillingtheSprayTank(page39).
14.Repeatsteps2through12usingcleanwateronly.
15.Usingahosetowashofftheoutsideofthesprayer
tankwithcleanwater.
Note:Donotuseapowerwashertocleanthe
machine.Thehigh-pressurewatermayforceresidual
corrosivematerialsintospreader-spreadercomponents.
16.Removeandcleanthesprayernozzles;refertoCleaning
theSprayerNozzle(page42).
Note:Replacedamagedorwornnozzles.
17.Allowthespreader-sprayertocompletelydrybefore
thenextuse.
CleaningtheStrainer
ServiceInterval:Aftereachuse
Important:Ifyouusedwettable-powderchemicals,
cleanthestraineraftereachtimethatyourinsethe
sprayertank.
1.Emptythetank;refertoEmptyingtheSprayerTank
(page40)
2.Rotatethehandleforthesupplyvalve90°
counterclockwise(Figure47).
Figure47
1.Pump-shutoffvalve2.Strainer
3.Alignadrainpanunderthestrainer(Figure47).
4.Rotatethestrainerbowlcounterclockwiseandremove
thebowlandscreenfromthebodyofthestrainer
(Figure48).
Note:Removethestrainerbowlbyhand.
41