32RCA001TS-02ISEN
26
RBP-RC001-E Installation & Owner's Manual
Changing the system operation settings
System operation screen
List of the setting items on the system operation screen
Item Description
Operate Use [Λ] and [V] to switch between Link and Individual.
Run Use [Λ] and [V] to switch the current operating state.
*
If Operate is “Link”, you cannot operate the system.
Mode Use [Λ] and [V] to switch between Stop, Cool, and Heat.
*
If Operate is “Link”, you cannot operate the system.
*
Changing the mode does not change the mode for the operation pattern.
Cool PST
Heat PST
Set the set temperatures for Cool/Heat.
Select either “C.PST” or “H.PST” and press [●] (Confirm) to display the set temperature input screen.
Use [<] and [>] to select an input digit, use [Λ] and [V] to change the value, and press [●] (Confirm).
The valid setting ranges are as in the table below.
Model
Cool PST [°C] Heat PST [°C]
Initial
value
Setting range
Initial
value
Setting range
USX, EDGE Series 7.0 4.0 to 30.0 45.0 25.0 to 55.0
SFMC Series 4, 5 7.0 5.0 to 25.0 45.0 35.0 to 55.0
CAONS700
65.0 50.0 to 90.0
Heat Recovery CAONS
Series 1
– – 65.0 50.0 to 85.0
Heat Recovery CAONS
Series 2
30.0 9.0 to 35.0 65.0 50.0 to 85.0
*
If you change the set temperature, the set temperature of the currently selected operation pattern is changed.
Demand Set the demand current (for SFMC Series 4, 5, demand capacity).
Select “Demand” and press [●] (Confirm) to display the value input screen.
Use [<] and [>] to select an input digit, use [Λ] and [V] to change the value, and press [●] (Confirm).
The range of values that can be input is “0” to “30000”.
*
The initial value is “0”. Note that if you enable demand/power saving with an incorrect setting, the unit will be
stopped.
*
If you change the demand current and capacity, the demand current and capacity of the currently selected
operation pattern is changed.
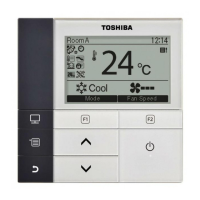
1 On the system information screen, press [ ] to display
the system operation screen.
2 Use [<] and [>] to select the item to change.
For information about how to set each item, refer to the table below.
3 To confirm the changes, press [ ] (Return) and on the
message screen, press [●] (Confirm).
 Loading...
