TK 61753-2-MM-EN
111
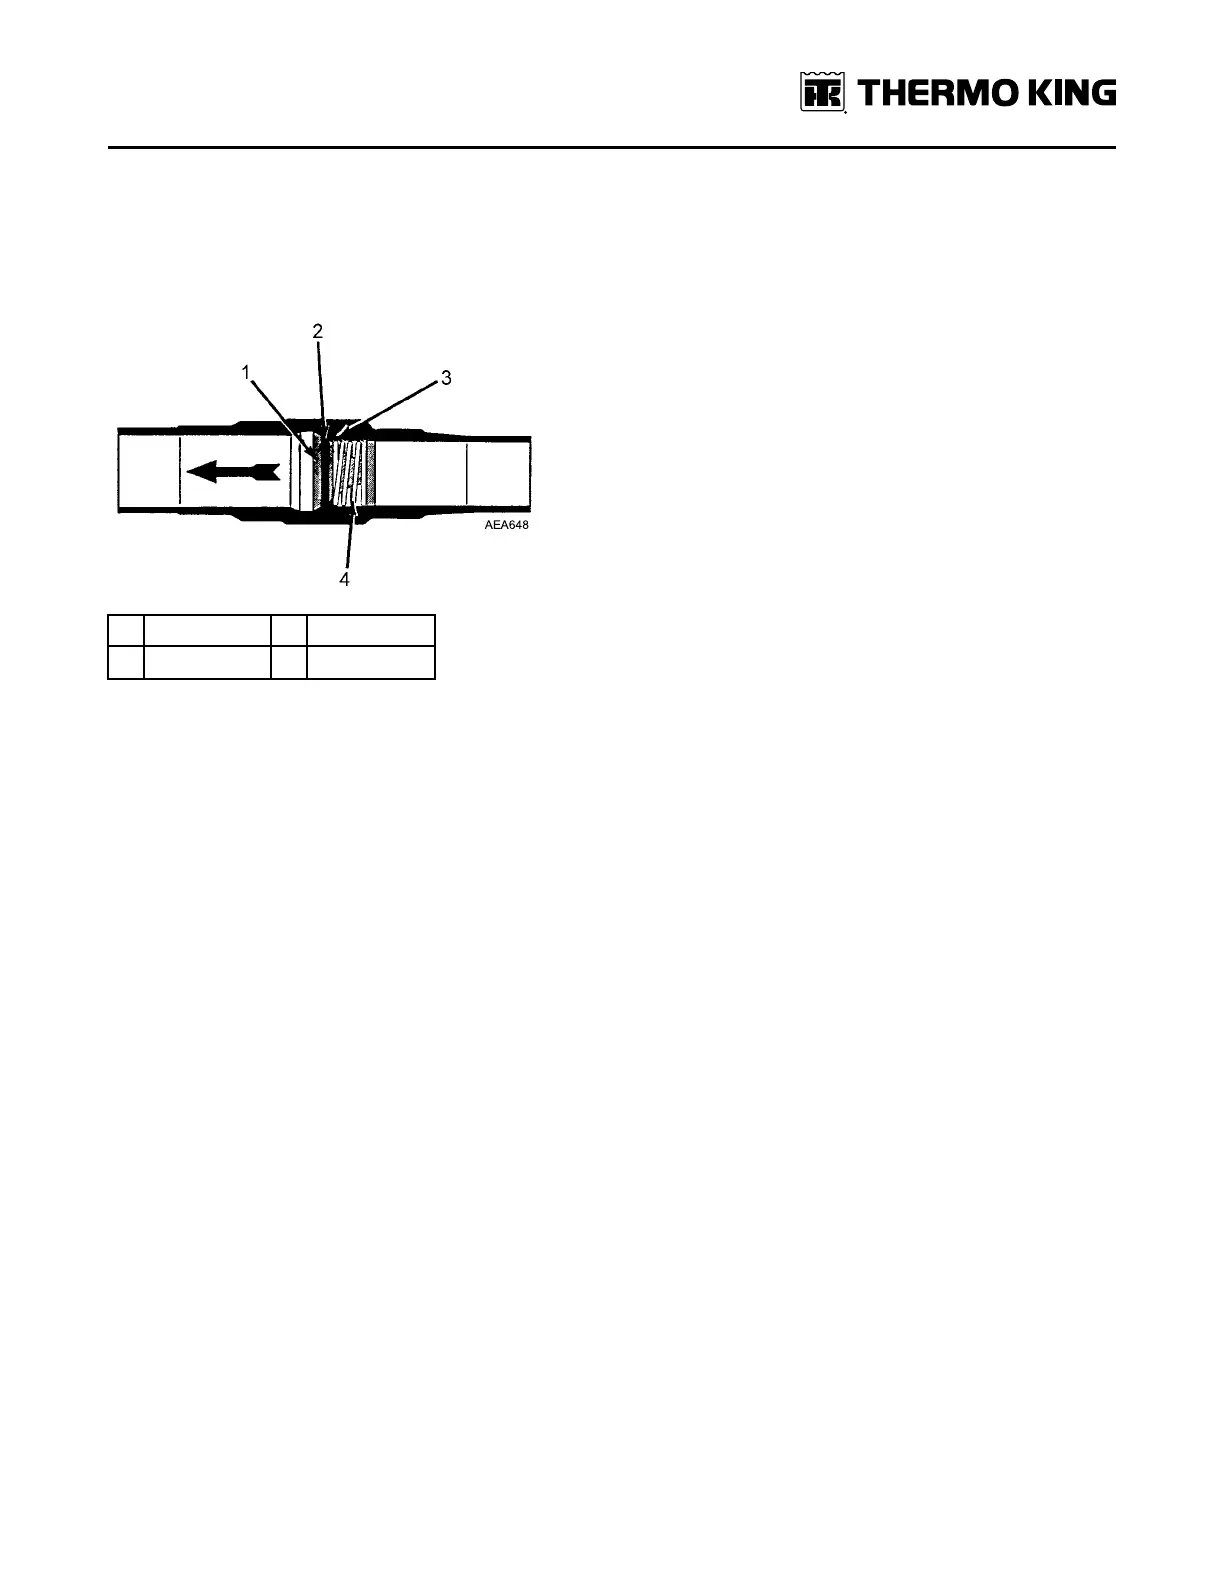
In-Line Condenser Check Valve
This unit uses an in-line condenser check valve. The in-line check valve is not repairable and must be replaced if it fails.
A heat sink must be used on the in-line check valve when it is being soldered in place to prevent damage to the
neoprene seal.
Figure 60. Cross Section of In-line Condenser Check Valve
1. Valve 3. Valve Seat
2. Neoprene Seal 4. Spring
Condenser Check Valve Replacement
Removal
1. Recover the refrigerant charge.
2. Place a heat sink on the check valve.
3. Unsolder the lines and remove the check valve.
Installation
NNoottee:: A heat sink must be used on the in-line check valve when it is being soldered in place to prevent damage to the
neoprene seal.
1. Clean the tubes for soldering.
2. Place the check valve in position. The arrow on the valve body indicates the direction of refrigerant flow through the
valve.
3. Place a heat sink on the check valve.
4. Solder the inlet and outlet connections.
5. Pressurize the refrigeration system and test for leaks.
6. If no leaks are found, evacuate the system.
7. Recharge the unit with proper refrigerant and check the compressor oil.
Bypass Check Valve
Removal
1. Pump down the low side and equalise the pressure to 0 psig (0 bar g).
2. Front seat bypass hand valve.
3. Unsolder the bypass check valve. Use a heat sink on the bypass check valve.
Installation
1. Solder the bypass check valve onto the receiver tank. Use a heat sink on the bypass check valve.
RReeffrriiggeerraattiioonn SSeerrvviiccee OOppeerraattiioonnss