116
TK 61753-2-MM-EN
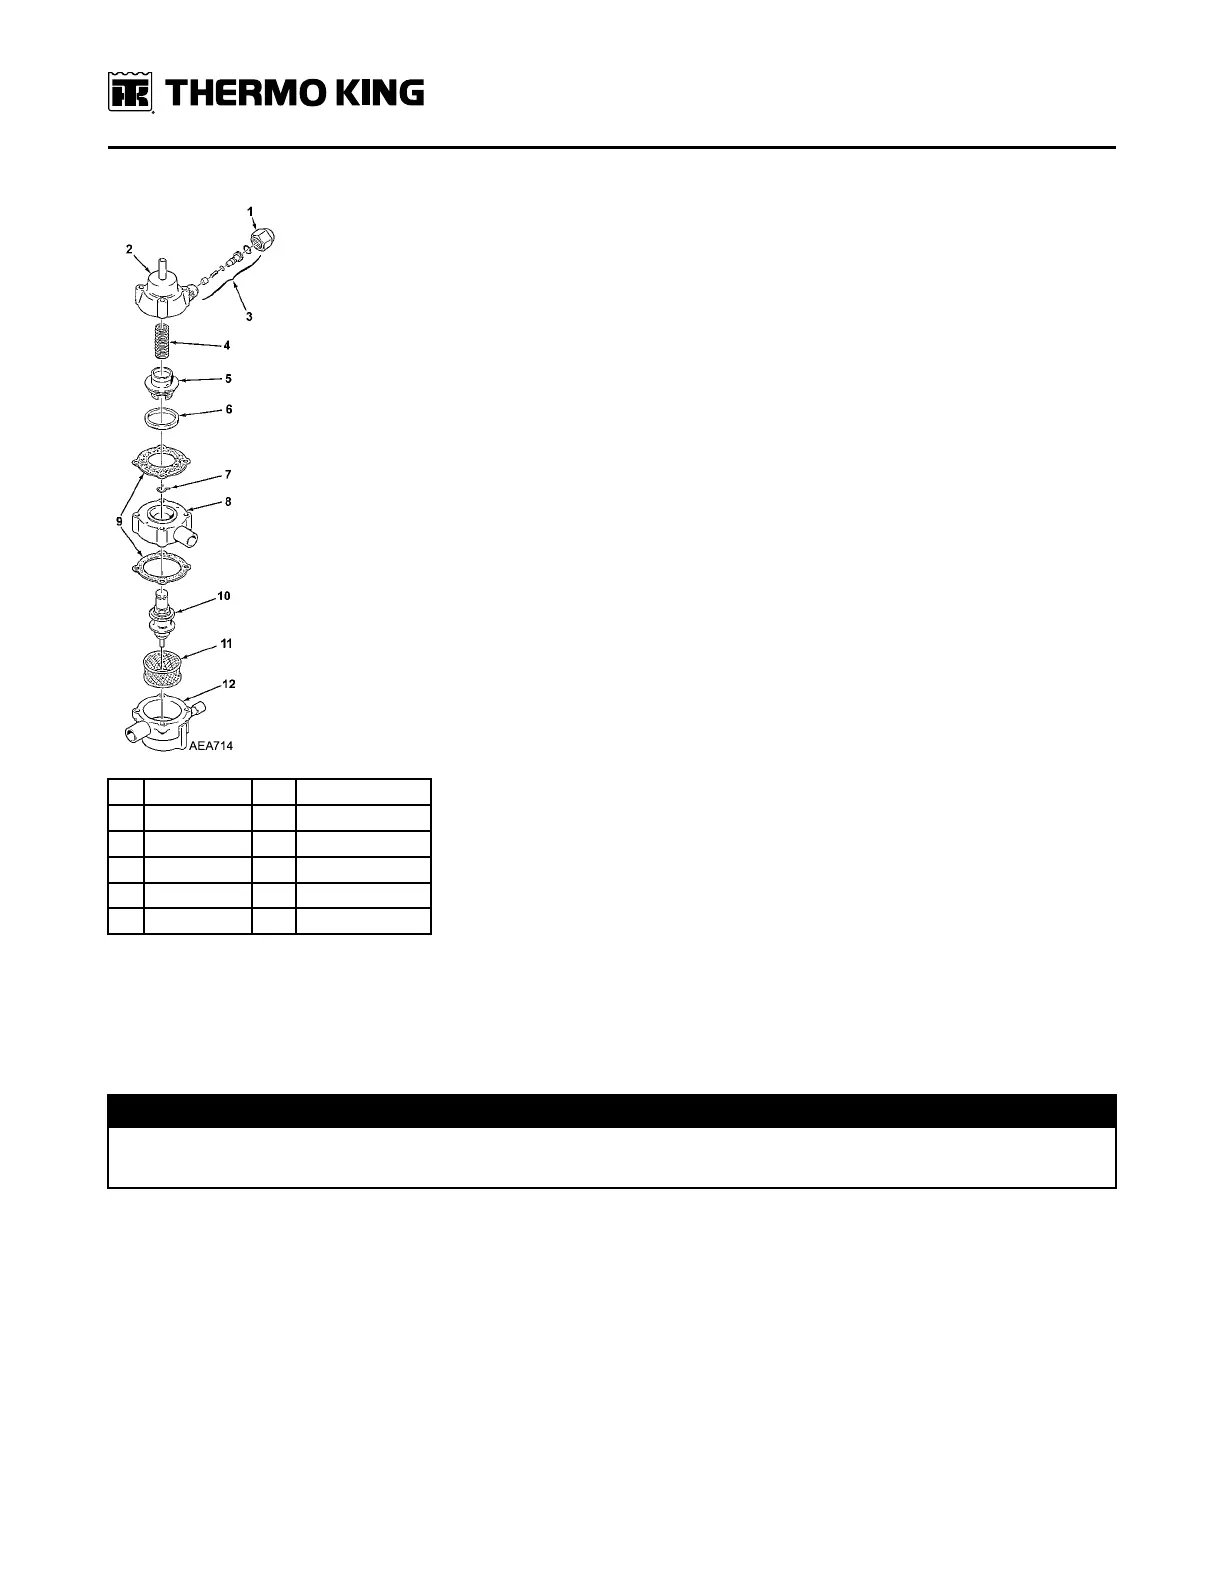
Figure 61. Three-Way Valve
1.
Cap
7.
Clip
2.
End Cap
8. Seat
3. Check Valve 9. Gaskets
4.
Spring
10.
Stem Assembly
5. Piston 11. Screen
6. Seal 12.
Bottom Cap
Removal/Disassembly
1. Recover the refrigerant charge.
2. Clean the exterior surface of the valve.
3. Remove the line from the three-way valve to the pilot solenoid.
NNOOTTIICCEE
EEqquuiippmmeenntt DDaammaaggee!!
DDoo nnoott ffoorrccee tthhee ttooooll iinnttoo tthhee bbrraassss oorr aaggaaiinnsstt tthhee bboollttss..
4. Loosen the four 1/4 inch Allen head screws (DO NOT REMOVE OR CAP MAY POP OFF); use tool P/N 204-424 to
break the gasket at each side of the center section.
RReeffrriiggeerraattiioonn SSeerrvviiccee OOppeerraattiioonnss