144
TK 61753-2-MM-EN
Idler Assemblies
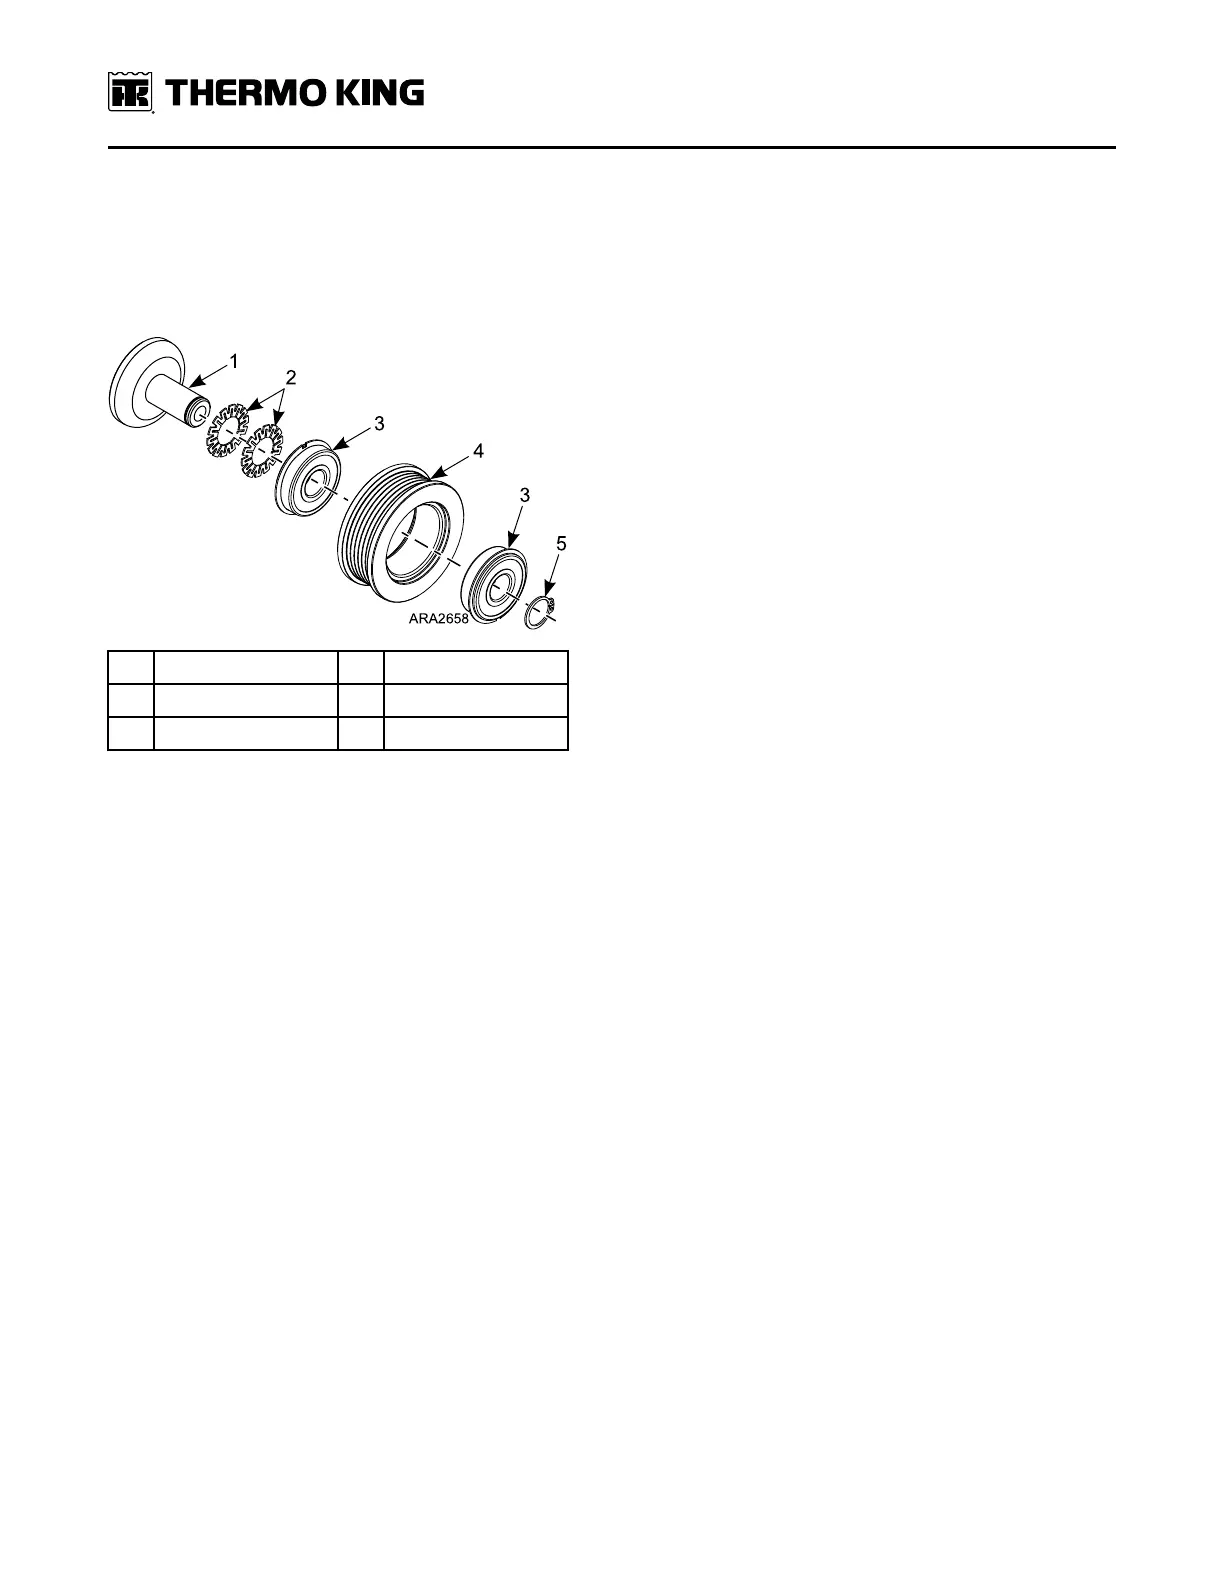
The idler assemblies contains special sealed bearings. The bearings should be checked when the belt is replaced. Spin
the idler pulley with the belt removed and listen. Unusually loud bearing noise indicates the idler bearings should be
replaced. The idler assembly for the idler pulley in the engine/cross shaft belt is shown below. The other idler
assemblies are similar. See the appropriate Parts Manual.
Figure 82. Typical Idler Assembly
1. Spindle 4. Idler Pulley
2. Washer 5. Snap Ring
3. Bearing
Disassembly
1. Remove the appropriate belt. See “Engine/Cross Shaft Belt” or “Fan Drive Belt” in the Engine Maintenance Chapter.
2. Remove the snap ring and discard it.
3. Remove the idler pulley and bearings from the spindle.
4. Remove the washers from the spindle and discard them.
5. Remove the bearings from the idler pulley with a hammer and punch.
6. Clean and inspect the parts, but do not clean the bearings in solvent. Replace the parts that show significant wear or
damage.
Reassembly
IImmppoorrttaanntt:: To prevent damage to the bearings, use bearing drivers (or other suitable tools) on the bearing races when
installing the bearings.
1. Install the bearings in the idler pulley.
2. Place new washers on the spindle.
3. Place the idler pulley and bearings on the spindle.
4. Install a new snap ring.
5. Install the belt. See “Engine/Cross Shaft Belt” or “Fan Drive Belt” in the Engine Maintenance Chapter.
SSttrruuccttuurraall MMaaiinntteennaannccee