TK 61753-2-MM-EN
91
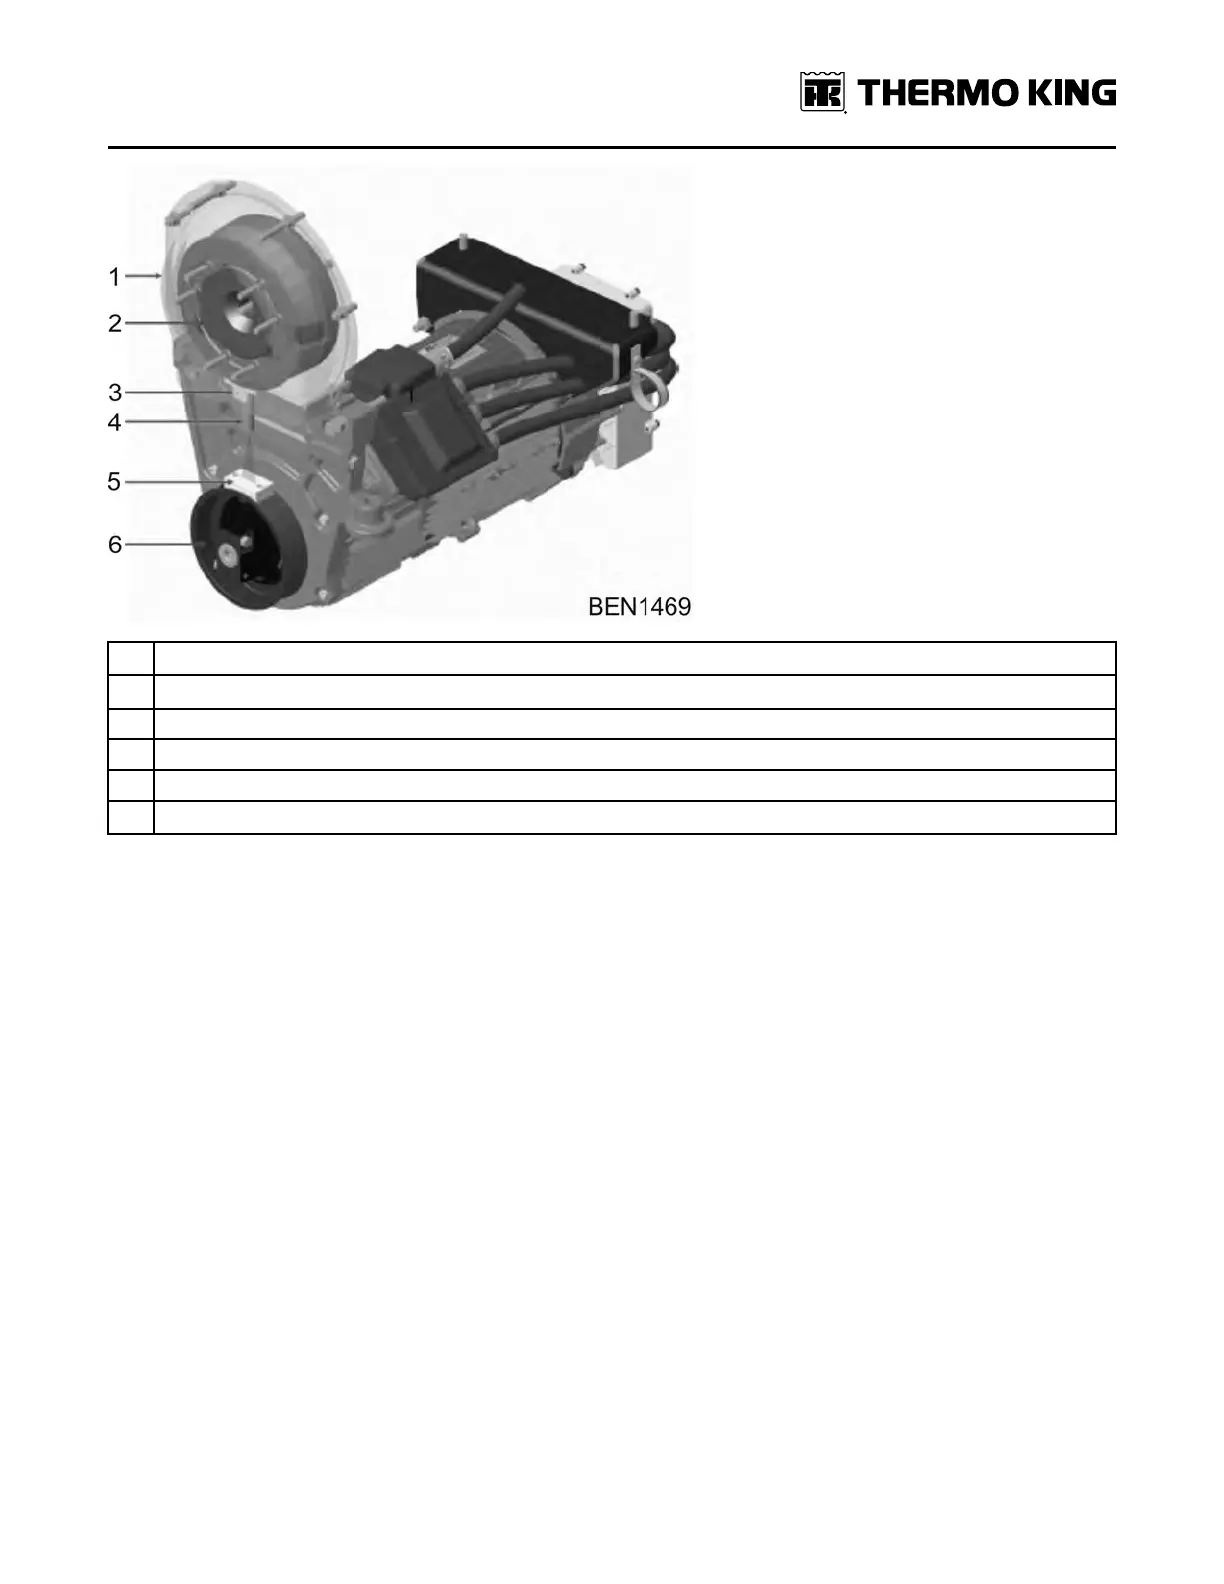
1. Compressor Flange
2. Clutch Pulley (Fixed Position)
3. Emitter Block
4. Laser
5. Receiver Block
6. Motor Pulley (Adjustable)
Bearing/Idler Assembly Replacement
1. Release the Tension on the belt by loosening the Lock Plate Fastener and Tensioning Bolt. Bolt need not be fully
removed.
2. Remove the Belt from Tensioner Pulley and Motor Pulley.
3. Remove the fasteners securing the Compressor Flange to Flywheel Housing. And pull the Compressor away from
the Engine.
4. Remove the Lock Plate from the Tensioner Arm by unfastening the Lock Plate fasteners.
5. Take the Tensioner Assy out from the Machined Bracket Slot.
6. Remove the Idler Pulley with pressed bearings from the Tensioner arm using appropriate tools and press.
7. Check for any damage on Tensioner Shaft. If found damaged, replace the Tensioner arm also with Idler Pulley
assembly.
8. Fit the new Idler Assy to the tensioner arm using press.
9. Press fit the Washer to Tensioner Arm and screw it to tensioner arm.
10. Place the Tensioner Arm in the Motor Bracket slot and held it in position using Lock plate.
11. Fit the Compressor to the Engine, install and tighten the fasteners securing the Compressor.
12. Align the Motor Pulley with respect to Clutch Pulley using Laser Alignment tool. Ensure the Tensioner bolt is
unscrewed and Tensioner is moved to extreme end while doing alignment.
13. Lock the Motor Pulley and wrap the belt around Motor Pulley.
14. Ensure the fasteners in Lock plate of Tensioner arm is hand tight. Screw the Tensioner Bolt such that the Tensioner
slides and tensions the belt.
15. Use the Belt Frequency measuring tool to check for Belt tension while adjusting Tensioner position.
16. Torque the Lock Plate Bolts and re-check the Belt Tension is as per the values mentioned in the table.
EEnnggiinnee MMaaiinntteennaannccee