TK 61753-2-MM-EN
109
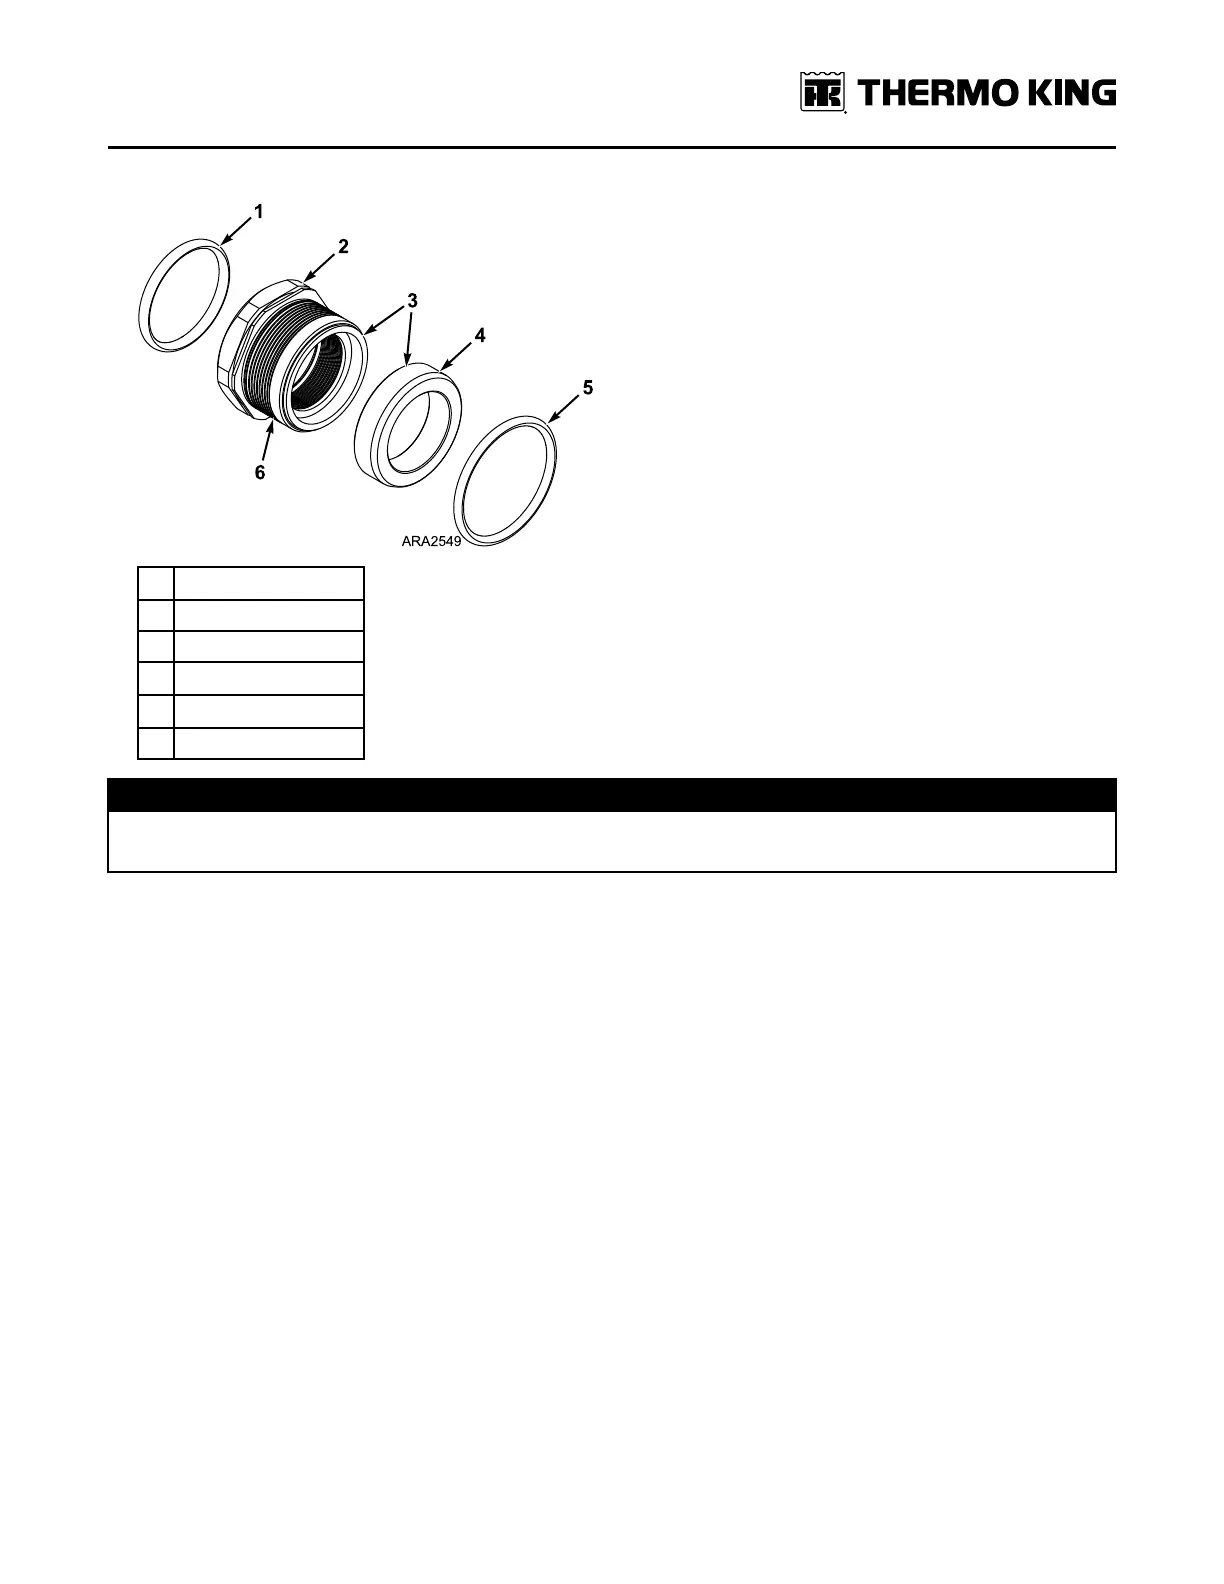
Figure 58. Hex Drive Type Bellows Seal
1. O-ring (Inside Bellows)
2. Hex Drive
3. Seal Faces
4. Hard Ring
5.
O-ring (In Seal Plate)
6. Bellows
NNOOTTIICCEE
EEqquuiippmmeenntt DDaammaaggee!!
OOiill aapppplliieedd ttoo tthhee sseeaall ffaacceess mmuusstt bbee aabbssoolluutteellyy cclleeaann..
14. Remove the yellow protective cap. Clean the hard ring and the primary ring (bronze ring) with the alcohol wipes
found in package labeled “1”. Clean the polished mating surfaces of both rings with the lint free dry wipes from
package number “2”. Apply clean compressor oil to the polished surfaces of the seal, the lip seals, and the seal plate
gasket from the package number “3” before assembling.
15. Install the seal plate and gasket to the compressor body. Do not bump the seal hard ring on the end of the
crankshaft during assembly.
16. Install the seal plate mounting bolts and washers. Torque the seal plate bolts to 38 N•m (28 ft-lb) in two steps using
a criss-cross pattern.
17. Install the mounting flange and torque the bolts to 38 N•m (28 ft-lb) in two steps using a criss-cross pattern.
18. Install the compressor in the unit.
Condenser Coil
Removal
1. Recover the refrigerant charge.
2. Remove the condenser grille.
3. Unsolder the inlet and outlet refrigeration line connections from the copper stub tubes on the micro-channel
condenser coil. Use a heat sink on the copper stub tubes.
IImmppoorrttaanntt:: This unit uses a micro-channel condenser coil. Micro-channel coils are made of aluminum but have
copper stub tubes at the inlet and outlet connections. Use a heat sink on the copper stub tubes to
prevent damage to the uniseal tape and brazed connections (and the aluminum) that attach the copper
stub tubes to the aluminum micro-channel coil. The uniseal tape is used to prevent corrosion between
the copper and aluminum.
RReeffrriiggeerraattiioonn SSeerrvviiccee OOppeerraattiioonnss