TK 61753-2-MM-EN
121
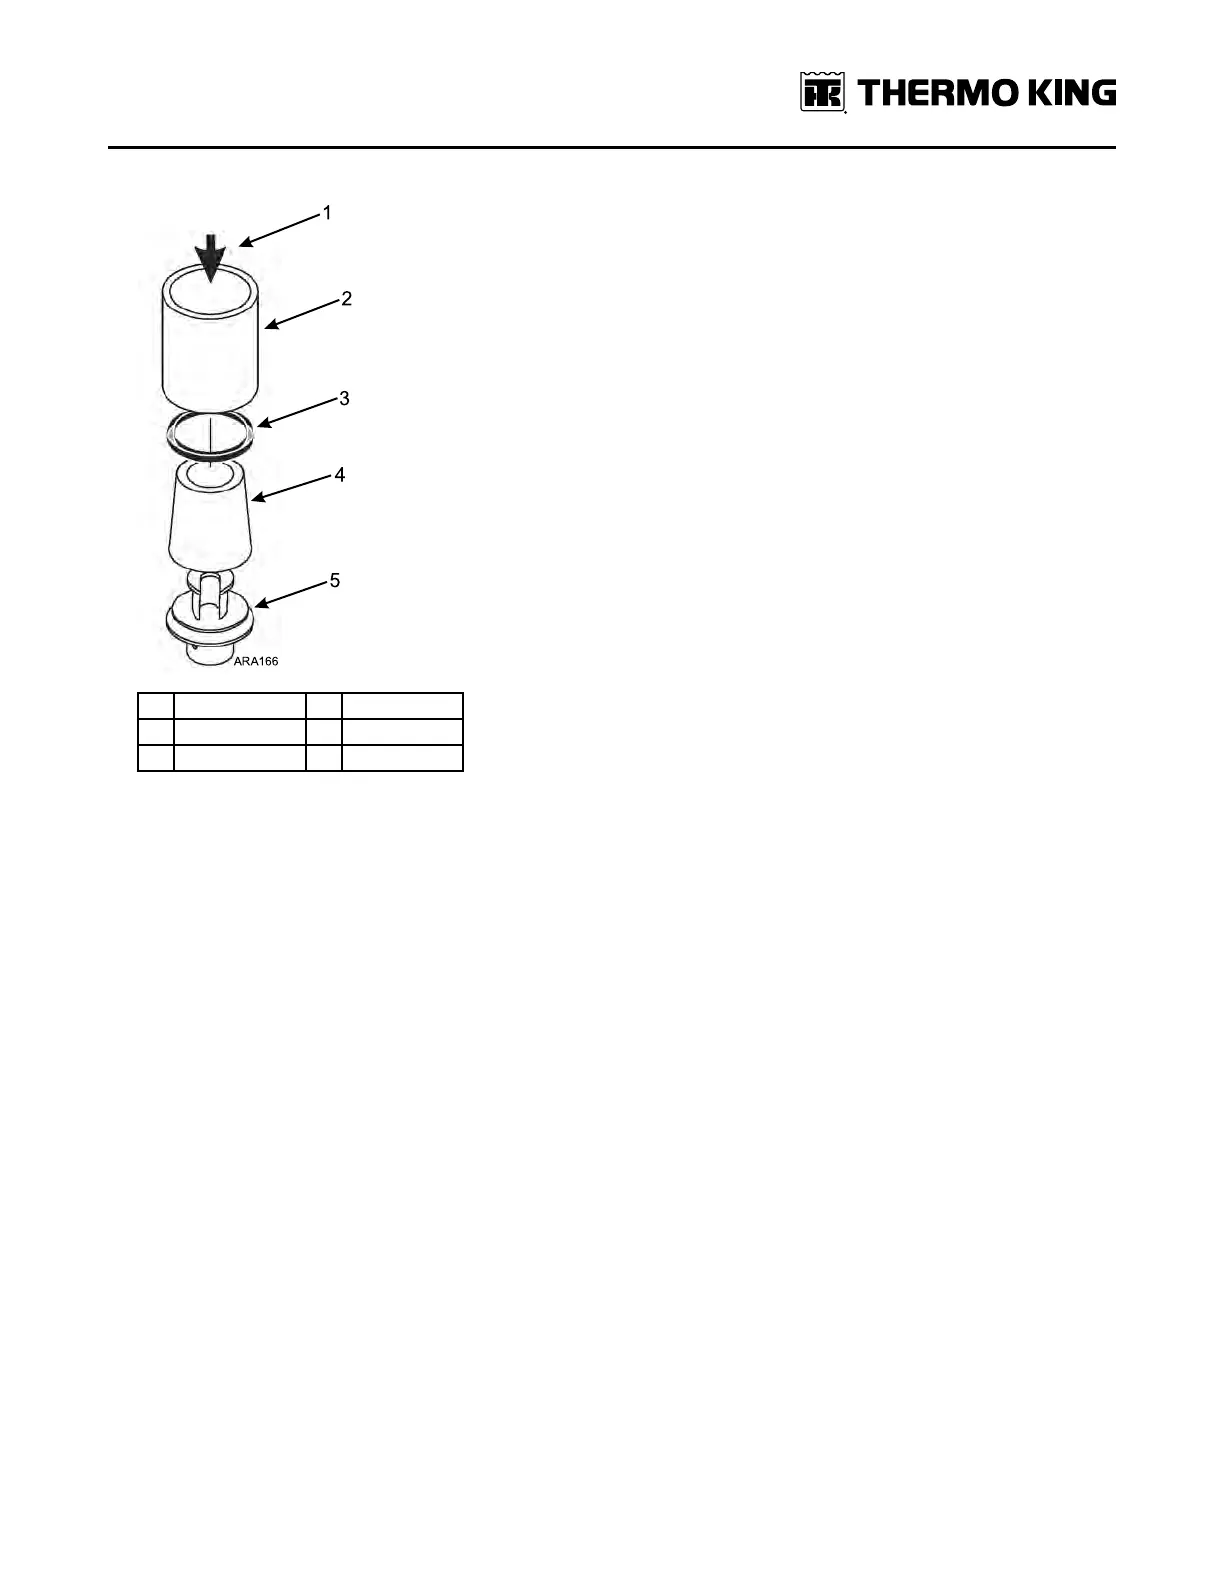
Figure 67. Seal Installation with Tool P/N 204-1008
1.
Press by Hand
4.
Tapered Tool
2.
Pipe
5. Piston
3. Seal
5. Place the piston slot on the stem and secure with spring clip. The open part of the clip should be on the opposite
side of the piston slot.
6. Install the spring and end cap.
7. Line up the passageways in the cap and body. Failure to line up the holes will result in improper operation of the
valve.
8. Install the bolts and tighten in rotating sequence. Torque to 160 in-lb (18 N•m).
9. Install the pilot solenoid line and pressurize the system with refrigerant to check for leaks.
10. If there are no leaks, evacuate the system and recharge with the proper refrigerant.
11. Run the unit to check for proper three-way valve operation.
Three-Way Valve Condenser Pressure Bypass Check Valve Repair
Removal
1. Recover the refrigerant charge.
2. Unscrew the condenser pressure bypass check valve cap from the three-way valve.
3. Remove the snap ring.
RReeffrriiggeerraattiioonn SSeerrvviiccee OOppeerraattiioonnss