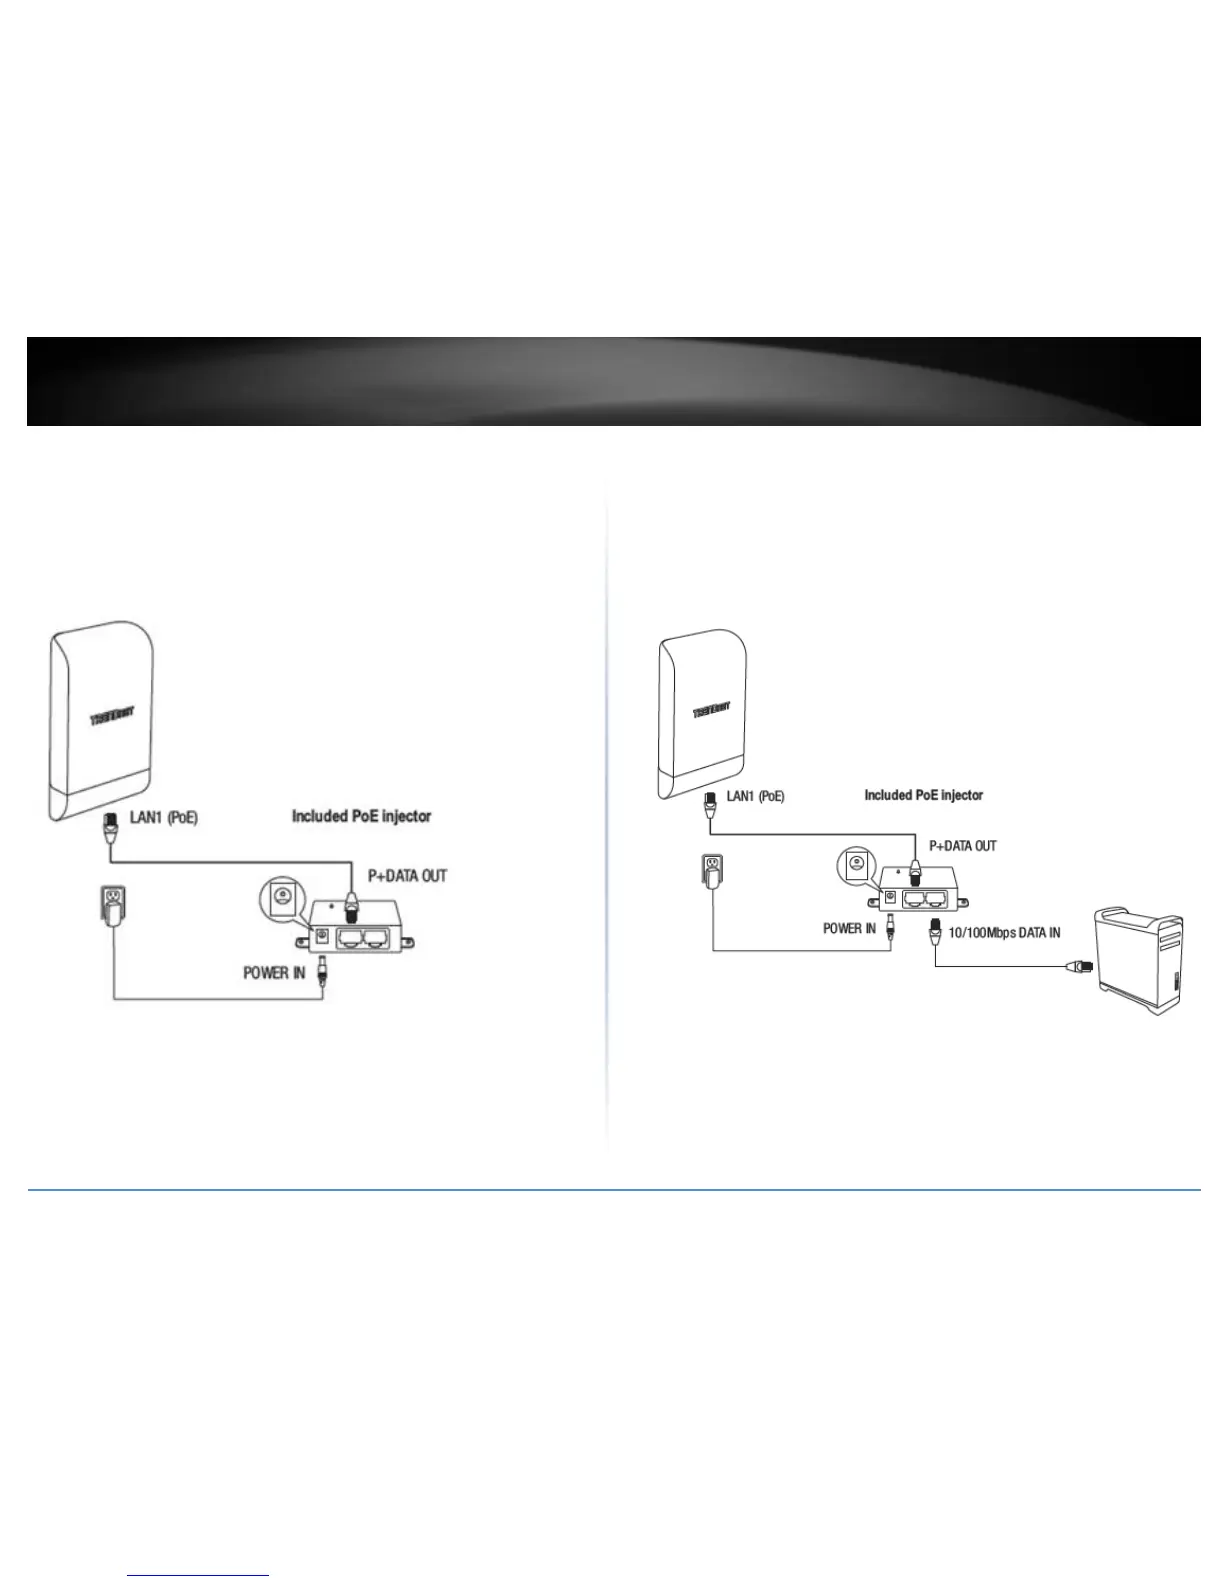
4. Connect the other end of the RJ-45 network cable to the P+DATA OUT port on the
included PoE injector.
5. Connect the included power adapter to the PoE injector POWER IN on the included
PoE injector.
6. Plug the connected power adapter into a power outlet.
7. Confirm the device is powered on through the PWR LED indicator.
Note: Repeat steps 1-7 to power on and connect the second access point.
8. Assign a static IP address to your computer’s network adapter in the subnet of
192.168.10.x (e.g. 192.168.10.10) and subnet mask of 255.255.255.0.
9. Using another network cable, connect one end to the 10/100 DATA IN port on the
included PoE injector for either the first or second access point.
10. Connect the other end of the network cable to your computer’s Ethernet port.

 Loading...