96
18. Remote Session Operation
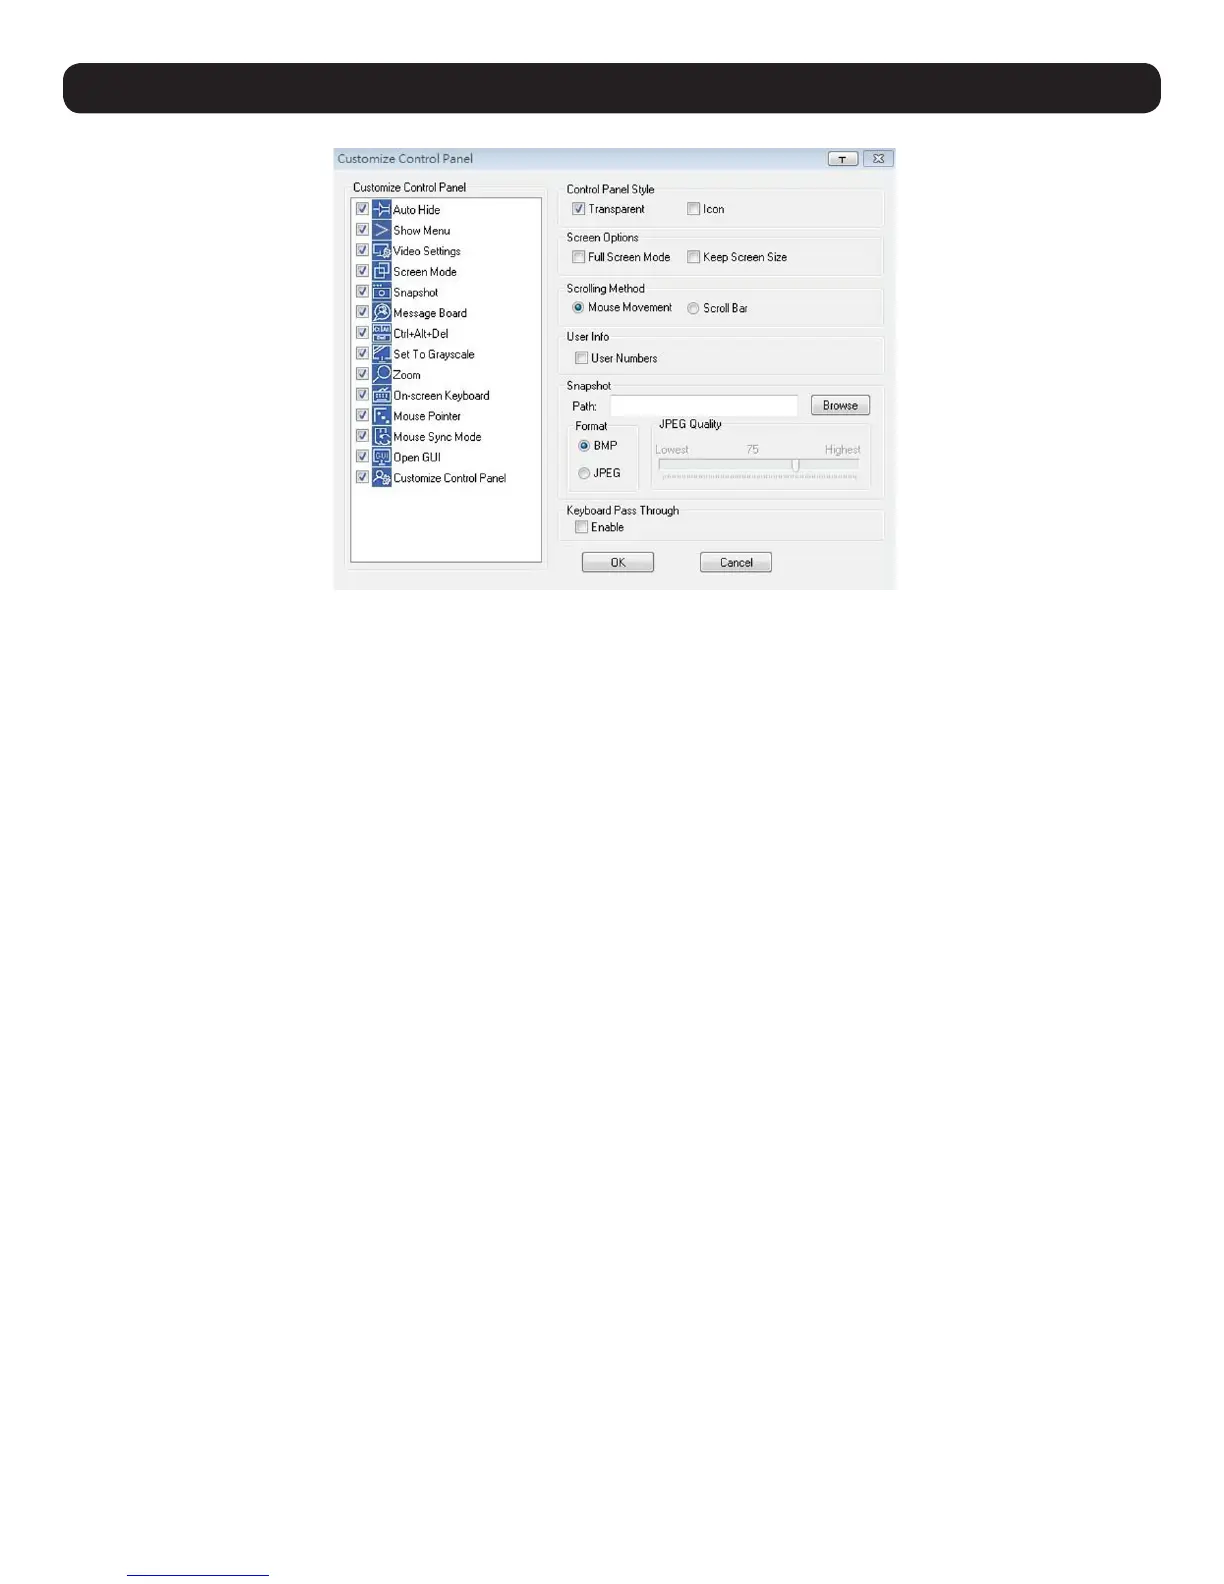
Control Panel Style
This section lets a user determine how the control panel is displayed when it is dragged out of the default position in the top-center of the
screen.
Note: A second default position for the control panel is available at the bottom-center of the screen.
• When the Transparent box is checked, dragging the control panel away from one of the default locations will leave it displayed transparently
in whatever location it was dragged to.
• When the Icon box is checked, dragging the control panel away from one of the default locations will leave it displayed as an icon in
whatever location it was dragged to.
• When both the Transparent and Icon boxes are checked, dragging the control panel away from one of the default locations will leave it
displayed as a transparent icon in whatever location it was dragged to.
• When neither box is checked, dragging the control panel away from one of the default locations will leave it displayed as normal in whatever
location it was dragged to.
• If the control panel is located in the top-center or bottom-center default locations, checking these boxes will have no effect.
Screen Options
This section enables Full Screen Mode and Keep Screen Size as the default settings when a remote session is activated.
• Check the Full Screen Mode box to display the remote screen in Full Screen Mode for the next time logging in to a remote session.
• Check the Keep Screen Size box to enable the Keep Screen Size feature for the next time logging in to a remote session.
Scrolling Method
In instances when the remote screen display is larger than the monitor, you can choose how to scroll to the off-screen areas.
• By selecting Mouse Movement, the screen will scroll when moving the mouse pointer to the screen border.
• By selecting Scroll Bars, scroll bars appear around the screen borders that available to scroll to the off-screen areas.
User Info
If User Info is enabled, the total number of users remotely accessing the KVM will display on the Control Panel’s bottom row.
Snapshot
The Snapshot section determines where snapshots are sent to, what file type they are saved as; and if saved as a JPEG, the quality of the
JPEG image.
• Path – To select a location for snapshots to be saved, click on the Browse button next to the Path field and navigate to the desired location.
• Format – Check the file type button to select the snapshot format.
• JPEG Quality – If saving snapshots as JPEGs, the JPEG image quality can be selected here. The higher the quality of the image, the larger the
file size.
 Loading...