7
5. System Requirements
No. Component Description
1
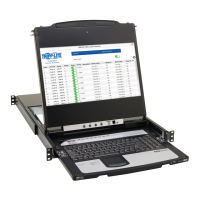
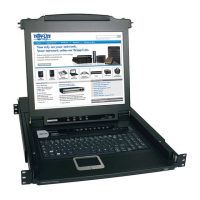
Handle Pull to slide the KVM module out; push to slide it in.
2
LCD Module After sliding out the KVM module, flip up the cover to access the LCD monitor.
3
LCD Controls The buttons to control the position and picture settings of the LCD monitor are located here.
4
LCD On / Off Button Push this button to turn the LCD monitor on and off. The button illuminates when the LCD monitor is off.
Note: The light indicates that only the monitor is off, not the attached KVM switch.
5
Port Selection
Buttons and LED
To access a port, press its corresponding selection button. Indicator LEDs are built into the switches, with an
Online LED to indicate that the computer attached to its corresponding port is up and running, and a Selection
LED light to indicate which port has the KVM focus.
• Press buttons 1 and 2 at the same time for 5 seconds to perform a keyboard/mouse reset.
• Press buttons 7 and 8 at the same time for 2 seconds to initiate an Auto Scan.
6
Keyboard Module Standard 99-key keyboard.
7
Touchpad Standard mouse touchpad.
8
USB Port The USB 1.1 hub port connects a USB peripheral device (flash drive, CD-ROM drive, etc.) to the console or a
USB mouse for users who prefer to use an external mouse.
9
Power LED Illuminates blue to indicate the device is receiving power.
10
Rack Mounting Tabs Rack mounting tabs are located at each corner of the device.
11
Lock LEDs The Num Lock, Caps Lock, Scroll Lock LEDs are located here.
12
Reset Switch
Located to the right of the Lock LEDs. Press this recessed switch using a thin object to perform a system reset.
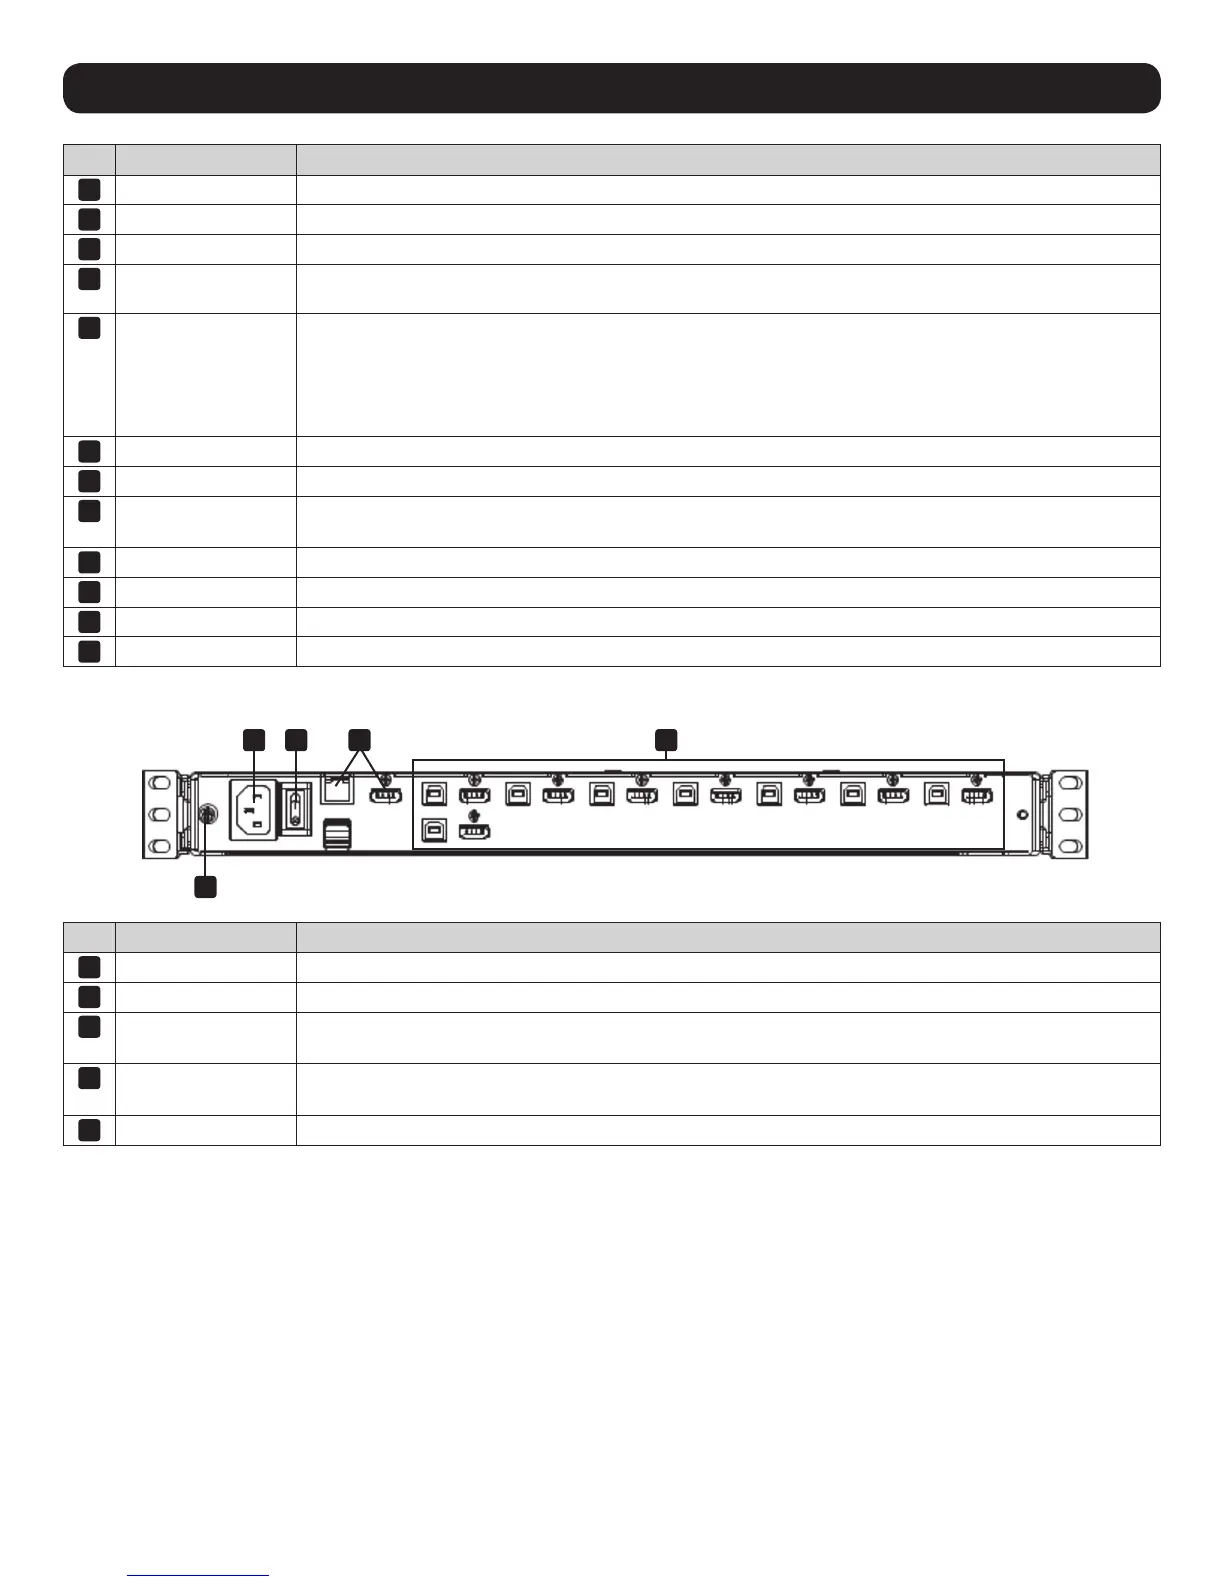
Rear View
No. Component Description
1
Power Socket This is a standard 3 prong AC power socket. The power cord from an AC source plugs in here.
2
Power Switch This is a standard rocker switch that powers the device on and off.
3
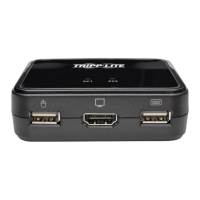
External Console
Section
Supports an independent, external KVM console for flexibility and convenience. The external console's USB
keyboard and mouse, HDMI monitor, and audio cables plug in here.
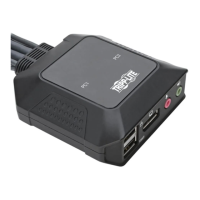
4
KVM Port Section
Connects the device’s ports to computers / servers using HDMI and USB cables. (see Optional Accessories
in section 3 for the KVM cable kit model)
5
Grounding Terminal The included grounding wire attaches here.
1
5
2 3 4
 Loading...