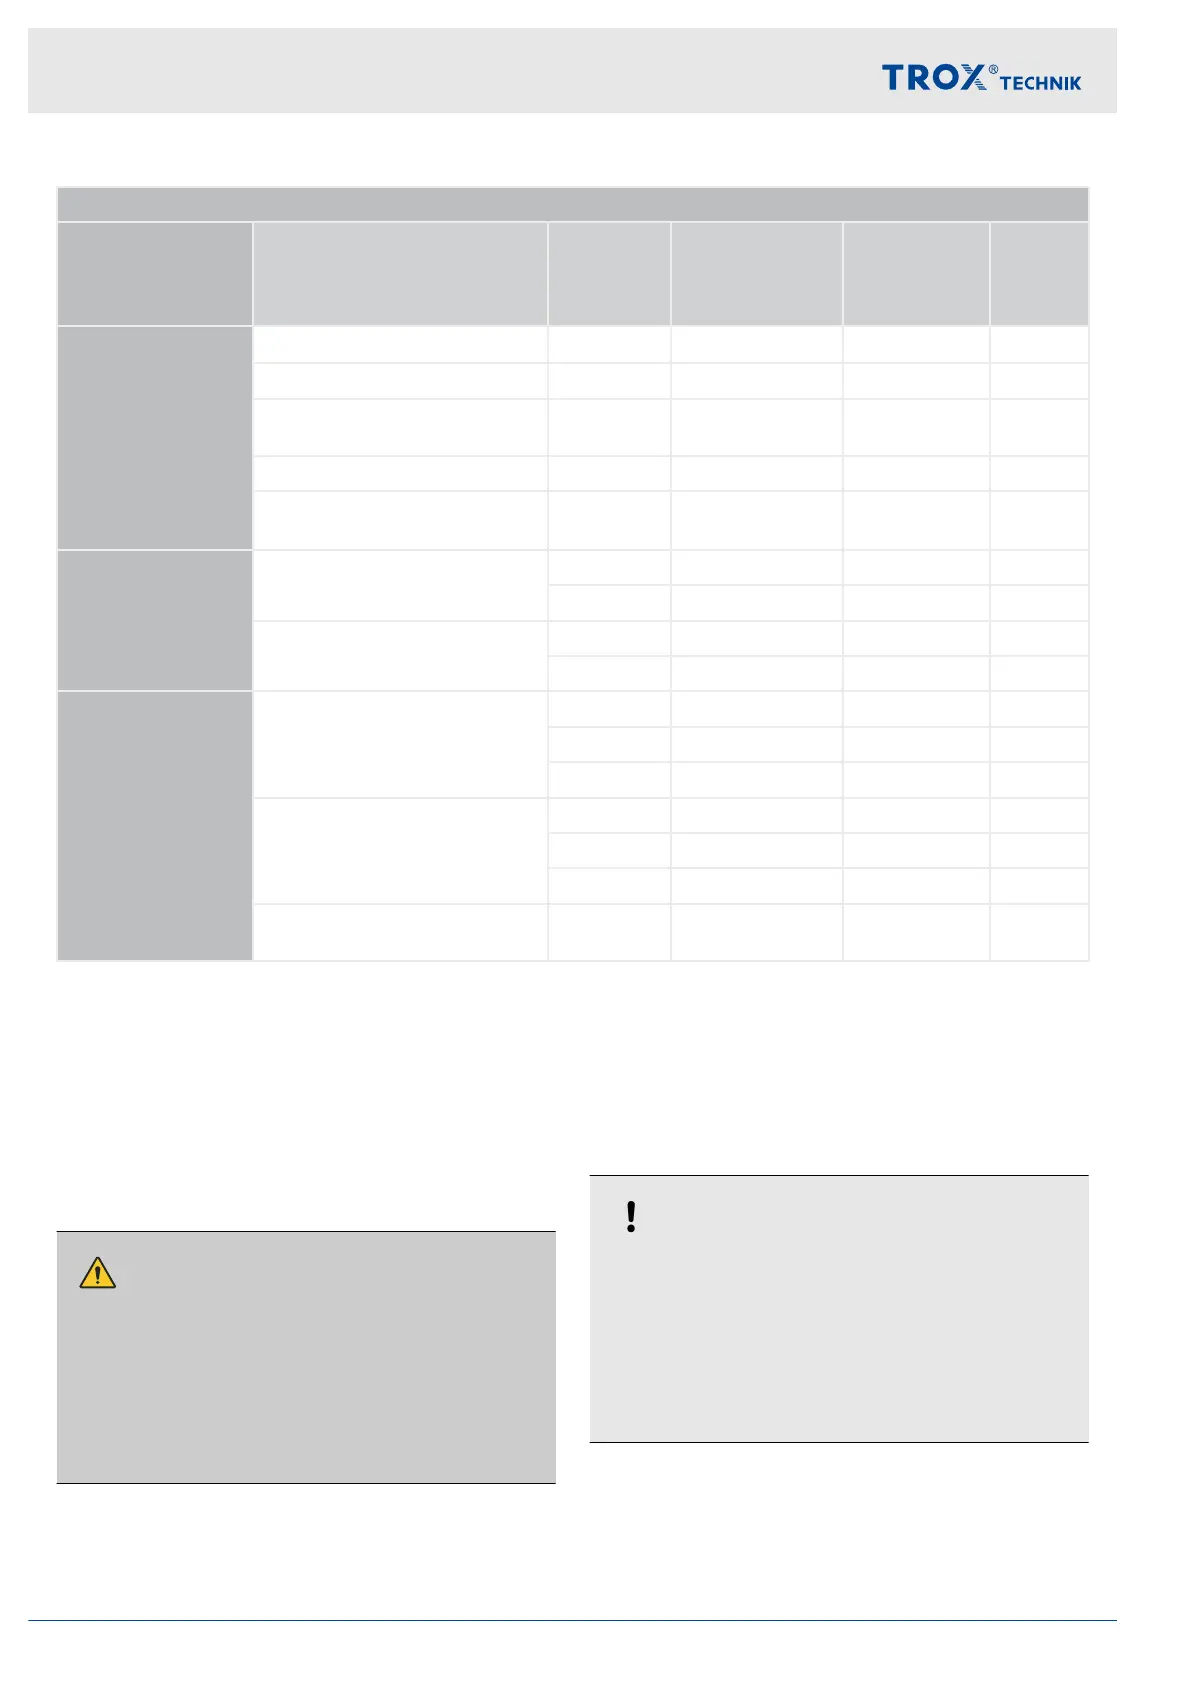
Installation situations
Supporting con-
struction
Installation location Minimum
thickness
[mm]
Class of per-
formance EI TT
(v
e
–h
o
, i ↔ o) S
up to
Installation
type
Chapter
in, ribbed ceilings
150
3
EI 90 S N
Ä
122
in, composite ceilings 150 EI 90 S N
Ä
123
in, combined with wooden
beam ceilings
150 EI 90 S N
Ä
124
in, combined solid wood ceiling 150 EI 90 S N
Ä
125
in, combined lightweight ceiling
4
150 EI 120 S N
Ä
126
Solid wood ceil-
ings
in 140 EI 90 S N
Ä
127
112.5 EI 90 S N
Ä
127
in, installation kit TQ 140 EI 90 S E
Ä
128
112.5 EI 90 S E
Ä
128
Wooden beam ceil-
ings
in 167.5 EI 90 S N
Ä
129
155 EI 60 S N
Ä
129
142.5 EI 30 S N
Ä
129
in, installation kit TQ 167.5 EI 90 S E
Ä
131
155 EI 60 S E
Ä
131
142.5 EI 30 S E
Ä
131
in, historical wooden beam ceil-
ings
–
5
EI 30 S N
Ä
133
1)
Gypsum wall boards EN12859
2)
The class of performance depends on the installation details
3)
Thickness increased near the installation opening
4)
Cadolto system
5)
Depending on local conditions
N = Mortar-based installation
E = Installation kit
W = Fire batt
E = Dry mortarless installation
5.2 Safety notes regarding installation
Sharp edges, sharp corners and thin sheet metal
parts
CAUTION!
Danger of injury from sharp edges, sharp cor-
ners and thin sheet metal parts!
Sharp edges, sharp corners and thin sheet metal
parts may cause cuts or grazes.
– Be careful when carrying out any work.
– Wear protective gloves, safety shoes and a hard
hat.
5.3 General installation information
NOTICE!
Risk of damage to the fire damper
– Protect the fire damper from contamination and
damage.
– Cover openings and release mechanism (e.g.
with plastic) to protect them from mortar and
dripping water.
– Do not remove the transport and installation pro-
tection (if any) until installation is complete.
Installation
General installation information
Fire damper FKR-EU26