Step 3: Mounting the caps Assembling the X/Y axes 35
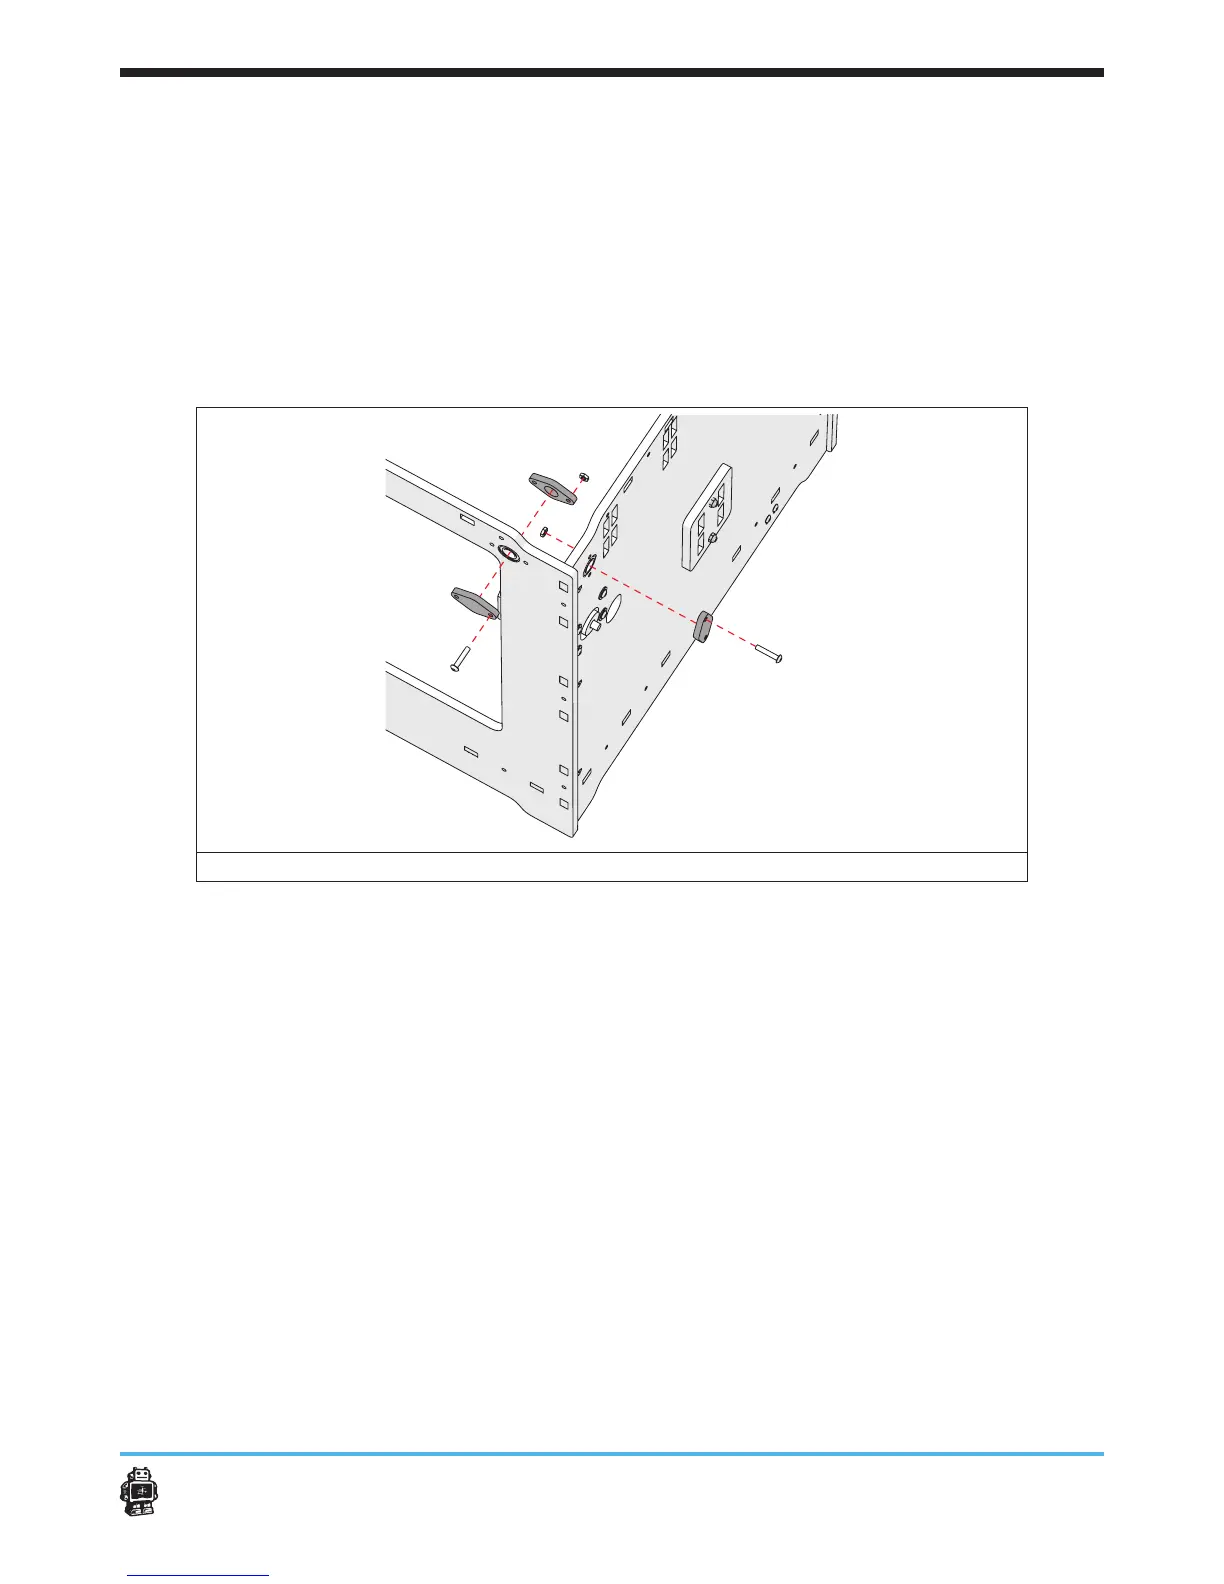
3. Attach the wooden caps in corner C, see image 35.
The wooden caps WITH hole on the inside, the wooden end caps
WITHOUT hole on the outside.
U
se ONE wooden end cap WITHOUT hole at the BACK panel
.
5 Notice: Use ONE bolt M3 x 16mm and ONE hex nut 3mm at the RIGHT
panel.
5 Notice: Use ONE bolt M3 x 16mm and ONE hex nut 3mm at the BACK
panel,
image 35: attaching the wooden caps in corner C
4. Attach the wooden caps in corner D, see image 36.
The wooden caps WITH hole on the inside, the wooden end caps
WITHOUT hole on the outside.
Use ONE a wooden end cap WITHOUT hole at the LEFT panel
5 Notice: Use ONE bolt M3 x 16mm and ONE hex nut 3mm at the BACK
panel,
5 Notice:
Use two bolt M3 x 16mm and two hex nuts 3mm at the LEFT
panel.
 Loading...


