Step 4: attaching the feeder to the machine Assembling the material feeder80
6.5.4. Step 4: attaching the feeder to the machine
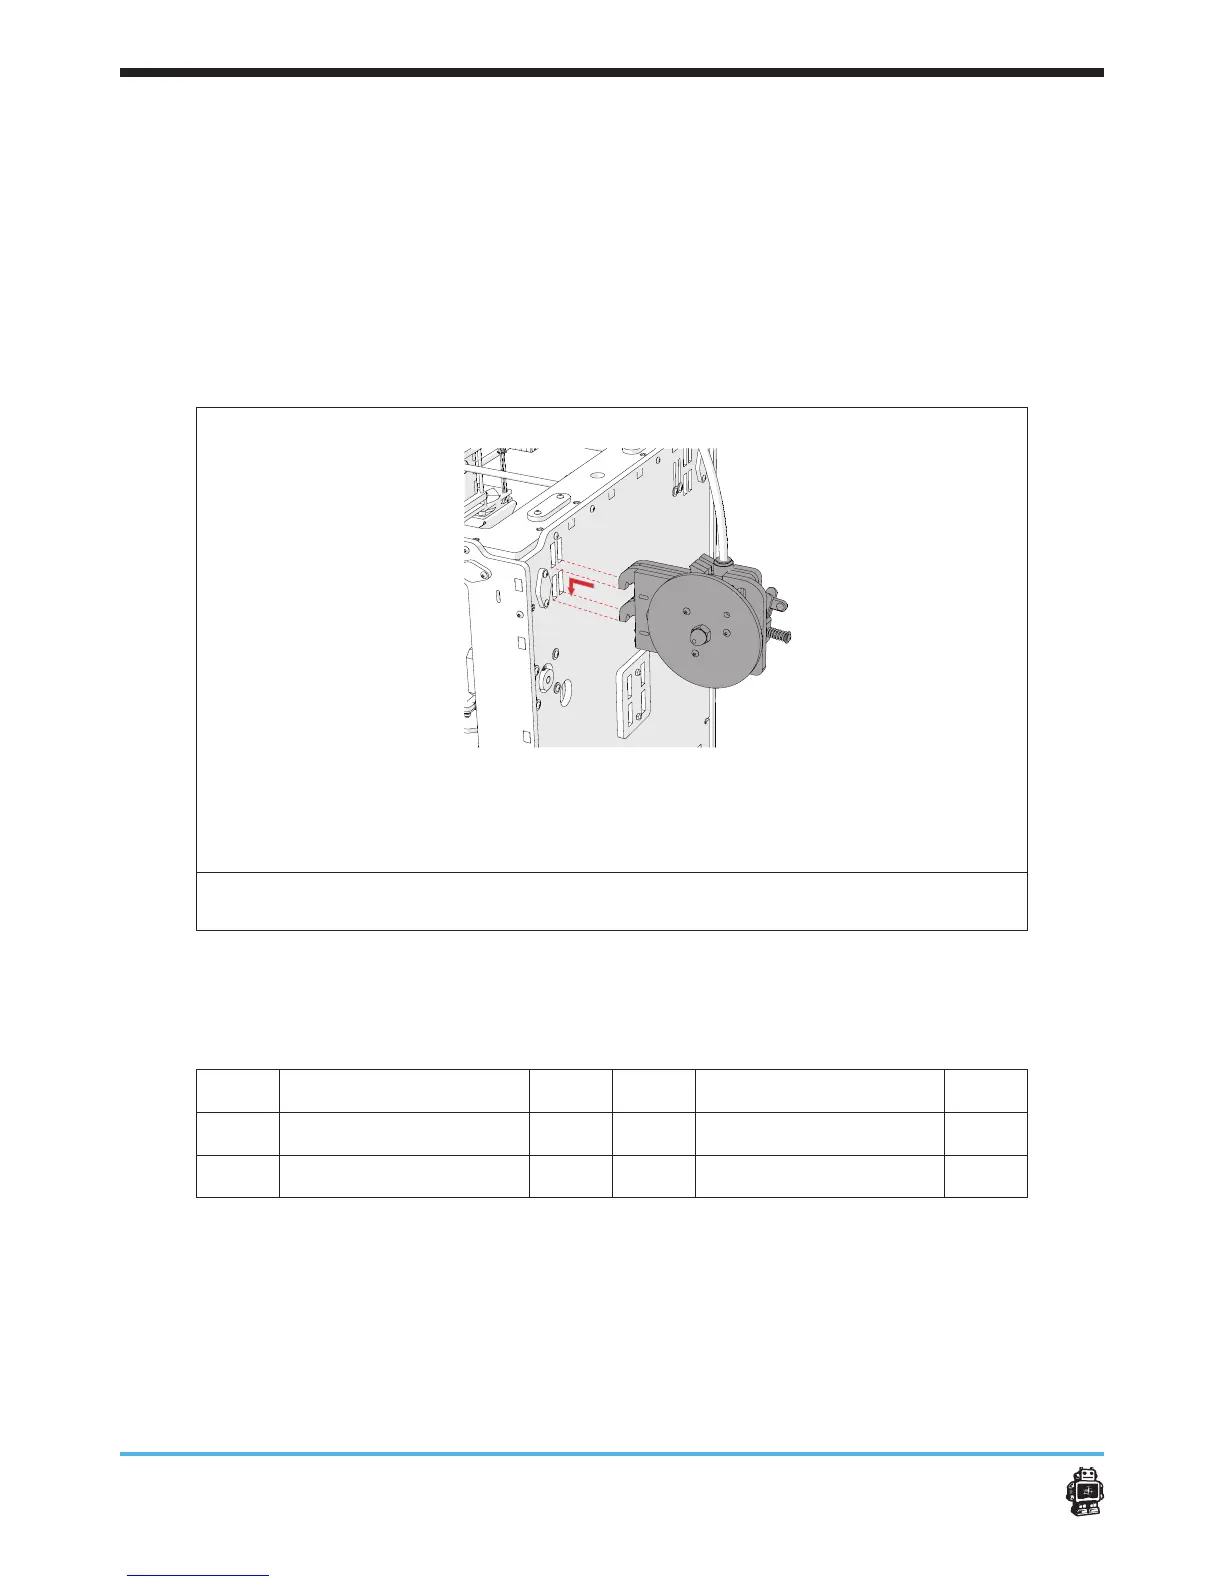
To attach the feeder to the machine, perform the following actions:
1. Attach the feeder in the slots of the BACK panel, see image 101
2. Place the bow shaped tube in the tube couple of the material feeder
mechanism.
3. Secure the bow shaped tube with a blue horse shoe.
4. Move the wires from the material feeder through the hole below the
material feeder of the BACK panel.
5. Move the wires through the corner hole of the BOTTOM panel.
image 101: attaching the clamp assembly with U-Bracket and lever on the main body
of the drive mechanism
6.5.5. Step 5: assemble the lament holder
The following parts are needed in this step.
Letter Description Qnty. Letter Description Qnty.
A
wooden parts 11B 2
B
wooden parts 11C 6
C
Small wooden part 11B 2