Step 1: Assemble the extrusion head housing Assembling the extrusion head46
image 50: placing the linear bearings in the sides of the extrusion head housing
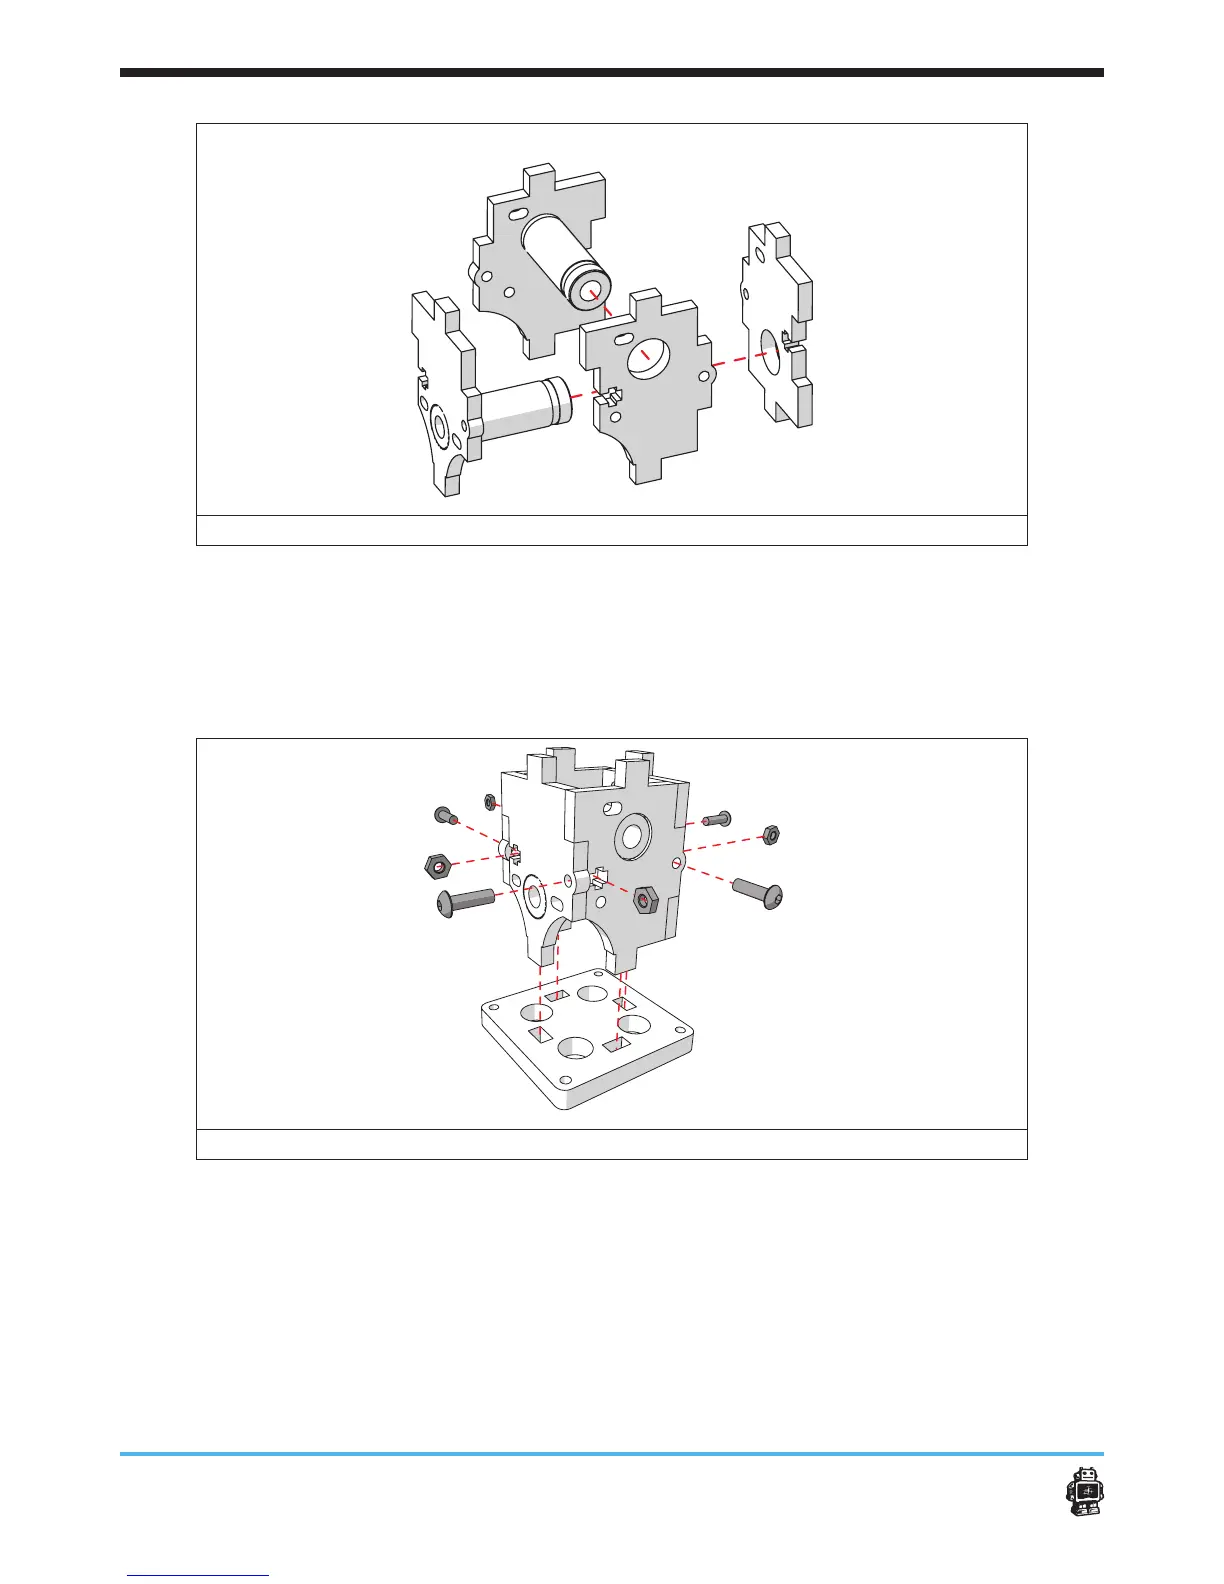
4. Attach the sides together, see image 51.
Use four bolts M3 x 10mm and four hex nuts 3mm.
5. Place the extrusion head housing into the wooden part 8B, see image
51.
image 51: attaching the sides together and placing into wooden part 8B.
6. Place the peek into the aluminium plate, see image 52.
5 NOTICE: the aluminium plate is symmetric. You can choose any hole
you want.
7. Attach the peek into the brass pipe (keep the aluminium heater block
in position as shown), see image 52.
5 NOTICE: Attach the peek through the aluminium plate to the brass
pipe as tight as possible.