Step 3: attaching the housing on the XY frame Assembling the extrusion head56
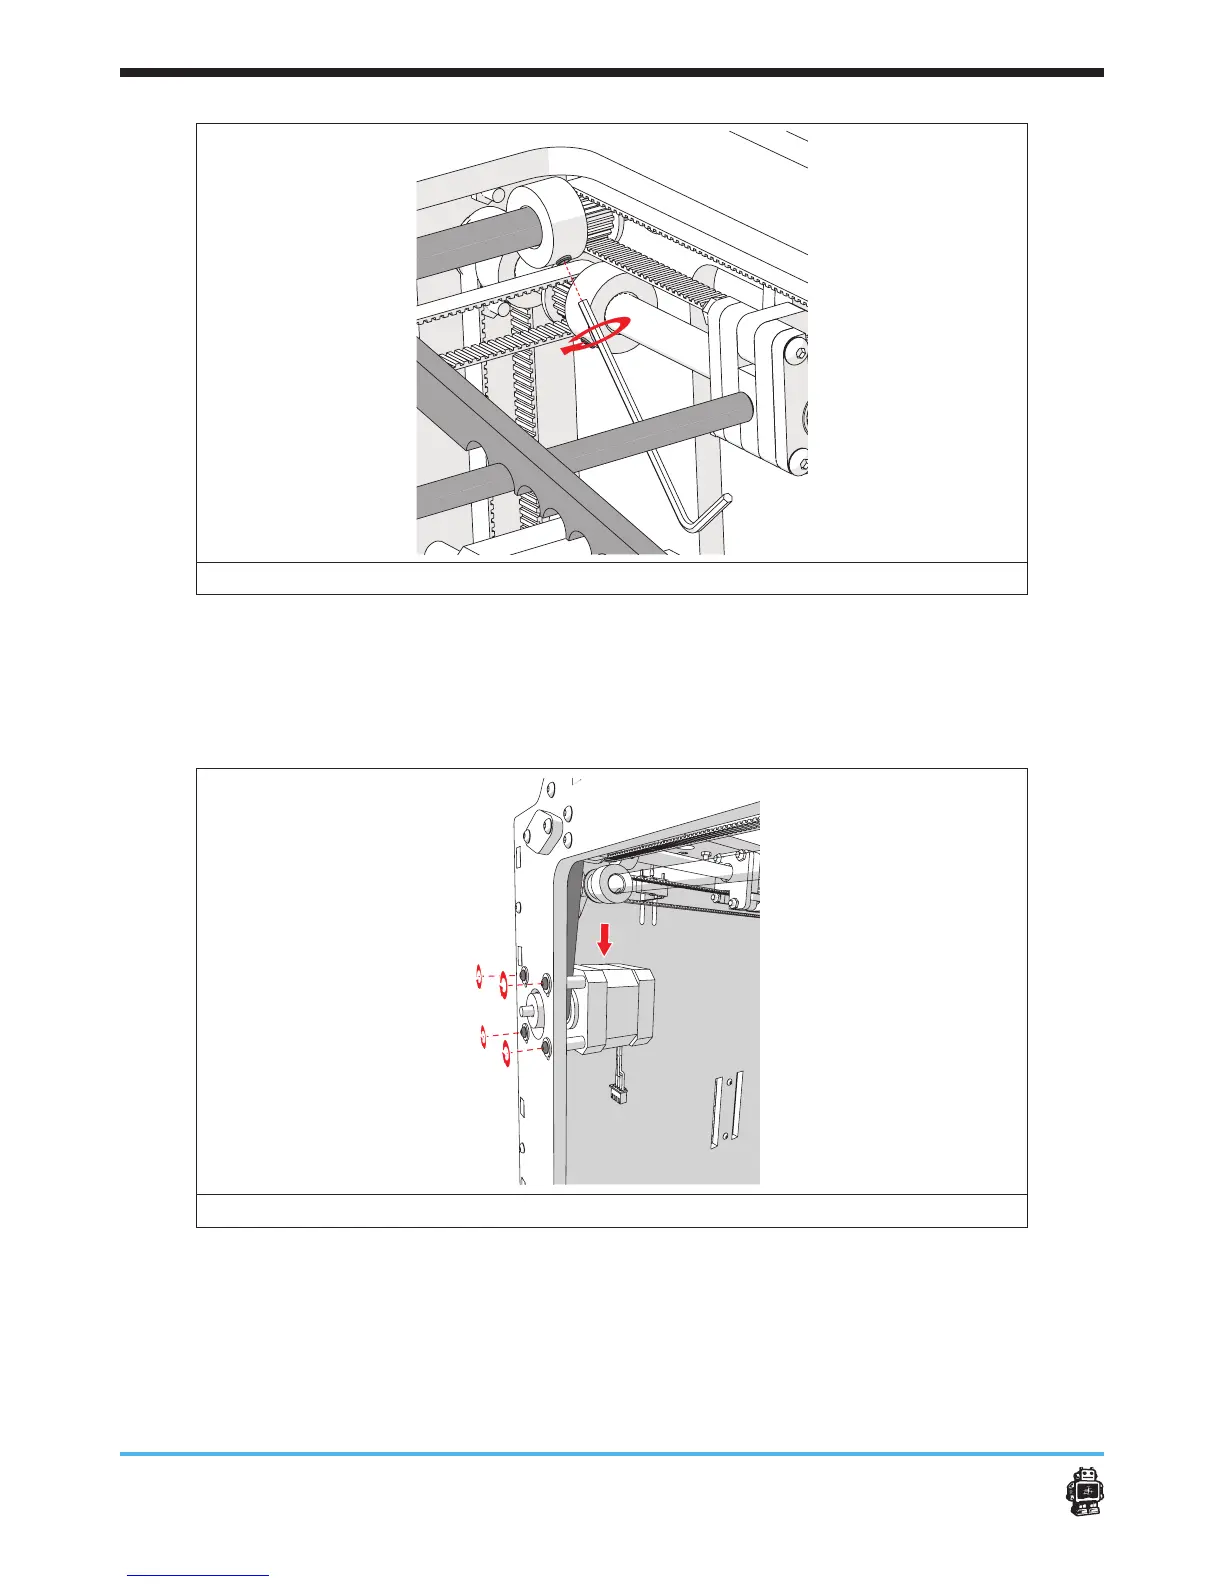
image 69: adjusting the timing pulleys
15. Move the X motor down en keep it in position.
5 Notice: push gently, do not overdo.
16. Tighten the bolts, see image 70
17. Repeat step 14 and 15 for the Y motor.
image 70: tightening the bolts of the X motor.
18. Move the extruder head all to the end of the X axis.
5 Notice: Make sure you hear the limit switch clicking.
If not: move the RED wired limit switch till the clicking sound occurs.
19. Tighten the RED wired limit switch.
20. Repeat step 19 and 20 for the BLUE wired limit switch.





 To Next Page