Step 4: nishing the Z stage assembly Assembling the Z stage 65
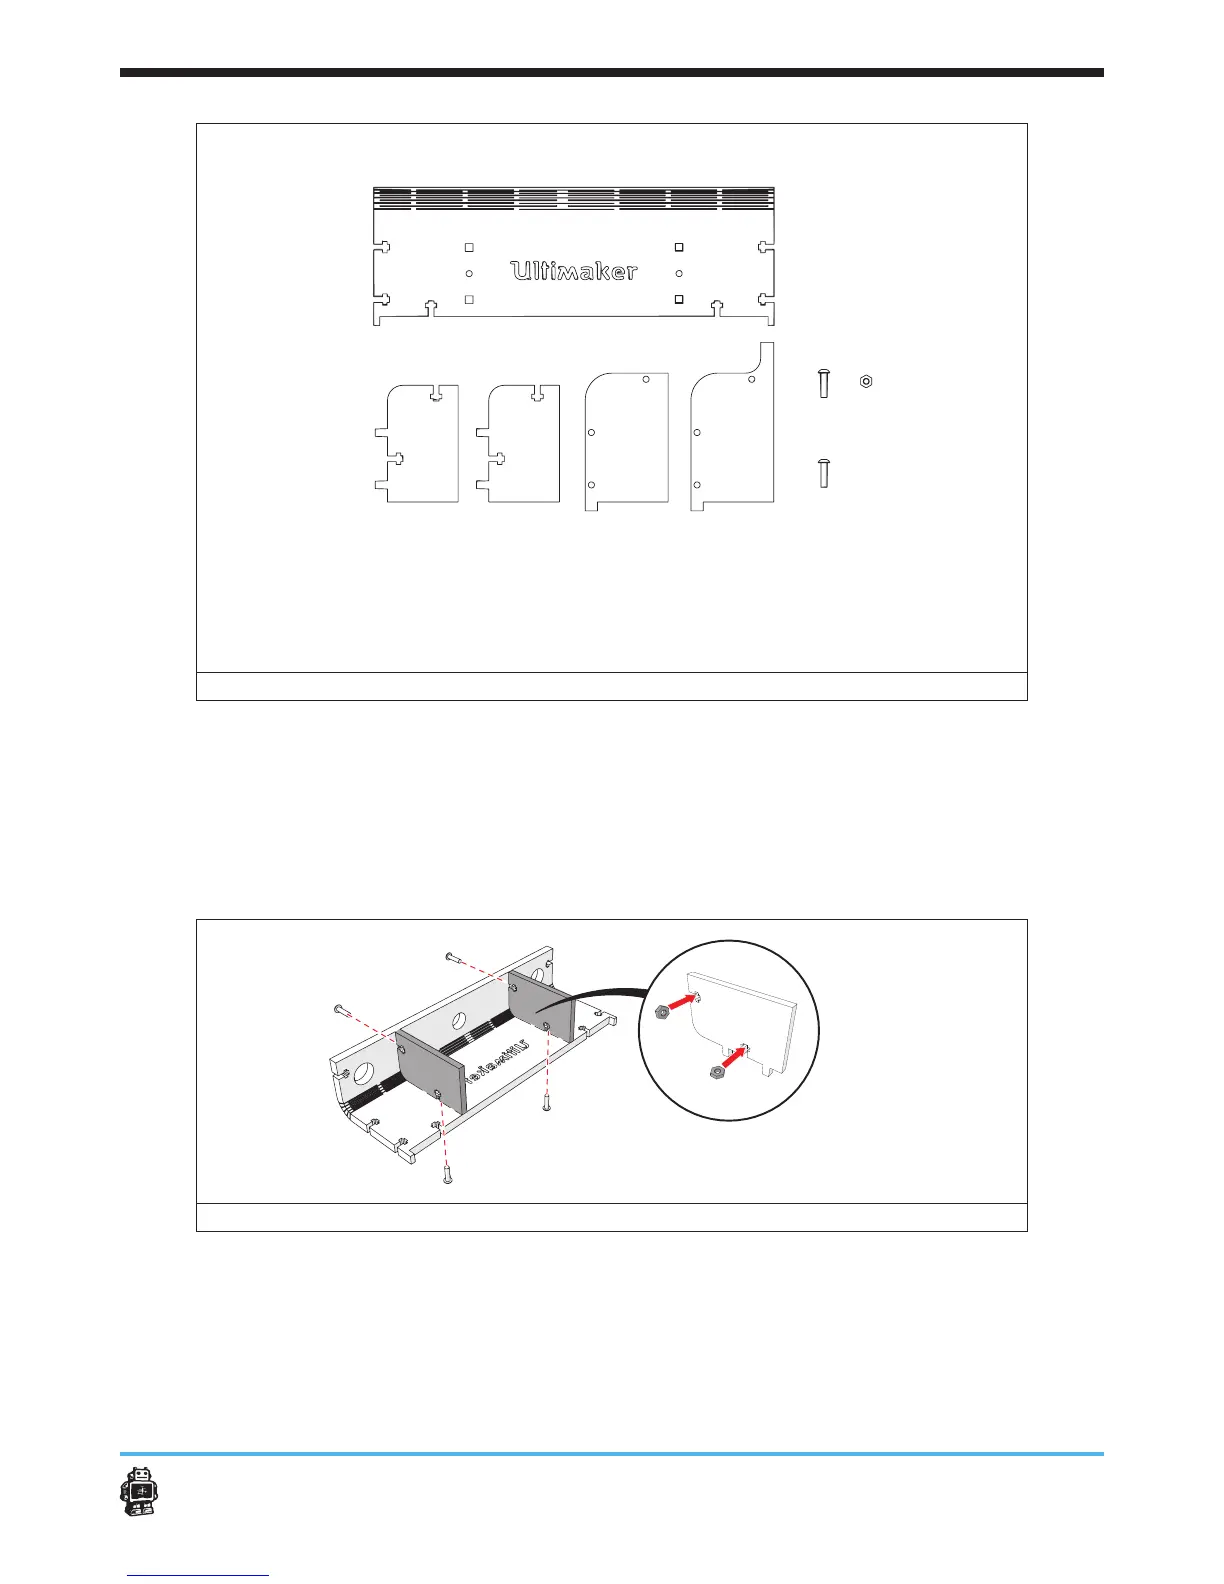
image 79: parts needed for this step
To assemble the Z-stage Cap perform the following actions.
1. Take the 6mm wooden part and place it facing down, so you can’t read
the word Ultimaker.
2. Take the wodden middle parts and place them into the middle to slots.
3. Fold the 6mm wooden part 90 degrees and secure it in place with
4x M3x14 and 4x M3 nuts. See image 80.
image 80: attaching the RIGHT arm on the drive nut assembly
D
B C E
A
F
G