Step 4: nishing the Z stage assembly Assembling the Z stage66
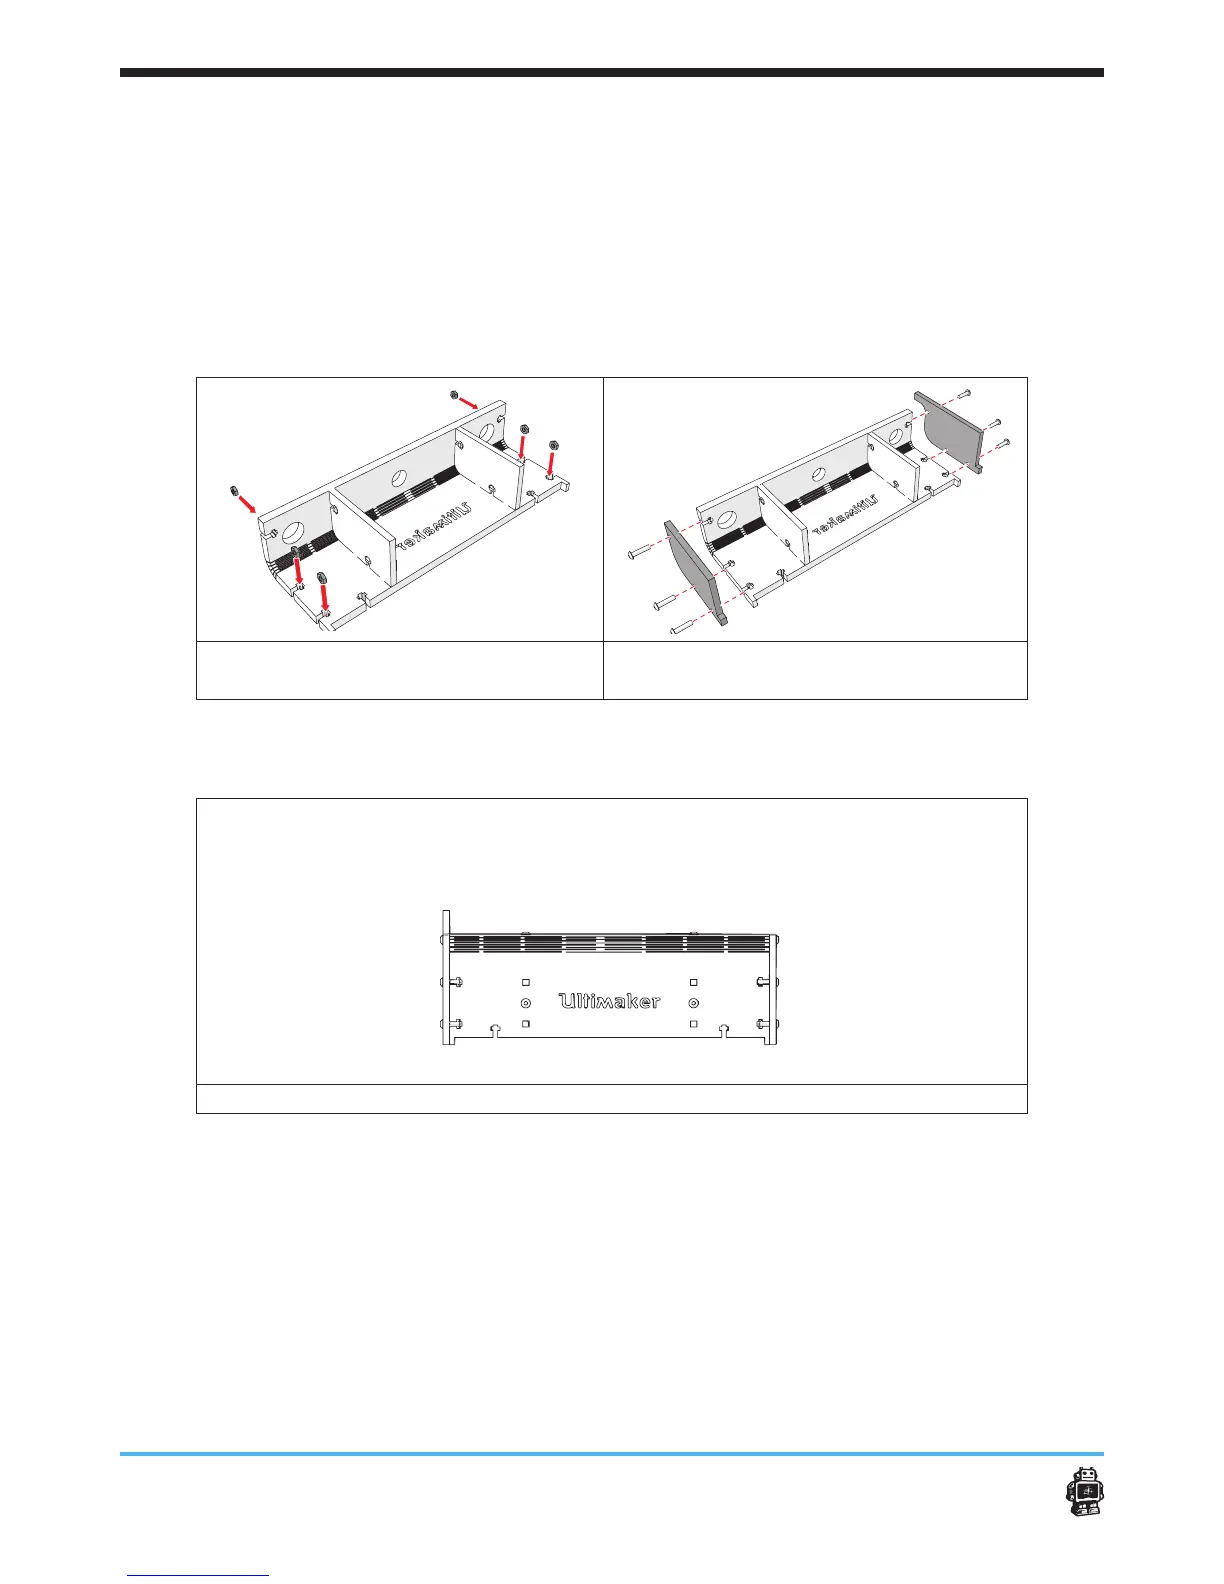
4. Place the six hex nuts 3mm in the slots of the 6mm wooden panel. See
image 81.
5. Place the 4mm wooden side parts on theZ stage cap. One side has the
extra protruding part at the top. see image 82
6. Attach the parts together.
Use six bolts M3x12mm.
image 81: rotating the wooden end cap
WITHOUT hole
image 82: Side view FRONT slider block
If done correctly, the result must look like this, see image 83.
image 83: result of the Z stage assembly
 Loading...


