4.2 Register thermostats in controller
The illustration below shows how to register the various room
thermostats associated with Uponor Controller C-55/56.
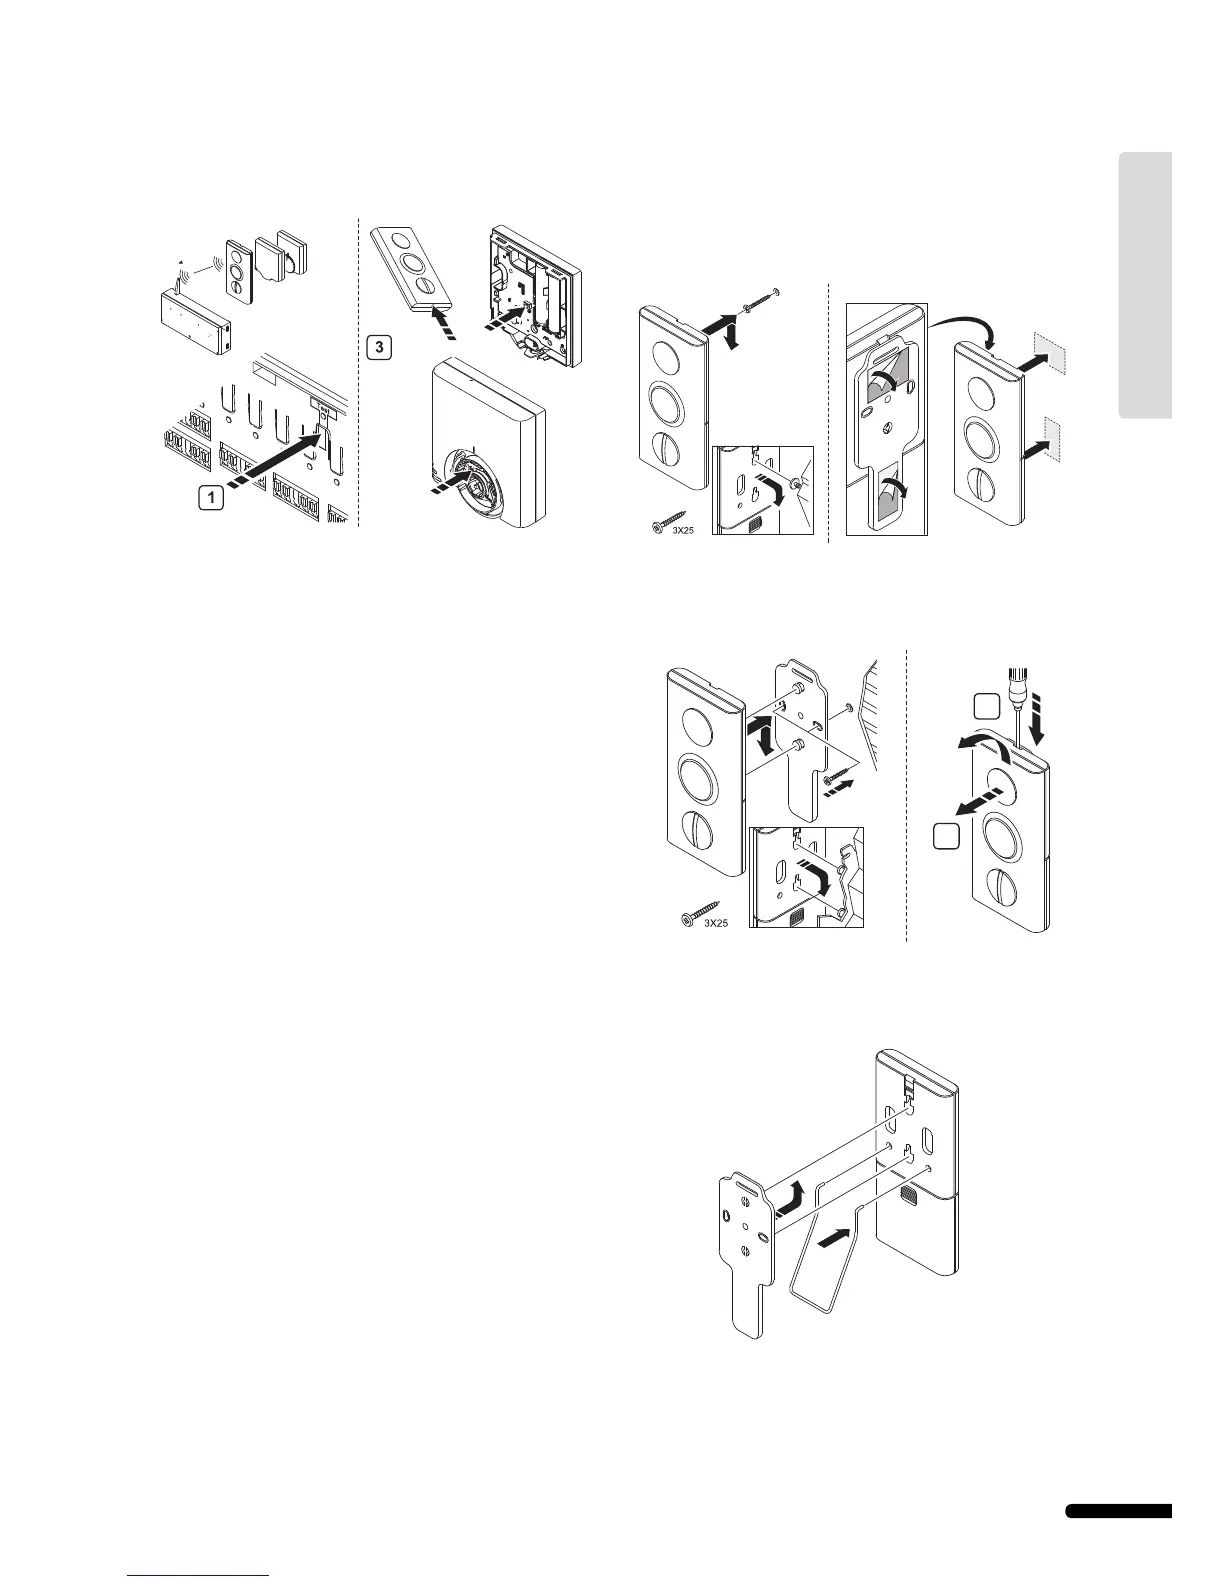
To register room thermostats in the controller:
1 Press and release the Test button. The test LED comes on.
2 Press the button of preferred channel. The channel LED
fl ashes.
3 Using a pointed instrument, gently press on the registration
button of the thermostat until the channel LED in the
controller is constantly on.
4 Repeat steps 2 and 3 until all used room thermostats are
registered.
5 Press and release the Test button to end registration. The
test LED goes off.
To register a room thermostat for multiple channels in the
controller:
1 Press and release the Test button. The test LED comes on.
2 Press and release the button of the chosen channels in the
controller. The channel LEDs fl ash.
3 Using a pointed instrument, gently press the registration
button of each thermostat until the channel LEDs in the
controller are constantly on.
4 When all thermostats are registered, press and release the
Test button. The test LED goes off.
To deregister already registered thermostats see section 6.2
Deregister channels in controller on page 30.
4.3 Install Thermostat with display T-75
Attach to wall
The Uponor Thermostat with display T-75 can be attached to a
wall with screws or adhesive strips, as shown in the illustration
below.
Wall bracket
The thermostat can be attached to a wall with a wall bracket, as
shown in the illustration below.
Attach to table stand
The illustration below shows how to attach the thermostat to a
table stand.
1
2
21
UPONOR CONTROL SYSTEM – INSTALLATION AND OPERATION MANUAL
UK English