Maintenance/Repairs
71
10. Degrease the other end of the motor shaft with an appropriate solvent.
11. Pull on a new slip clutch over the top end of the shaft. Do not use any
lubricant!
The slip clutch fits very tightly on the shaft. Hitting the end of the shaft with the
slip clutch on solid ground firmly several times will help push on the slip clutch.
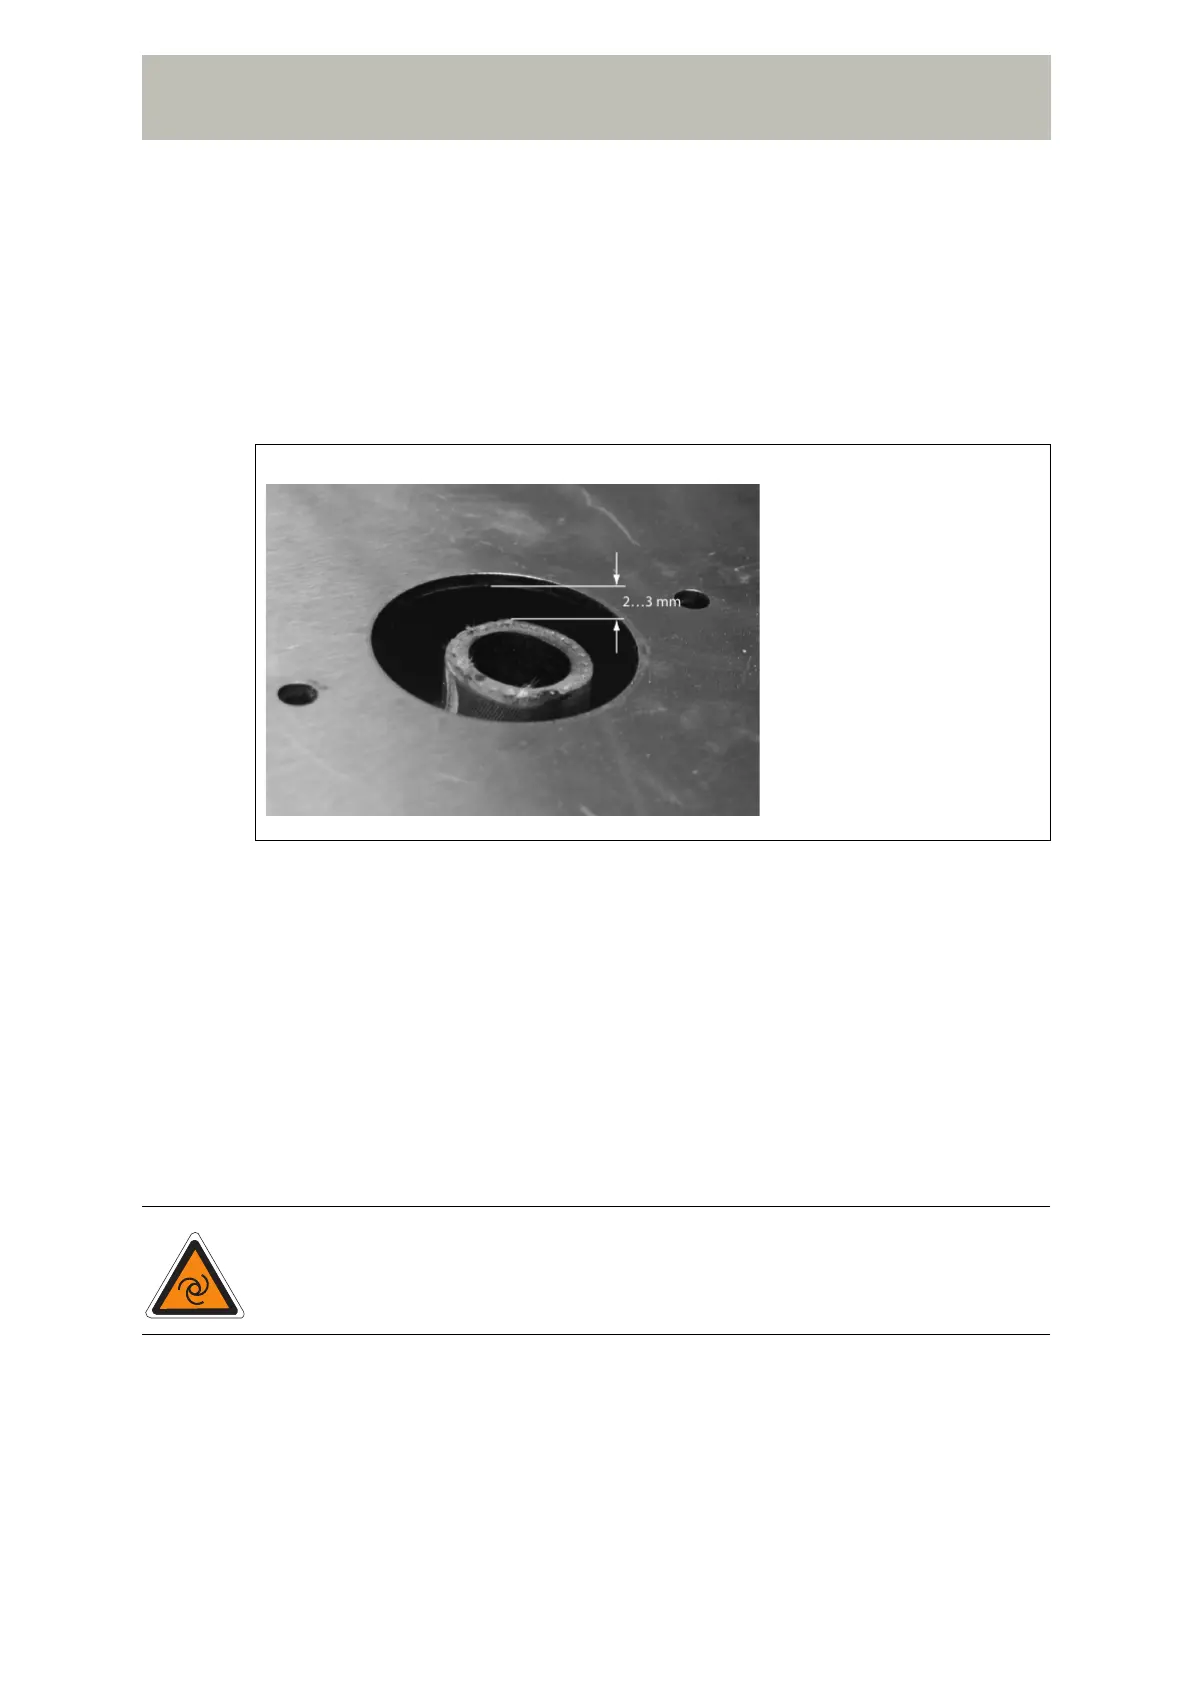
The slip clutch is pulled on until it ends approx. 2 - 3 mm below the container
lid when tentatively installing the shaft:
12. Position the 2-ear clamp on the outside of the slip clutch.
13. Insert the shaft with the slip clutch.
14. Position the motor shaft on the slip clutch from the top; push motor down until it
sits on the container lid.
15. Press together each ear of the 2-ear clamp using appropriate pliers in order to
clamp the slip clutch on the shaft of the agitator.
16. Insert the motor screws from below (see figure 9/2) and tighten them.
17. Briefly start up agitator to check for correct function.
Figure 9/5: Adapting the slip clutch
CAUTION
Danger of injuries caused by rotating tools
Do not reach into the feed container when the agitator is running!