10-9
Troubleshooting > Solving Malfunctions
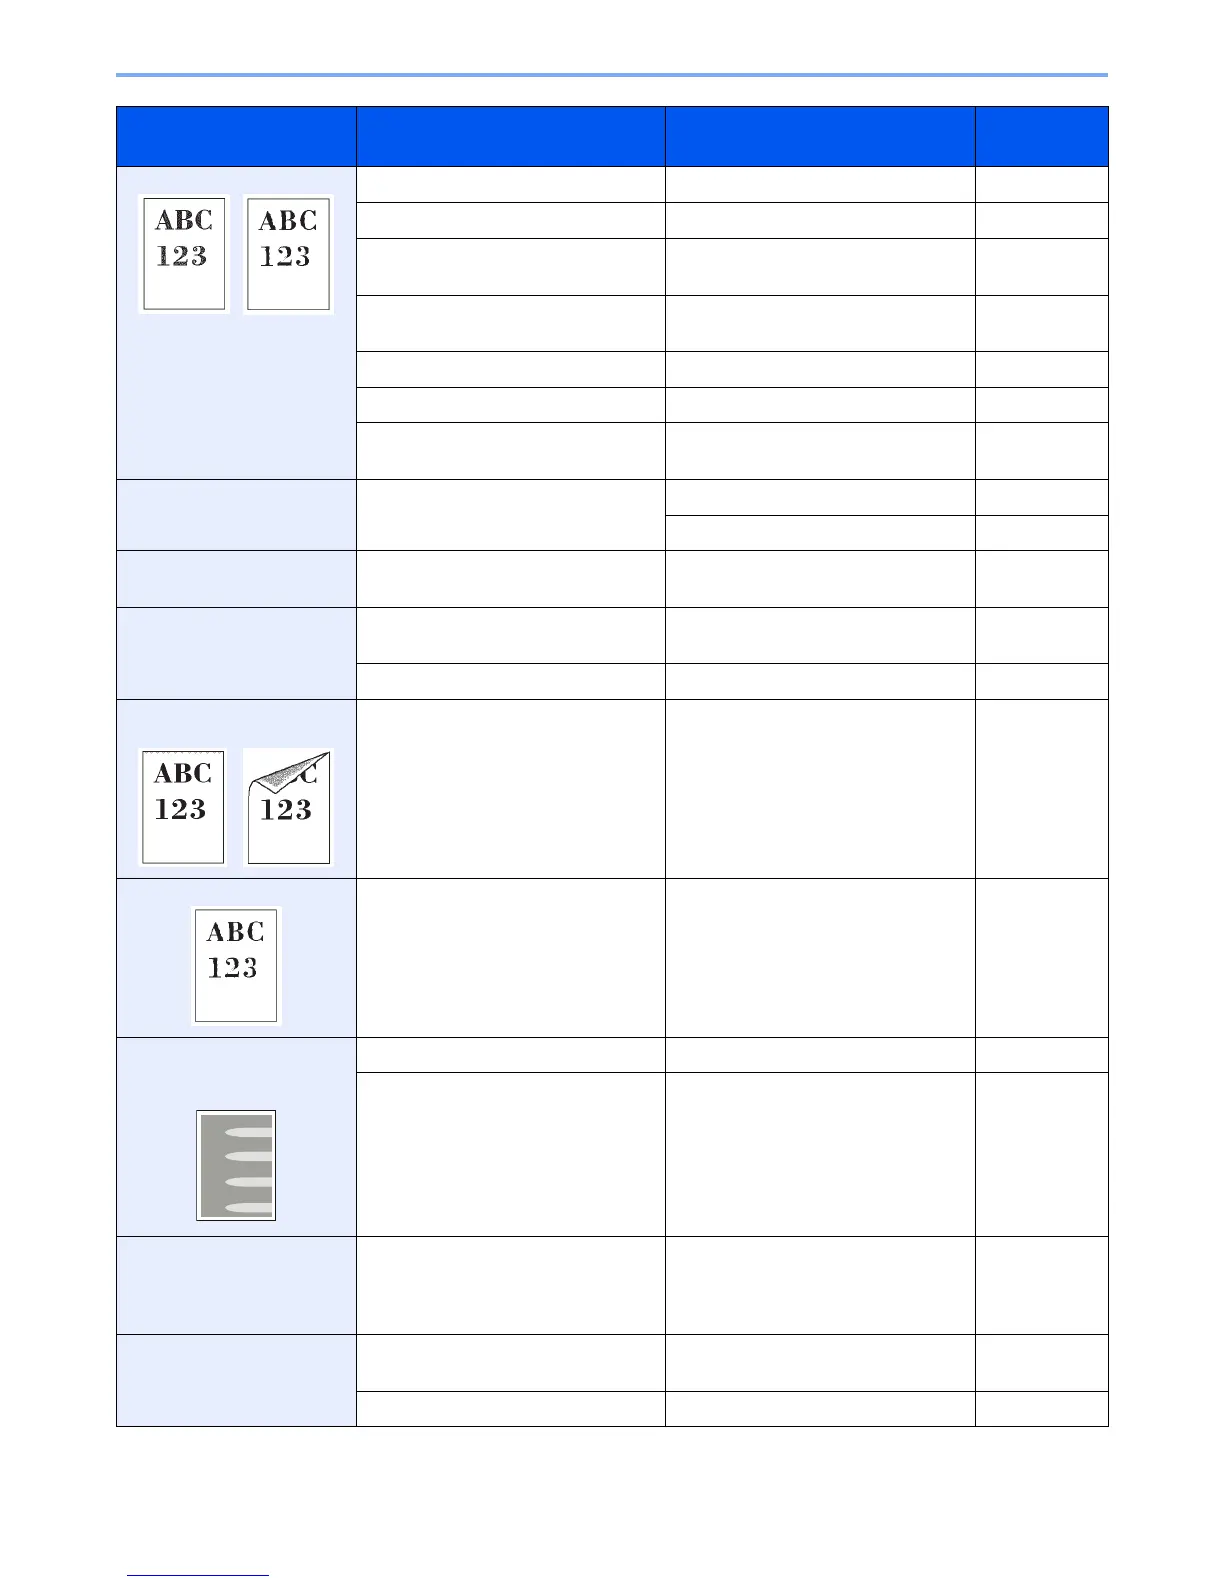
Printouts are too light. Is the paper damp? Replace the paper with new paper. 3-2
Have you changed the density? Select appropriate density level. 3-43, 9-28
Is the toner distributed evenly within
the toner container?
Shake the toner container from side to
side several times.
10-2
Is there a message indicating the
addition of toner?
Replace the toner container. 10-2
Is EcoPrint mode enabled? Disable EcoPrint mode. 3-46
— Run [Laser Scanner Cleaning]. 9-29
— Make sure the media type setting is
correct the paper being used.
9-7
Printouts are too dark. Have you changed the density? Select appropriate density level. 3-43, 9-28
Run [Calibration]. 9-29
The background density is
obtrusive.
—
Carry out [Background Density
Adjustment].
3-48
Dirt on the print side of the
paper.
Is the platen or the document
processor dirty?
Clean the platen or the document
processor.
10-6
— Run [Laser Scanner Cleaning]. 9-29
Dirt on the top edge or back
of the paper.
Is the paper transfer unit dirty? Clean the transfer unit. 10-7
Printouts are fuzzy. Is the machine being used in very
humid conditions?
Use in an environment that has
suitable humidity.
1-3
Part of the image is
periodically faint or shows
white lines.
— Open and then close the rear cover. —
— Run [Drum Refresh]. 9-29
Copies have a moire pattern
(dots grouped together in
patterns and not aligned
uniformly).
Is the original a printed photograph? Set the image quality to [Photo]. 3-45
Printouts are not clear. Did you choose appropriate image
quality for the original?
Select appropriate image quality. 3-45
— Run [Laser Scanner Cleaning]. 9-29
Symptom Checkpoints Corrective Actions Reference
Page