77
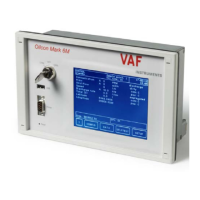
8.3 TEST AND CHECK-OUT PROCEDURE
CAUTION:
UNDER NO CIRCUMSTANCES SHOULD THE PUMP RUN WITHOUT LIQUID. THE
PUMP HOUSING MUST FIRST BE FILLED WITH LIQUID, OTHERWISE THE PUMP
WILL SEIZE AND DAMAGE WILL OCCUR.
Before a test is carried out, the person in charge should familiarise himself/herself with the operation
of the system and ensure the following conditions are met:
Control air supply is on
Fresh water supply is on
Electrical supplies are on
Main Control Unit is switched on
Electro Pneumatic Unit is switched on
Starter box is switched on
All manual valves in the system are open
Cargo pump is on standby
NOTE
The MCU will divert flow into the slop tank during the test.
Proceed as follows:
1. Turn the key switch in the “Control” position.
2. Press the <SETUP> key to enter the “setup mode”.
3. Press the <CHANGE> key and next press the <NXT> key until “total oil limit” is displayed.
4. Change the “total oil limit” to 40 l.
5. Press the <NXT> key to display “reset total oil”.
6. Change the “reset total oil” to “Yes”.
7. Press the <NXT> key until “speed ind.” is selected. Use the < + > and < - > keys to change
the ship’s speed to 15 knots.
8. Press the <NXT> key until “flowrate ind.” is selected. Use the numeric keys to enter a flow
rate of 1000 m³/h.
9. Press the <NXT> key until “oil conc. Ind.” is selected. Use the numeric keys to enter a oil
concentration of 400 ppm.
Please note that the “conc. alarm” must be > 400ppm.
10. Press the <OK> key to exit the “setup mode”.
11. Press the <FLUSH> key. The system will not perform the “back flush” sequence but will
immediately go into “idle mode”.
12. Press the <SAMPLE> key to start the “sample mode”.
13. Check the display of the MCU for correct information.