Chapter 8 ___________________________________________________________________Repair
VAISALA______________________________________________________________________ 109
7. Connect the power cable to connector J2.
8. Switch on the power with all three switches. Wait until the
Laser
on LED starts blinking at 2-second intervals. Ensure that all six
diagnostic LEDs are lit. Refer to Figure 26.
The ceilometer unit should now return to normal operation. Verify that
the unit is working properly and that there are no other failures with the
system. If other failures exist, separate troubleshooting may be necessary.
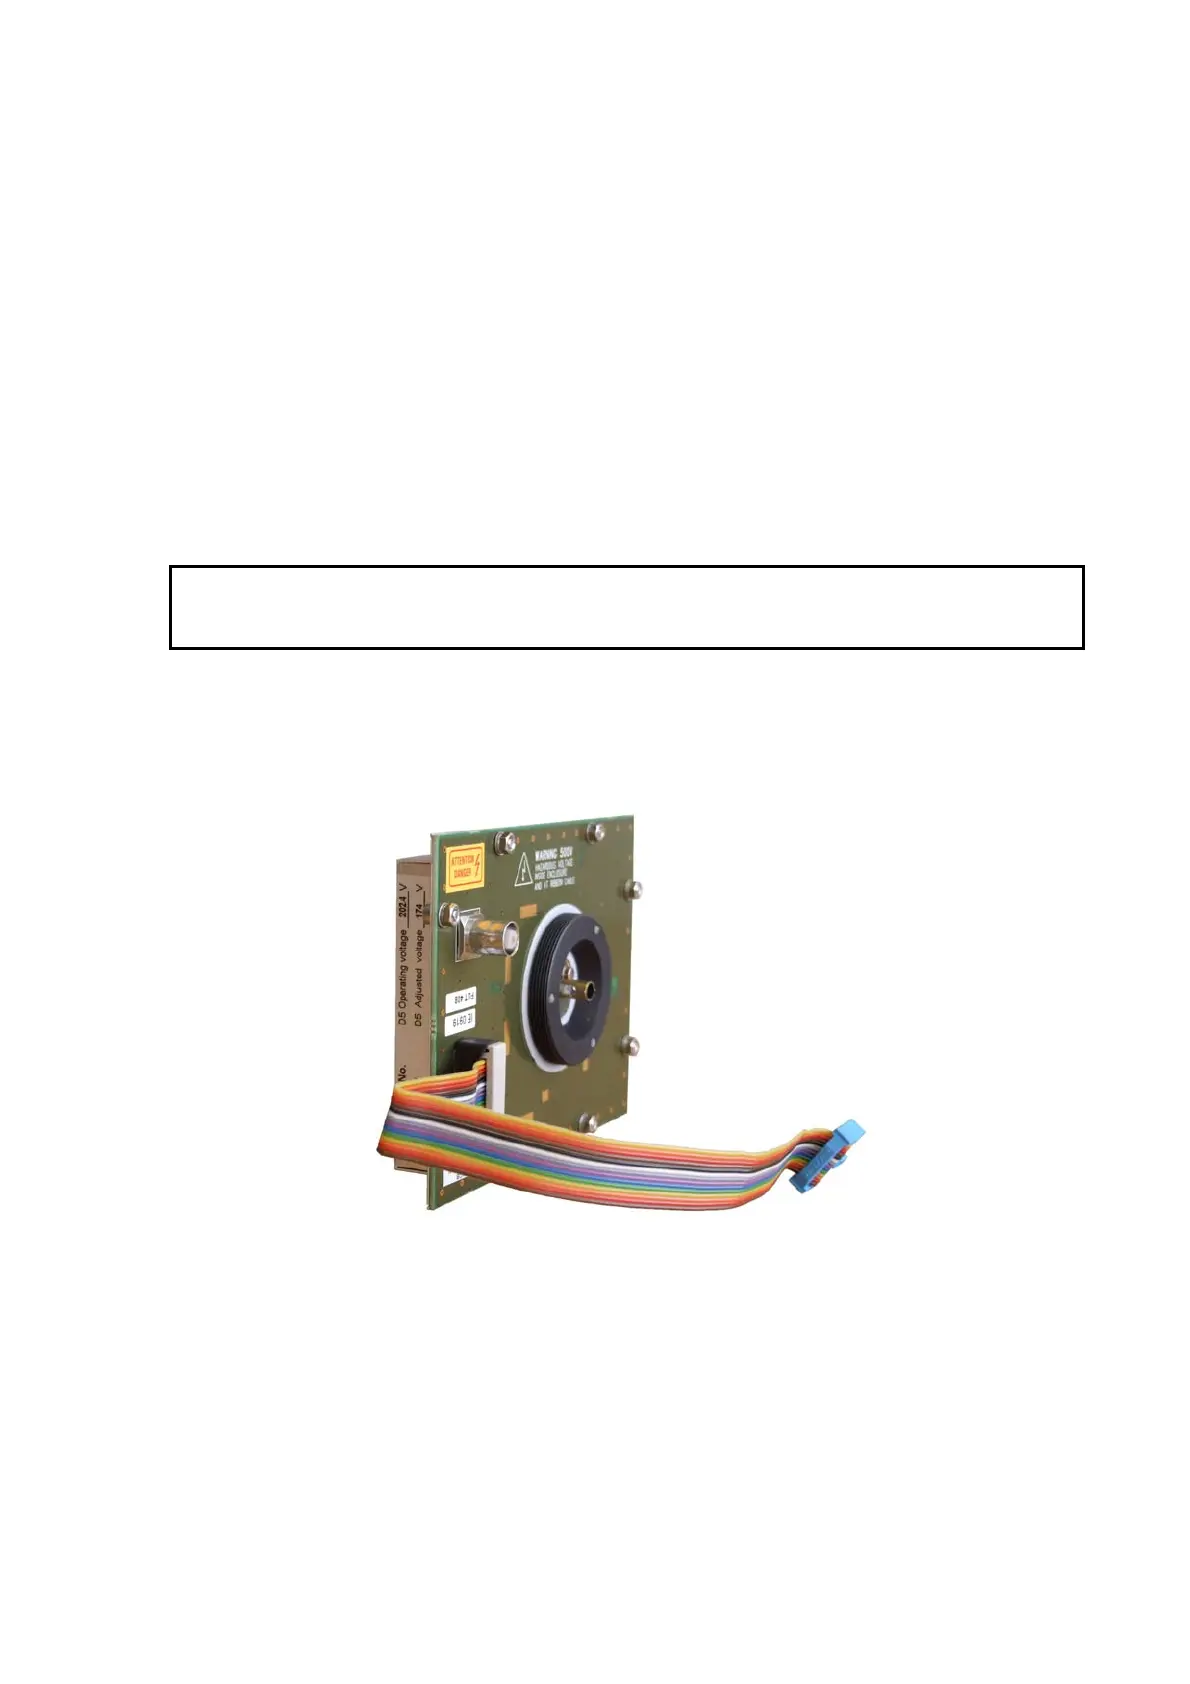
Replacing Ceilometer Receiver CLR321
Refer to number 2 in Figure 22 on page 104.
CAUTION
Servicing the equipment must only be performed by qualified
maintenance personnel.
The receiver should be replaced if the ceilometer unit has been
generating warnings and alarms, and a malfunction in the receiver
operation has been detected.
0910-111
Figure 25 Receiver CLR321
To replace Ceilometer Receiver CLR321, you will need a 2.5 mm Allen-
key. Then proceed as follows:
1. Open the measurement unit door and confirm that there is an active
receiver failure. In case of a receiver failure, the
CLR ok LED will
be off. Refer to Figure 26 on page 111.