Connecting the 2U12 storage shelf and appliance
power cords
Each appliance and each storage shelf contain two AC power supplies. To ensure
power redundancy, connect the power supplies on each component to separate
AC power sources.
Caution: Do not turn on the power to any components while connecting the power
cords. The components must be turned on in a specific sequence to ensure correct
communication.
To connect the power cables
1
Verify that the AC power supply input for the appliance and for the storage
shelf is within one of these ranges.
■ 100 - 127 VAC at 50/60 Hz
■ 200 - 240 VAC at 50/60 Hz
2
For each shelf, obtain two power cords that are appropriate for your region and
equipment.
3
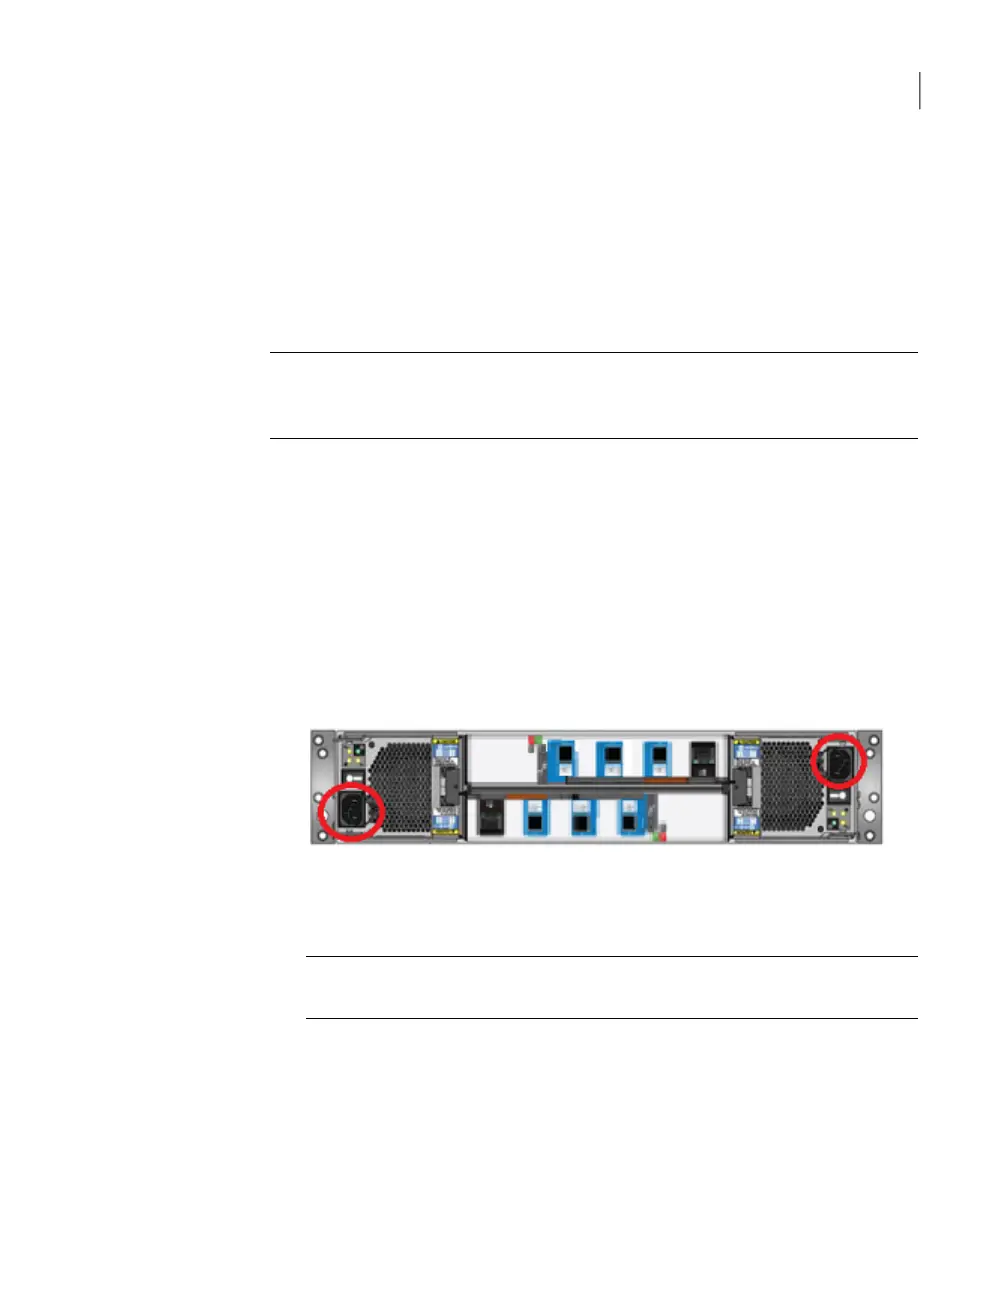
Locate the power sockets in the shelf.
4
Connect one cable between each socket and a socket on the Power Distribution
Unit (PDU) for your rack.
Note: The following steps apply if you removed the appliance from the rack to
install additional components.
5
Obtain two power cords for your appliance.
121Adding 2U12 storage shelves to an operational NetBackup 5230 Appliance
Connecting the 2U12 storage shelf and appliance power cords

 Loading...


