■ Put on a grounded ESD wrist strap or take other precautions against ESD
damage.
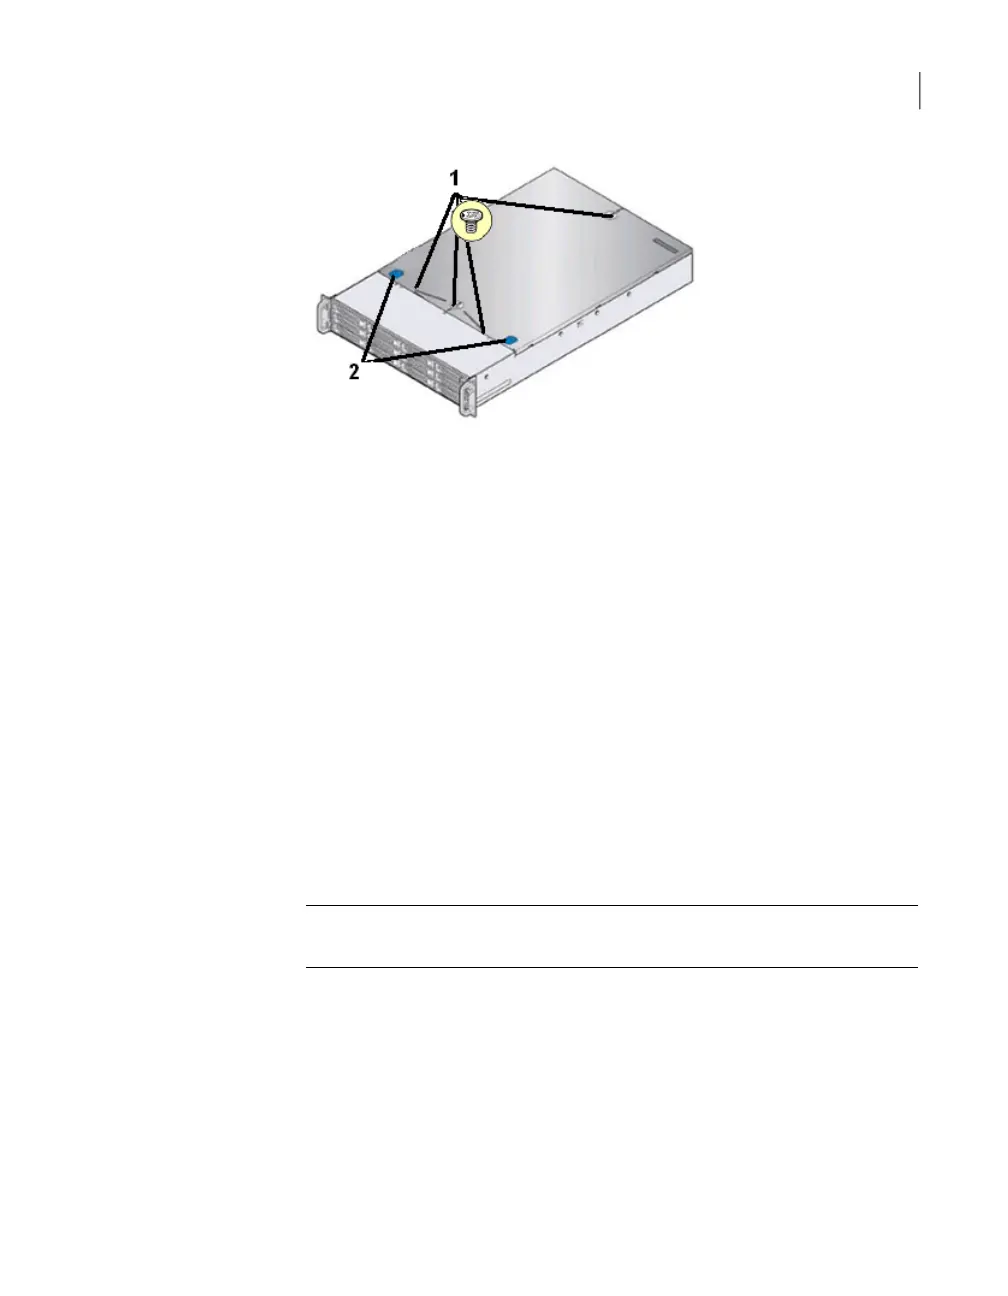
■ Remove the four screws (1) from the top of the chassis cover as shown in
the figure above.
■ Press the blue thumb grips (2) to release the locks and slide the cover back
0.5 inches (1.27 cm).
■ Lift the cover off the chassis and set it aside where it cannot be damaged.
Installing the additional memory
Base NetBackup 5230 appliances are equipped with 64GB of memory in the form
of Dual In-line Memory Modules (DIMMs). When a base unit is upgraded to use
storage shelves, 64GB of additional memory must be installed.
To install the memory
1
Remove the air duct as follows:
Note: The air duct is the plexiglass cover behind the fan bulkhead as shown
in the following figure. The air duct has two blue latches attached.
52Adding 3U16 storage shelves to an operational NetBackup 5230 Appliance
Installing the additional memory

 Loading...


