■ Fibre Channel cables for client and device connections
■ PS/2 to USB adapter cable
■ KVM cable
Connecting the VGA cable
When the appliance is initialized, a monitor can be connected to the Video Graphics
Array (VGA). You can attach a keyboard to the USB port. Alternatively, you can
connect the VGA to a Keyboard Video Mouse (KVM) adapter or switch.
To connect the VGA Cable
1
Insert the connector of a VGA (DB15) cable into the video port on the rear
panel of the NetBackup appliance.
See “Appliance rear panel” on page 9.
2
Connect the other end of the cable directly to a monitor, or to a KVM adapter,
or KVM switch.
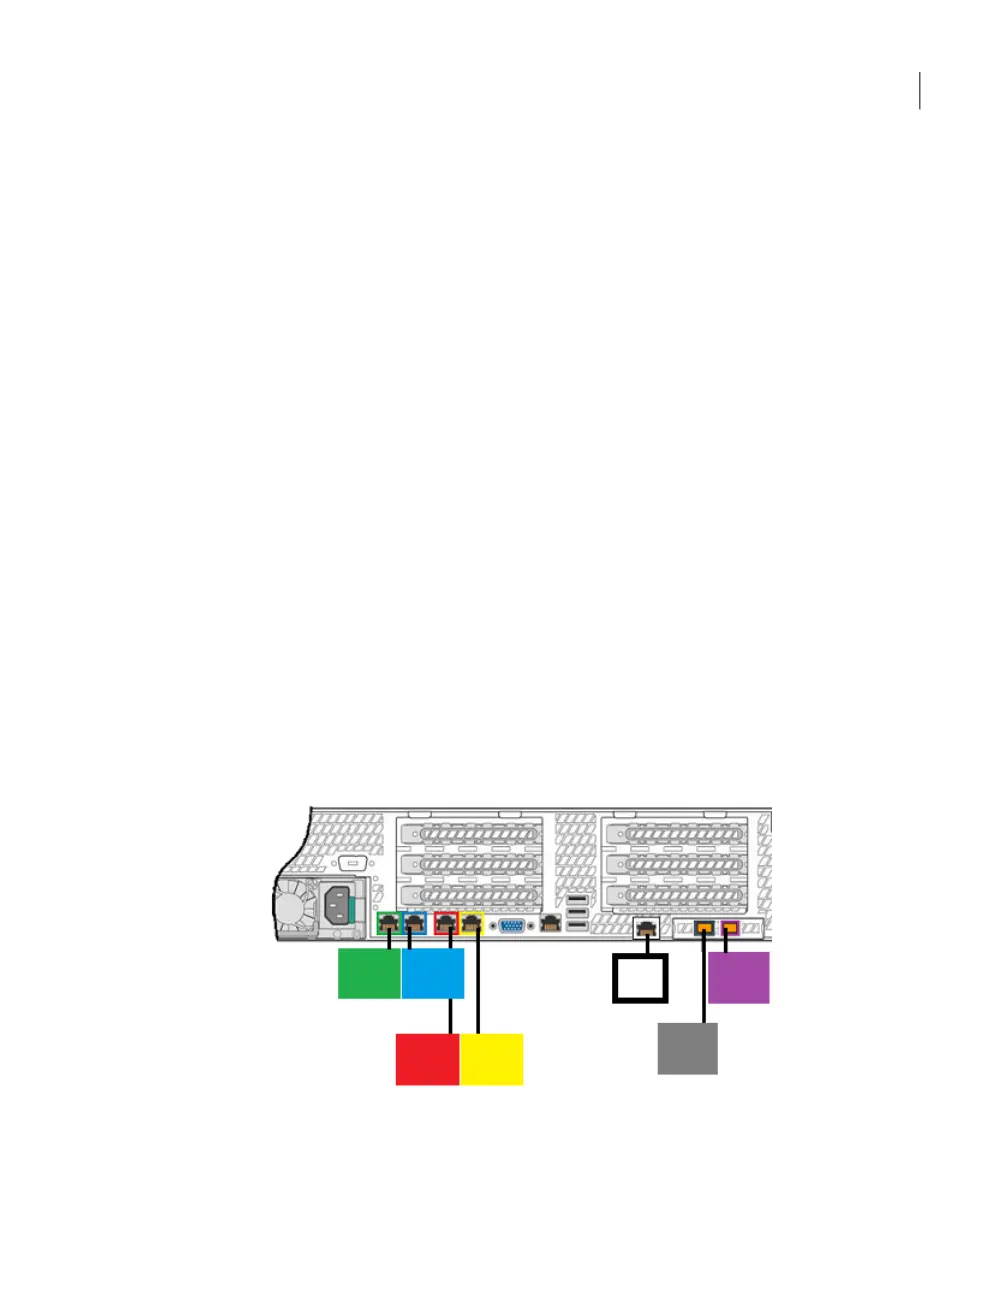
Connecting the network cables
The networking ports are accessed on the rear panel of the appliance. The following
picture shows the layout of the network ports. It includes the four 1 Gb Ethernet
ports on the left and the two 10 Gb Ethernet ports on the right. The remote
management (IPMI) port is located to the left of the 10 Gb Ethernet ports.
NIC2/
ETH1
NIC1/
ETH0
NIC3/
ETH2
NIC4/
ETH3
IPMI
NIC5/
ETH4
NIC6/
ETH5
By default, NIC1 (eth0) is factory set to IP address 192.168.229.233. This private
network address is reserved to provide a direct connection from a laptop to perform
28Cables
Connecting the VGA cable

 Loading...


