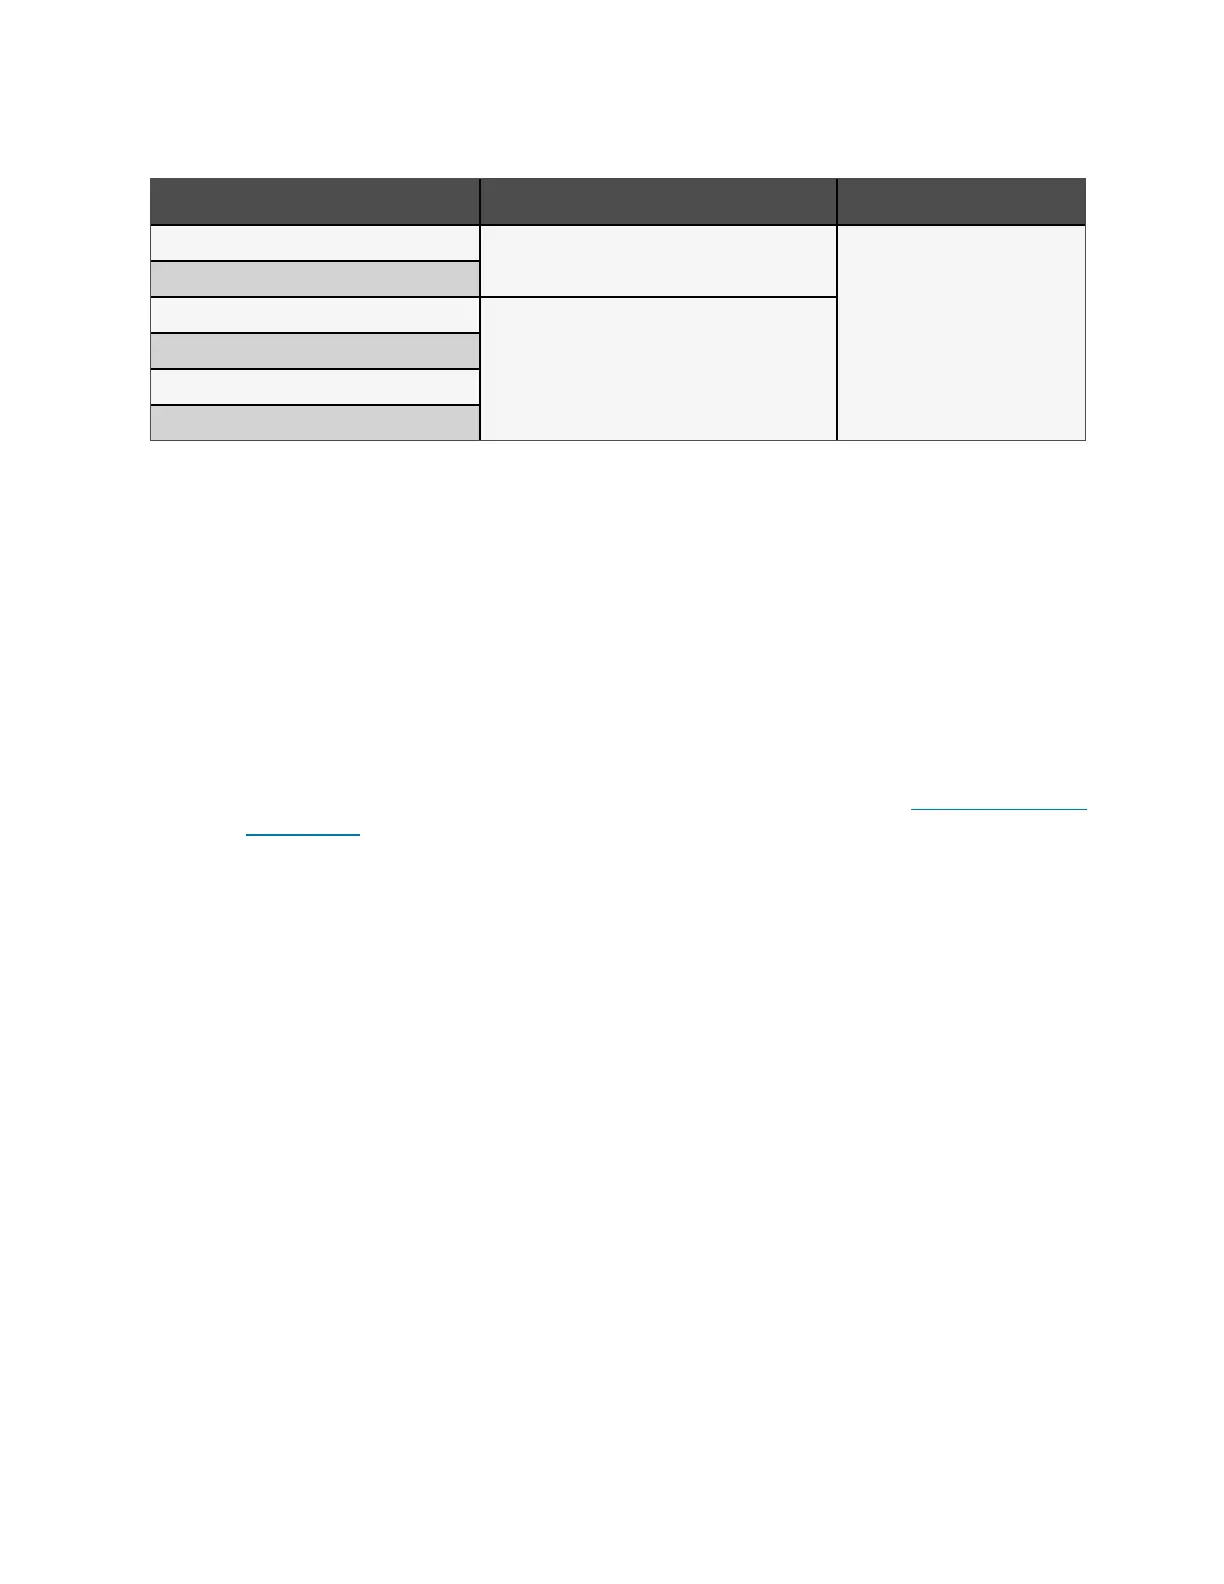
UPS Model Number Battery Pack Model Number Quantity Required
GXT5-3KL620RT2UXL
GXT5-72VBATKIT
1
GXT5-3KL630RT2UXL
GXT5-6KL630RT5UXLN
GXT5-192VBATKIT
GXT5-5000HVRT5UXLN
GXT5-8000HVRT5UXLN
GXT5-10KHVRT5UXLN
Table 6.1 Replacement Battery Pack Model Numbers
To replace a battery pack:
NOTE: The internal battery pack is hot-swappable. However, you must exercise caution because; during this
procedure, the load is unprotected from disturbances and power outages. Do not replace the battery while the UPS is
operating in Battery Mode. This will result in a loss of output power and will drop the connected load.
1. Press the button on the left-front of the UPS front panel, and pull the panel open, then, loosen and remove the
screw from the battery door, see Figure 6.1 on the facing page.
2. Lay the battery door and screw aside for reassembly.
3. Grasp the battery handle, and pull out the battery pack, see Figure 6.1 on the facing page.
4. Unpack the replacement battery pack, taking care not to damage the packaging to re-use when disposing of the
old battery.
5. Compare the new and old battery pack to make sure they are the same type and model. If so, proceed with step
6 . If they are different, stop and contact your Vertiv representative, or Technical Support, http://www.Vertiv.com/
en-us/support/.
6. Line-up and slowly push in each replacement battery pack until 2/3 of the length is in the bay, then lift up and
continue to push smoothly until the battery pack is fully inserted in the bay. The battery is fully inserted if the
battery door fits flush against the UPS.
7. Re-attach the battery door with the screw and replace the front cover.
8. Activate the new battery packs using the operating/display panel:
NOTE: The display menus and functions are described in Operation and Display Panel .
9. From the main menu, select Settings, then the Monitoring tab and verify that the date and time are correct. If the
date or time need correction, see Setting the Date and Time on page56.
10. Select the Battery tab, use the arrows to select Replace Battery, and press Enter. The replaced battery packs are
activated.
11. Use ESC to return to the main display.
58 Proprietary and Confidential ©2024 Vertiv Group Corp. 6 Maintenance
Vertiv™ Liebert® GXT5 UPS Installer/User Guide
 Loading...