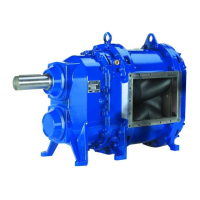
VX100Q/VX136Q/VX186Q, VX136QD/VX186QD, VX136QDM2/VX186QDM2
Pos: 238 /Übersc hriften/Überschrif t 3 /Cartridge- Gleitringdic htungswechsel a m QD-Deckel @ 58\mod_1312 968780602_4 8.doc @ 3095 71 @ 3 @ 1
8.9.2 Cartridge mechanical seal change on the QD cover
Pos: 239 /WBV/P umpen/Instandse tzung/002 W echsel der Cartr idge-Gleitring dichtung am QD-D eckel - VX.. QD @ 64\ mod_132257939331 8_48.doc @ 3 34224 @ @ 1
1. Depressurize both buffer chambers.
2. Emptying and cleaning the buffer chamber at the QD cover.
3. Remove any flushing connections and circulation system chap. "Circulation system on the cartridge
mechanical seal” and Fig. “Flushing operation".
4. Perform the work steps according to chap. "Opening the QD cover” starting at point 2.
Fig. “Cartridge mechanical seal on gearbox a) and b)"
5. Put on cartridge installation tool (D) and screw the hexagonal socket screws (b) into the borings of the
cartridge.
6. Remove retaining ring, O-ring carrier and O-rings
7. Pull off cartridge evenly by the means of the three hex head screws (c) for the cartridge installation
tool.
Fig. "Cartridge mechanical seal on the QD cover"
8. Place washer (2) on the hex head screw (3 and push it through the bearing cover.
9. Change O-ring in the bearing seal housing.
10. Clean the cartridge seat in the housing.
11. Insert the new cartridge.
12. If a circulation system is present, the bore holes in the cartridge mechanical seal must be aligned with
the flushing connections in the QD cover.
13. Put on tool G with the large boring facing the cartridge.
14. Insert tool F in tool G.
15. Slowly tighten the cartridge by tightening hex head screw (3).
16. Remove tools F and G.
17. Reinstall any removed flushing connections.
18. Fit O-ring carrier, O-rings and retaining ring.
19. Remove the hex head screw (3).
20. Close QD cover as per chap. “Closing the QD-cover".
21. Top up buffer fluid.
22. Readjust pressure in the buffer chambers.
Pos: 240 /---Seitenum bruch--- @ 21\mod_12 01696136229 _0.doc @ 805 75 @ @ 1


 To Next Page