BA 50Z3/6003 en – Edition 4.3 * 5003b520.fm 5-13
Maintenance
Replacing the air filter
Replacing the outside air filter
☞ Stop the engine.
☞ Raise the control lever base.
☞ Remove the ignition key and carry it with you.
☞ Let the engine cool down.
☞ Open the engine cover.
☞ Remove dirt and dust from the air filter housing and the area around it.
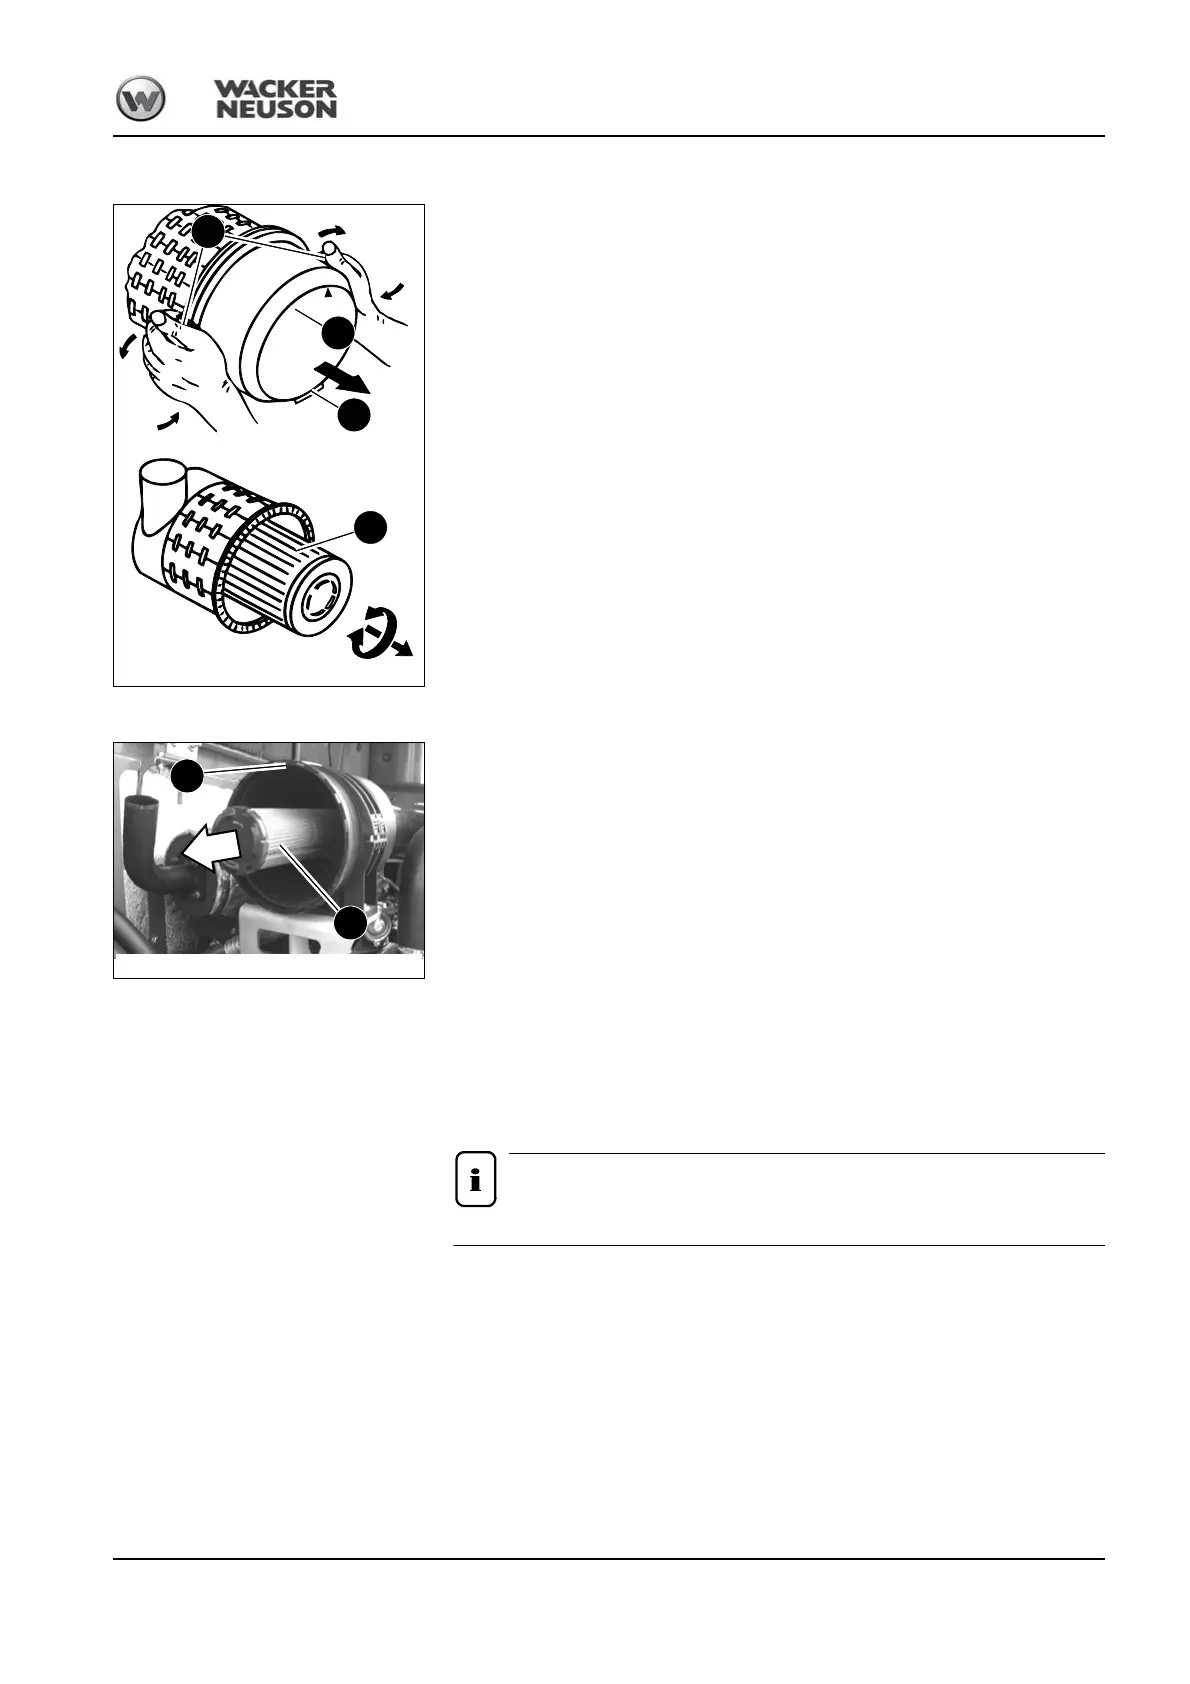
☞ Fold bow clips D on lower housing section E to the outside.
☞ Remove lower housing section E.
☞ Carefully remove outside filter A with slightly turning movements.
☞ Ensure that all dirt (dust) inside the upper and lower housing sections (F and E), includ-
ing dust valve G, has been removed.
☞ Clean the parts with a clean lint-free cloth, do not use compressed air.
☞ Check the outside air filter for damage, only install intact air filters.
☞ Carefully insert the new outside air filter A in the upper housing section F.
☞ Position lower housing section E (ensure that it is properly seated)
☞ Close bow clips D.
Replacing the inside air filter
☞ Remove outside air filter A as described above to access inside air filter B.
☞ Carefully pull out inside air filter B.
☞ Cover the air supply at the end of the filter with a clean lint-free cloth to prevent dust
from entering the engine.
☞ Ensure that all dirt (dust) inside the upper and lower housing sections (F and E), includ-
ing the dust valve G, has been removed.
☞ Clean the parts with a clean lint-free cloth, do not use compressed air.
☞ Remove the cloth from the air supply.
☞ Check the inside air filter for damage, only install intact air filters.
☞ Carefully insert the new inside air filter B in the upper housing section F.
☞ Carefully insert the outside filter A in the upper housing section F.
☞ Position lower housing section E (ensure that it is properly seated).
☞ Close bow clips D.
Ensure that dust valve G shows downward once it is installed.
Fig. 264: Removing the lower housing section
Fig. 265: Removing the outside air filter
D
E
A
G
Fig. 266: Replacing the inside air filter
F
B