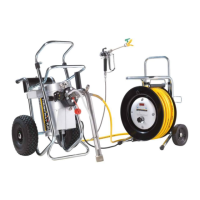
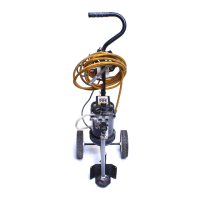
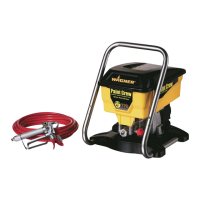
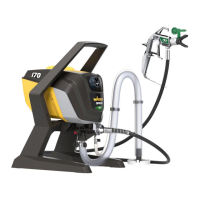
7. Connect the power plug (6) on the heating hose drum to
the socket in the device (7).
The connections between the unit and the
hose drum can lead to accidents with dam-
age to persons and property (stumbling).
STARTUP
4.4 CONNECTION TO THE MAINS NETWORK
Connection must always be carried out via
an appropriately grounded safety outlet with
residual-current-operated circuit-breaker.
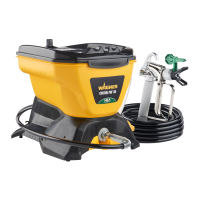
Before connecting the unit to the mains supply, ensure that
the line voltage matches that specied on the unit’s rating
plate.
As soon as the power plug is connected, the green indicating
light at the multifunction switch illuminates.
4.5 CLEANING PRESERVING AGENT WHEN
STARTINGUP OF OPERATION INITIALLY
1. Immerse the suction system into a container lled with a
suitable cleaning agent (recommendation: water).
2. Set the multifunction switch (Item 1) to (ON Circula-
tion). The unit starts up. The heating is switched on. Turn
the pressure regulating knob (2) to the right until the stop
is reached.
3. Wait until cleaning agent is emitted from the return hose
(3).
4. Turn the pressure regulating knob (2) back approx. one
rotation.
5. Set the multifunction switch (1) to (spray). Pressure is
built up in the high-pressure hose. (Visible at then ma-
nometer (4)).
6. The pressure is increased by turning the pressure regulat-
ing knob (2) to the right. Set approx. 10 MPa at the ma-
nometer.
7. Point the tip of the spray gun into an open collecting con-
tainer and pull the trigger guard at the spray gun.
8. Spray the cleaning agent out of the unit for approx.
1 - 2 min. (~5 liters) into the open collecting container.
1. Immerse the suction system into the paint container.
2. Press the inlet valve button (Item 5) several times in order
to open an inlet valve which may be clogged.
3. Set the multifunction switch (Item 1) to (ON Circula-
tion). The unit starts up.
Turn the pressure regulating knob (2) to the right until
the stop is reached.
4. When the noise of the valves changes, the unit is bled and
takes in coating material.
5. If coating material exits from the return hose, set the mul-
tifunction switch to (spray) and beforehand turn the
pressure regulating knob (2) back approx. 1 rotation.
6. Pull of the spray gun and spray into an open collecting
container in order to remove the remaining cleaning
agent from the unit. When coating materials exits from
the tip, close the spray gun.
7. Observe a waiting period of approx. 5 - 6 min until the
hose heating has warmed up the coating material.
While the material in the heated hose is being heated,
a dot illuminates in front of the temperature display. As
soon as this goes out, it will take another approx. 2 min-
utes until the material reaches the set temperature.
8. Remove the spray gun and turn the pressure regulating
head (2) to the right as far as the stop (pointer on manom-
eter is in the lower green area).
9. The unit is ready to spray.
1
3
2