1. Set the Edge [i] Controller’s Enable/Disable switch to Disable.
2. Open the water supply and return valves to the unit and ensure that the system pumps are
running.
3. Open the PROPANE supply valve to the unit.
4. Turn external AC power to the unit ON.
5. On the Controller, go to: Main Menu → Calibration → Manual Combustion. If necessary,
enter a technician level password.
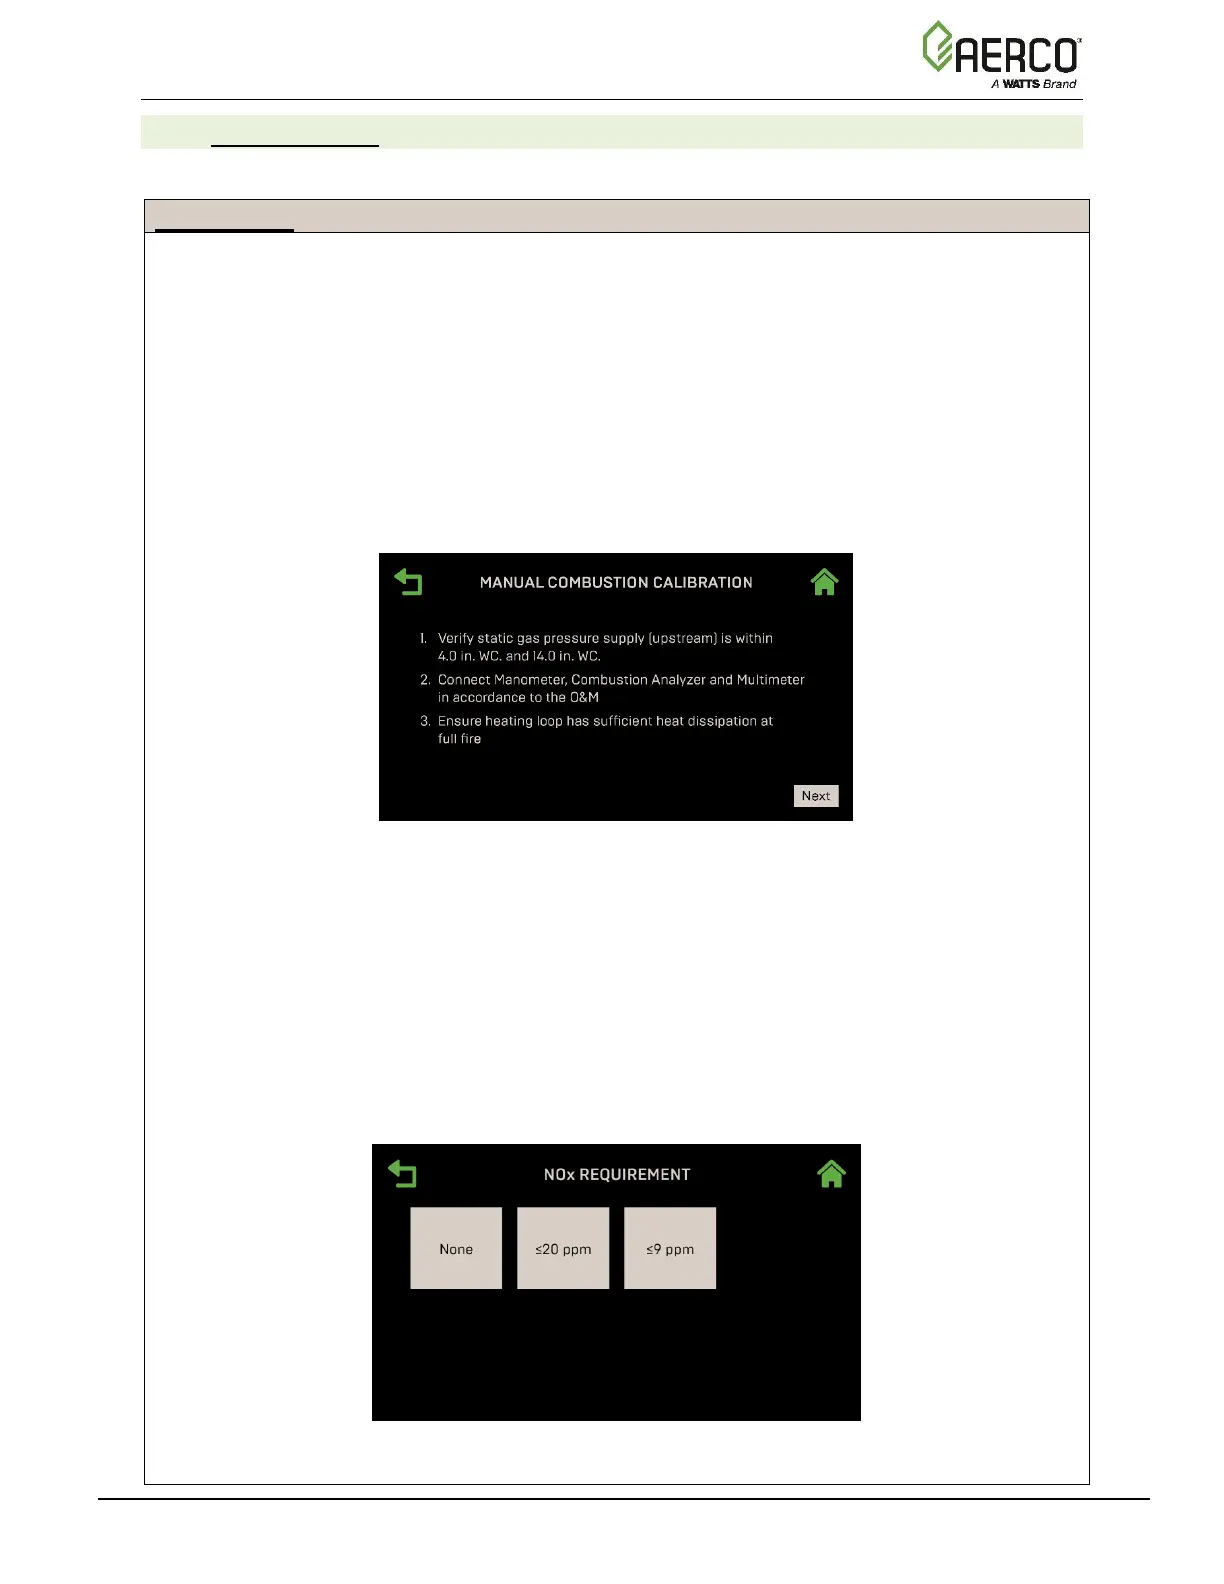
6. The first Manual Combustion Calibration screen appears. Complete the three steps listed
before continuing with the instructions. In addition, if your unit is running AERtrim, you must turn
that feature off before continuing, as AERtrim will interfere with combustion calibration.
Figure 4-7: First Manual Combustion Calibration Screen
7. Connect the gas pressure manometer to the upstream side of the gas train’s SSOV, as
shown in Section 4.2.2 and connect the Combustion Analyzer and Multimeter, as shown in
Section 4.2.3, and ensure that the heating loop is capable of dissipating sufficient heat at
full fire.
8. Verify that the incoming gas pressure to the unit is within the allowable range (see the
Benchmark Gas Supply Design Guide (TAG-0047, GF-2030).
9. Once you have completed the previous step, move the manometer (or use a secondary
one) to the downstream side of the SSOV and press Next to continue.
10. For the NOx requirement choose None.
Figure 4-8: Choose NOx Requirement
 Loading...