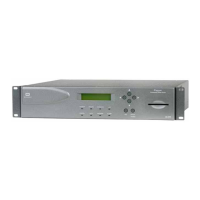
iPump User’s Manual
wegener.com 25 800009-01 Rev. A
3.3 Startup/Shutdown Procedures
The first time you start the iPump, the boot-up process and some initial setup
may require a few minutes to complete. (See Initial Unit Settings.) After the
initial startup, and if a normal shutdown was performed, the iPump may be
started again simply by pressing the ENTER button on the unit’s front panel.
Initial startup
a) For initial startup, set the power switch to the On position (
I
) and the
iPump will power up and begin the boot process. Usually within three
minutes, the iPump will complete its initialization (all outputs are muted
during this time).
b) The eight, front-panel LEDs flash on and off together once and then three
more times in succession. The LCD shows the current firmware version
and the message, "Booting, please wait. . . .". The expanding and
contracting ellipsis shows that the iPump is booting the software. (Note
that the version number shown is that of the front-panel firmware only and
does
not
indicate the current version of the iPump’s application software.)
c) During bootup, a quick check of the file system is made to detect and fix
any corrupted files. The message "Auto Maintenance . . ." indicates that
this check is in process. The duration of the file system check depends on
the extent of any needed repairs to the file system and the size of the
affected files. When no problems are detected, the "Auto Maintenance"
message will only briefly flash on the LCD. If the file system is corrupt
beyond repair, the message, "Filesystem is corrupt . . ." will appear.
Otherwise, the auto maintenance process is continuing normally and you
should wait for it to complete.
d) Following a normal file system check, the message, "Continuing to boot . .
." is displayed. At completion of bootup, the LEDs will light individually
as appropriate to show the iPump’s unit and signal status (see
Table 7:
LED Indicator Descriptions
on page 23). The display then becomes
"live" and will typically indicate a loss-of-carrier alarm condition if the
unit’s RF configuration has not been completed. This is normal and simply
means that the RF settings must be adjusted. After the RF setup has been
completed, subsequent startups will finish by displaying the home screen
(showing the iPump's serial number, E
b
/N
0
, and alternately displaying
FEC ratio, signal frequency, and data transport rate). This indicates that
your iPump is functioning normally and is ready for use.
Normal
Startup
Following initial startup and after a normal shutdown has been performed, the
iPump’s normal startup may be performed quickly by simply pressing the
ENTER button on the iPump's front panel. If the receiver is tracking a carrier
signal, the green CARRIER LED will light. If the RF set up has not been per-
formed or the receiver cannot track the carrier, the red Alarm LED will light.