iPump User’s Manual
800009-01 Rev. A 28 wegener.com
3.4 Front-panel Operation
Operate the iPump from the front panel using the pushbuttons and LCD. Menu
screens on the LCD direct you to screens that control various operating param-
eters or display information about the iPump. Menu titles represent either a cat-
egory of control (such as Unit Setup, Record and Play, and RF Setup) or the
name or category of parameters or information to be displayed (such as RF Sta-
tus, Active Recordings, or Navigation Help).
LCD Menu
Navigation
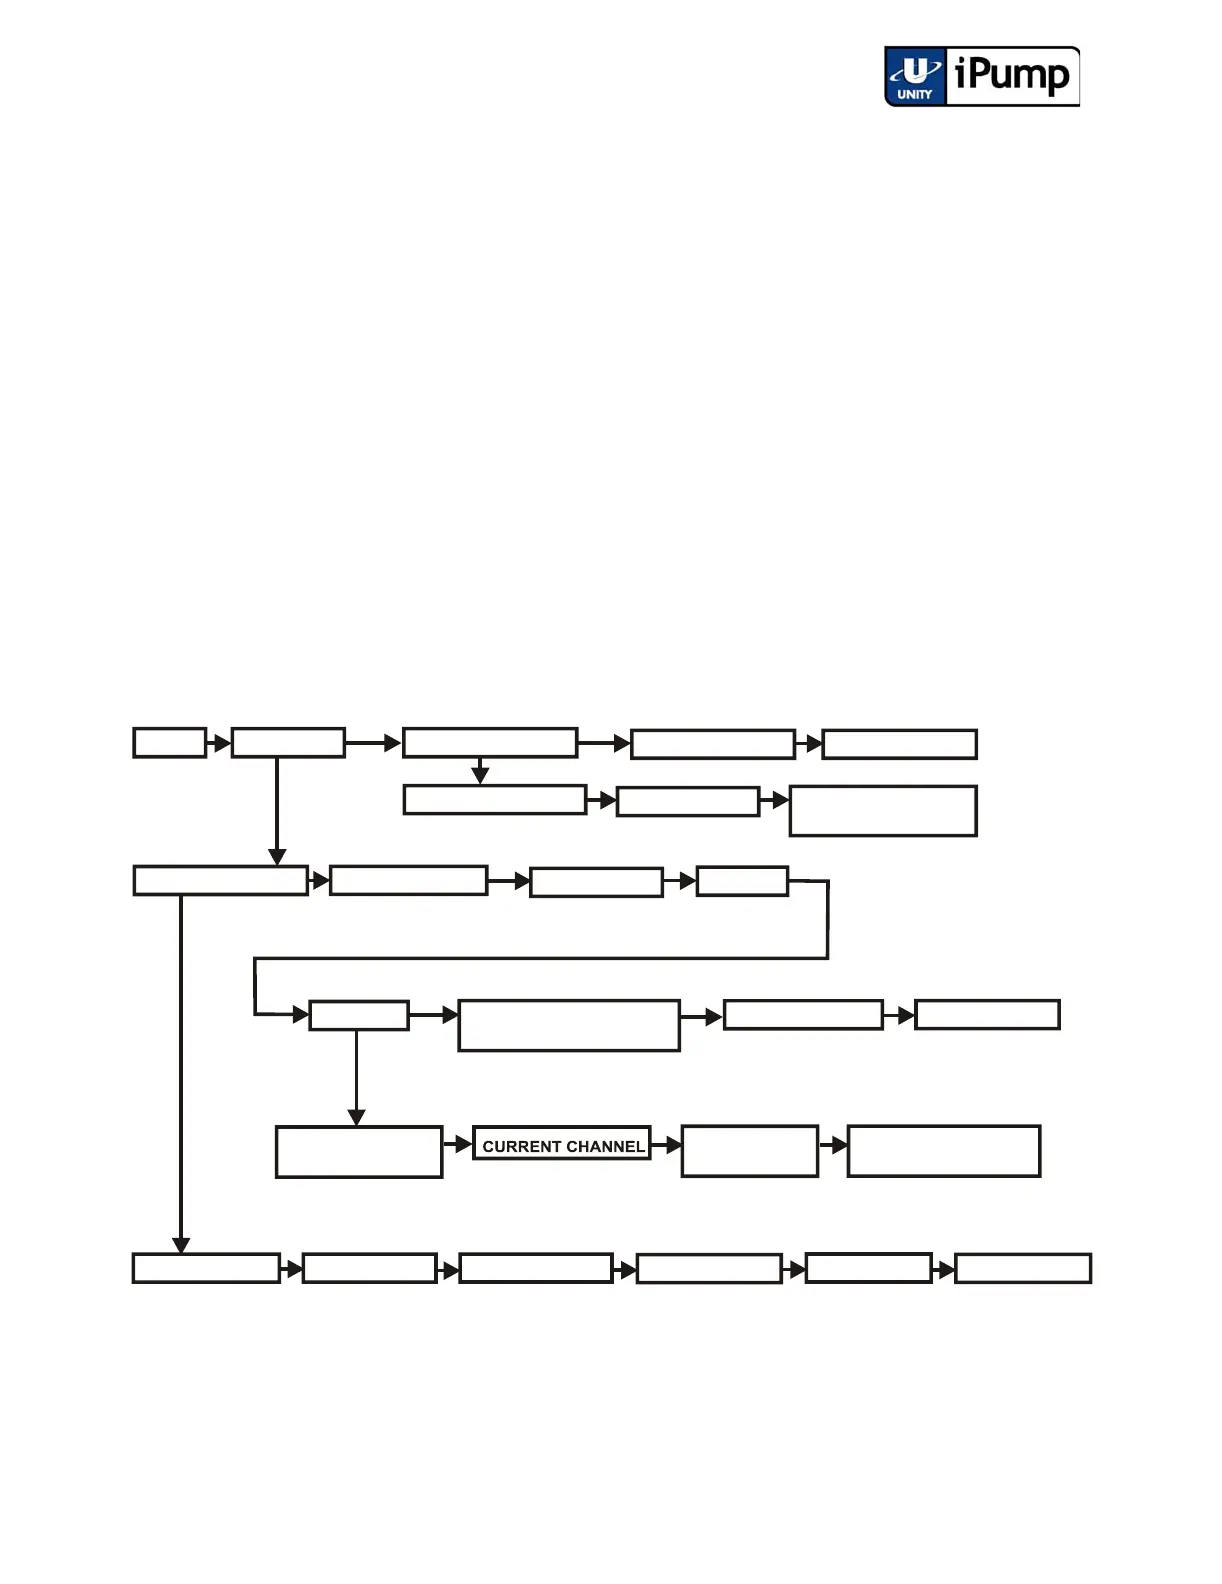
Refer to Figure 3.5 which illustrates the complete LCD menu structure. Infor-
mation and user-input screens beneath these menus are described later. Press
the right and left arrow buttons to move between menu screens on the same
level (represented in the illustration by arrows connecting the left and right
sides of the boxes). When you reach the last menu of a particular level, press-
ing the right arrow button again will move you back to the first menu of that
level. Press the ENTER button to move down to the next level of the menu
structure (represented in the illustration by arrows connecting the top and bot-
tom sides of boxes) or to view the information and user-input screens within a
particular category. Press the ESC button to move up a level or to the first
menu of the current level. Pressing the ESC button repeatedly will always
return you to the Home Screen.
Figure 3.5 LCD Menu Structure
HOME
*
*
RECORD SETUP STOP RECORD PLAY FILE SETUP
UNIT STATUS DETAIL
STOP FILE PLAY
DELETE FILES
RENAME FILES
DECODER SETUP
ACTIVE RECORDINGS
AUDIO SETUP
FILE PLAYBACK
IP SETUP
SOFTWARE VERSION
___________________
RF SETUP
DATE/TIME SETUP
SET UNIT LABEL
RF STATUS:
TRACKING Eb/No=
LNB LO VALUE
______.__
SNR ALARM/WARNING
SETUP
UNIT SOFTWARE SWITCH
TO B-UP
When alarm or warning conditions exist, the appropriate
message or messages will appear here.
RECORD AND PLAY
UNIT SETUP
NAVIGATION HELP UNIT SHUTDOWN