Initial commissioning
30
5661290000/00/06.08
Initial commissioning
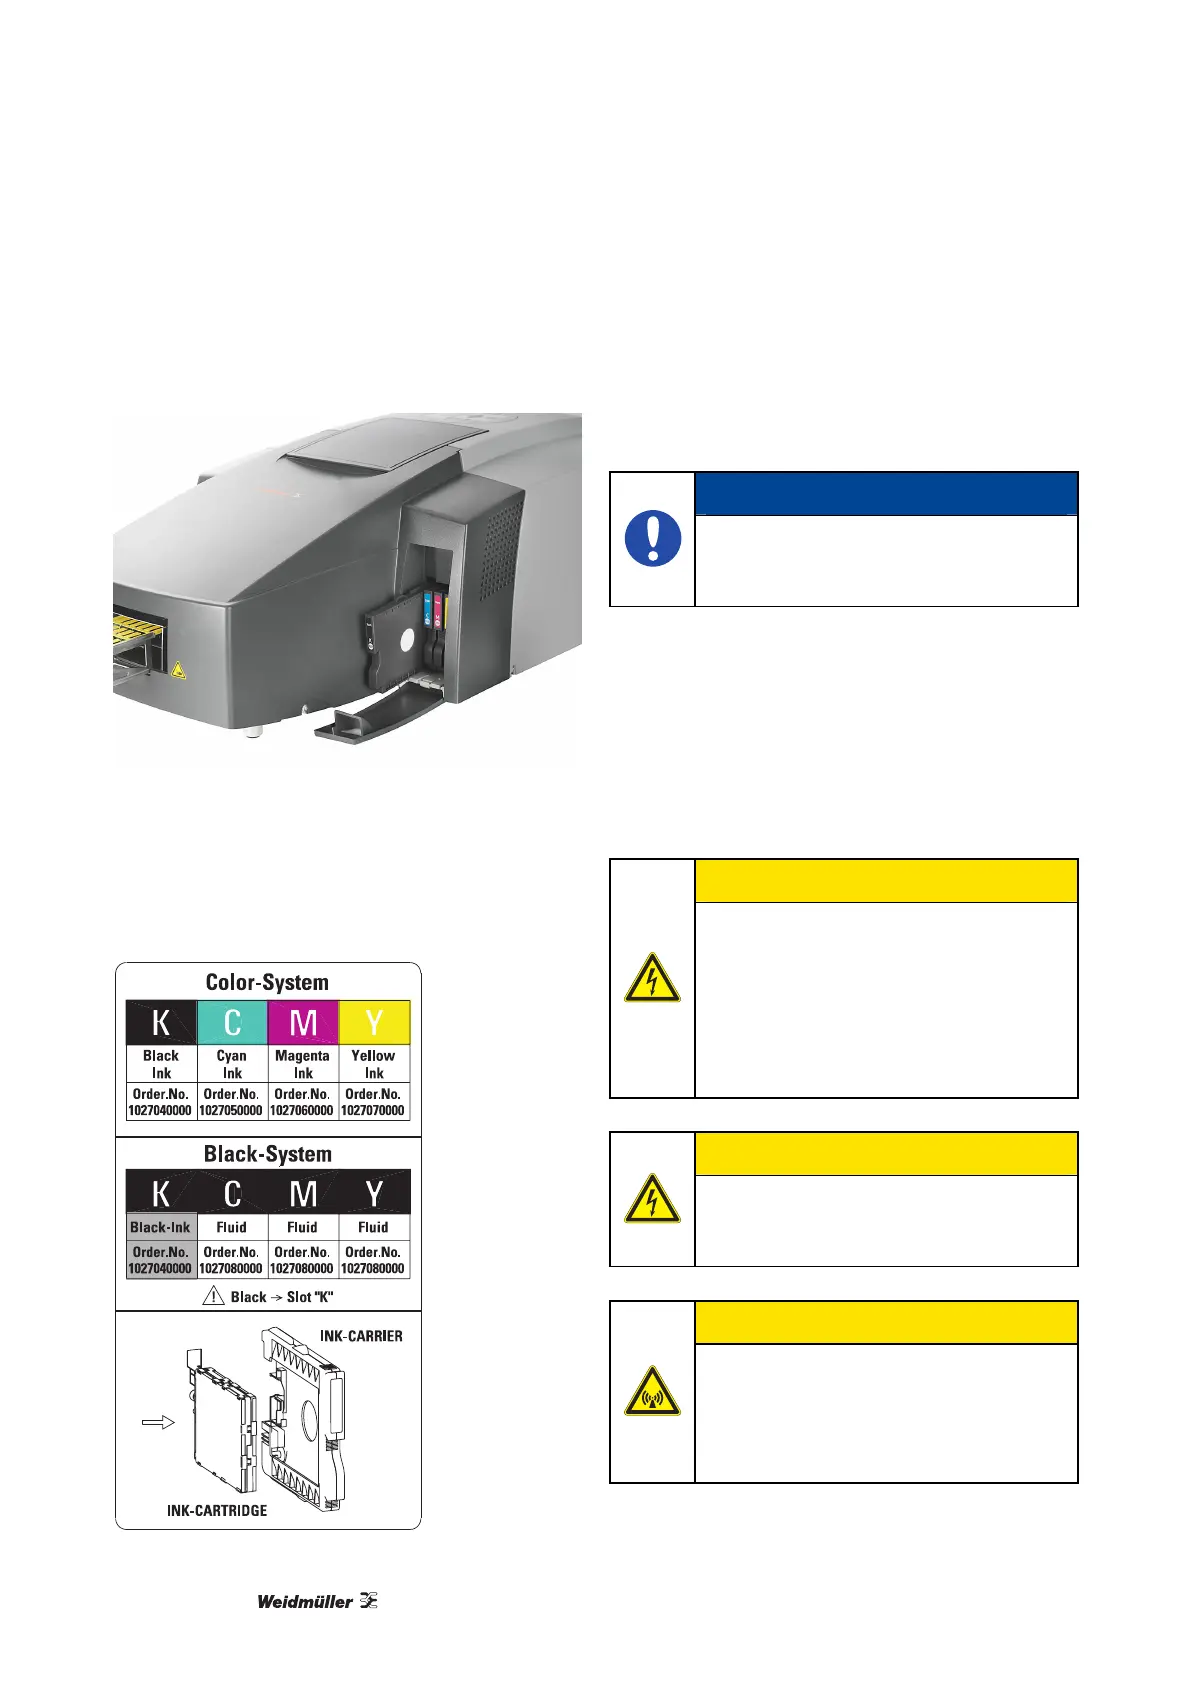
1 Open the ink-cartridges cover.
Figure 21 Inserting the ink-cartridge carrier
2 Check the alignment and the assembly of the ink-
cartridge carrier. Then carefully place it into the
printer using the following guidelines. Pay special
attention to whether you are installing black or
coloured inks.
Figure 22 Color System / Black System
3 Press on the middle of the ink-cartridge carrier
and push in until it snaps into place.
4 Repeat this step for all ink-cartridge carriers.
5 Close the ink-cartridge cover.
NOTE
Run through the commissioning proce-
dure as detailed in the instructions be-
fore turning on the printer!
4.4 Connecting the power cord
The mains voltage must correspond to the system
voltage given on the PrintJet PRO type plate.
Connect the plug-in power connection to a nearby
mains socket, ensuring it is easily accessible.
CAUTION!
Only connect the printer to a properly-
earthed and correctly-fused socket out-
let.
Do not use a socket outlet already being
used by devices that are turned on and
off at regular intervals, such as photo-
copiers or fans.
CAUTION!
Do not connect the PrintJet PRO to ei-
ther a switched or a timer-controlled
socket outlet.
CAUTION!
Do not use the computer system close
to potential electromagnetic disturbance
fields such as loudspeakers or base
transceiver stations for mobile tele-
phones.