411357590000/00/03.12
Maintenance
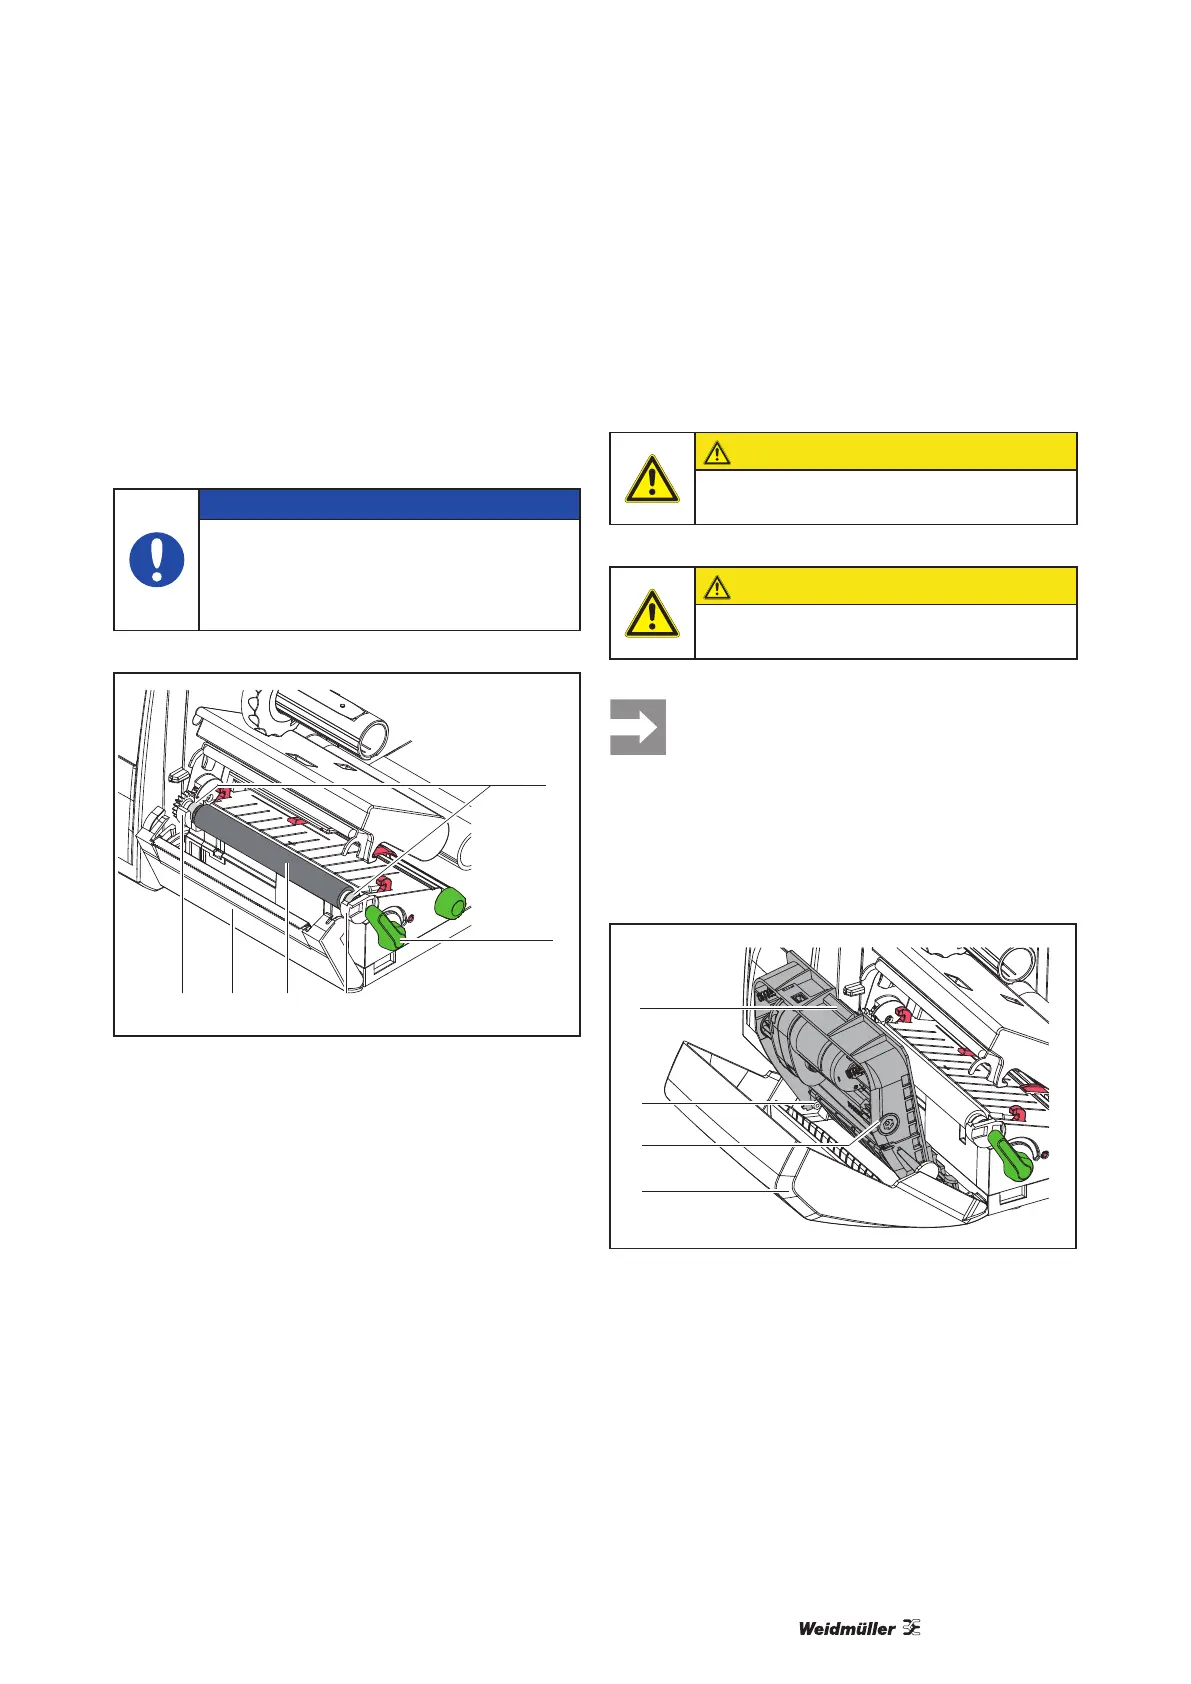
7.3 Cleaning or Replacing the
Print Roller
Accumulations of dirt on the print roller may impair
the media transport and the print quality.
NOTE
Damage of the print roller.
• Do not use sharp objects (knives,
screwdrivers, etc.) to clean the print-
head.
43 35
1
2
Fig. 15 Print Roller
1 Turn lever (2) counterclockwise to open print-
head.
2 Remove material and transfer ribbon from the
printer.
3 Fold down cover (5) with tear-off plate, cutter or
perforation cutter.
4 Lift print roller (4) from its retainers (3).
5 Remove deposits with roller cleaner and a soft
cloth, or replace it if the roller appears damaged.
6 Push roller with bearings (1) into the retainer (3)
until they click into place.
7 Fold up cover (5) with tear-off plate, cutter or per-
foration cutter.
7.4 Cleaning Cutter/Perforation
Cutter
CAUTION
Disconnect printer from electrical outlet
to prevent accidental blade movement.
CAUTION
Risk of injury! The cutter blades are
sharp!
When cutting through the label material in-
stead of the label gap remains of adhesive
may accumulate on the blades. If operating
in backfeed mode, such remains of adhe-
sive may be deposited on the drive roller
as well.
• Clean the drive roller and the cutter
blades often.
1
2
3
4
Fig. 16 Dismount Cutter
1 Fold down cutter.
2 Push release push button (1) and lift blade unit
(3) from the cover (4).
3 If the blades are only slightly dirty it is sufcient to
clean them with a soft cloth.
 Loading...