Page | 46
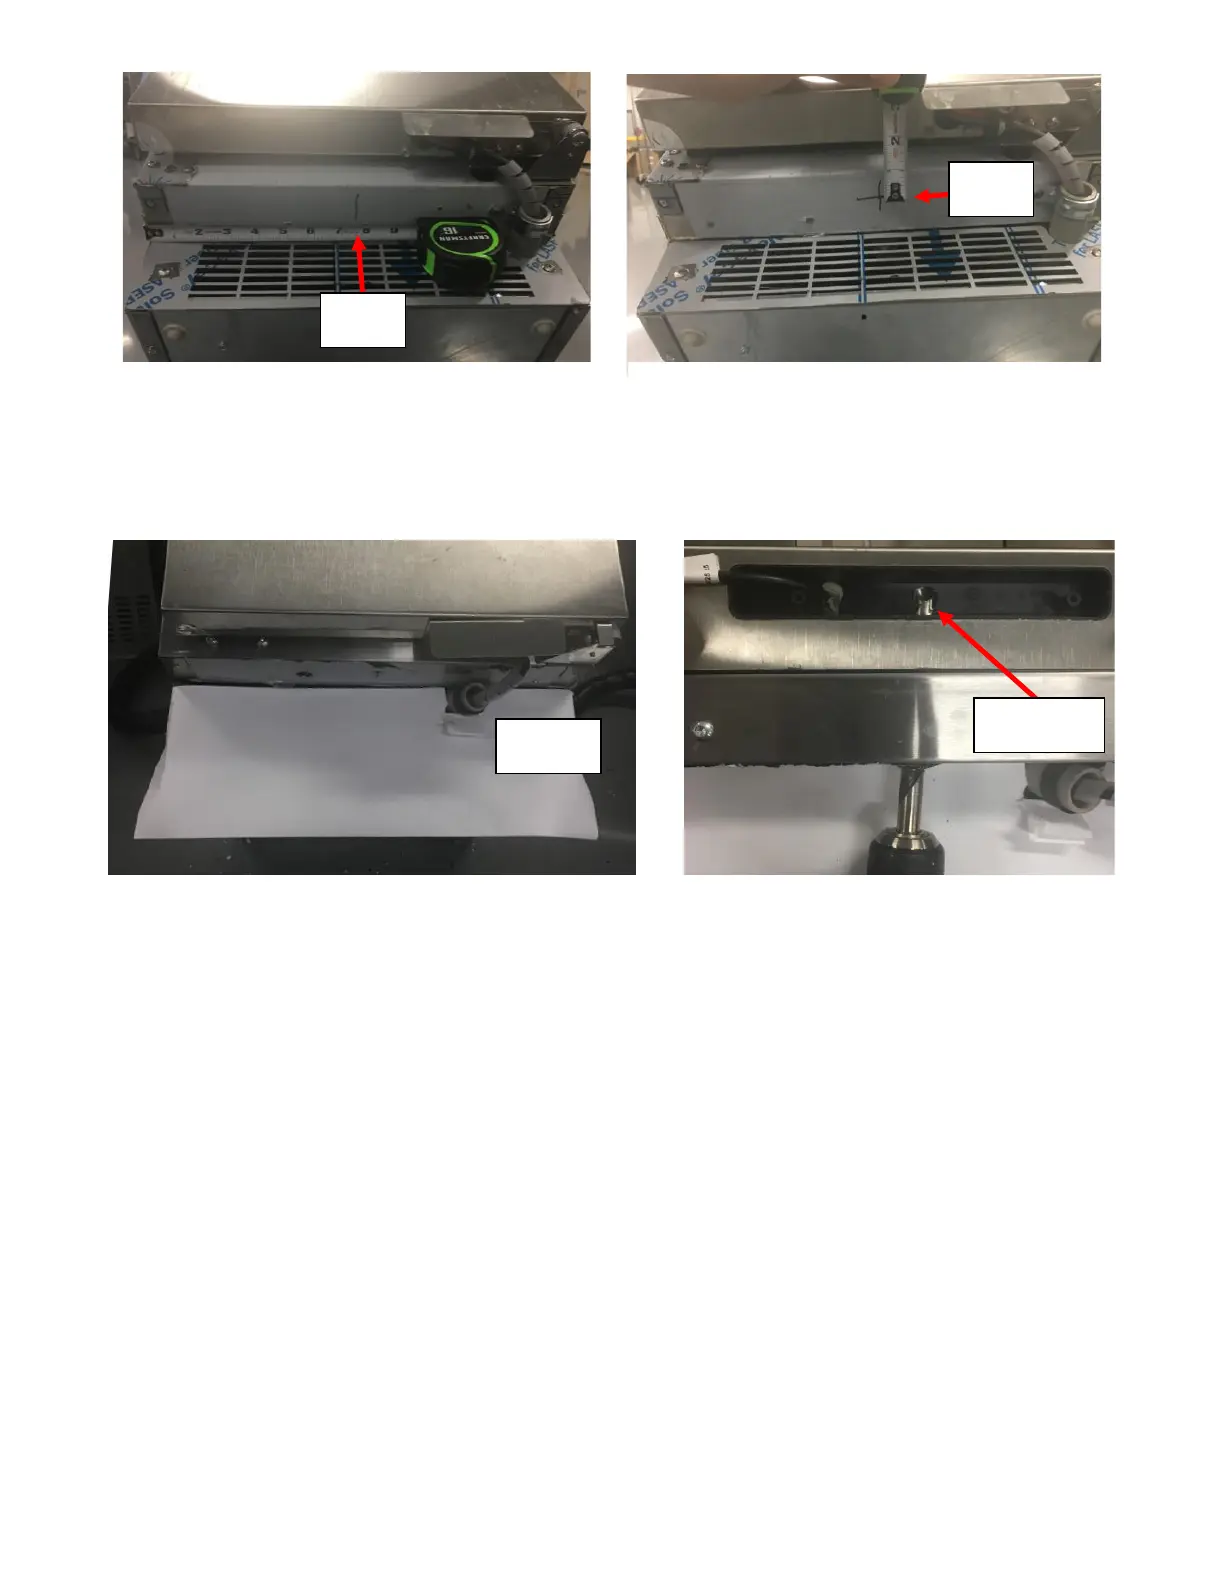
iii. Cover the vent holes in the Front Grill with paper/cardboard/plastic and/or tape to prevent debris
entering through the vent holes on the Front Grill. See Figure 103a.
iv. Drill at the marked location with a 5/8-inch Drill Bit using a Handheld Drill through to the UI Board
Housing. A small pilot hole can be drilled if necessary. See Figure 103b.
v. Deburr the hole using a deburring tool.
vi. Remove the paper/cardboard/plastic and/or tap used to cover the event holes on the Front Grill.
e. Insert the replacement UI Harness through the Access Hole:
i. Insert the supplied Grommet for 5/8-inch hole over the connector on the UI Harness that is labeled
Display Board. See Figure 104a.
ii. Apply Tape over the Connector on the UI Harness end so it is covered and prevents debris/foam
entering the sockets. See Figure 104b.