Page | 49
g. Route the UI Harness through the Fridge:
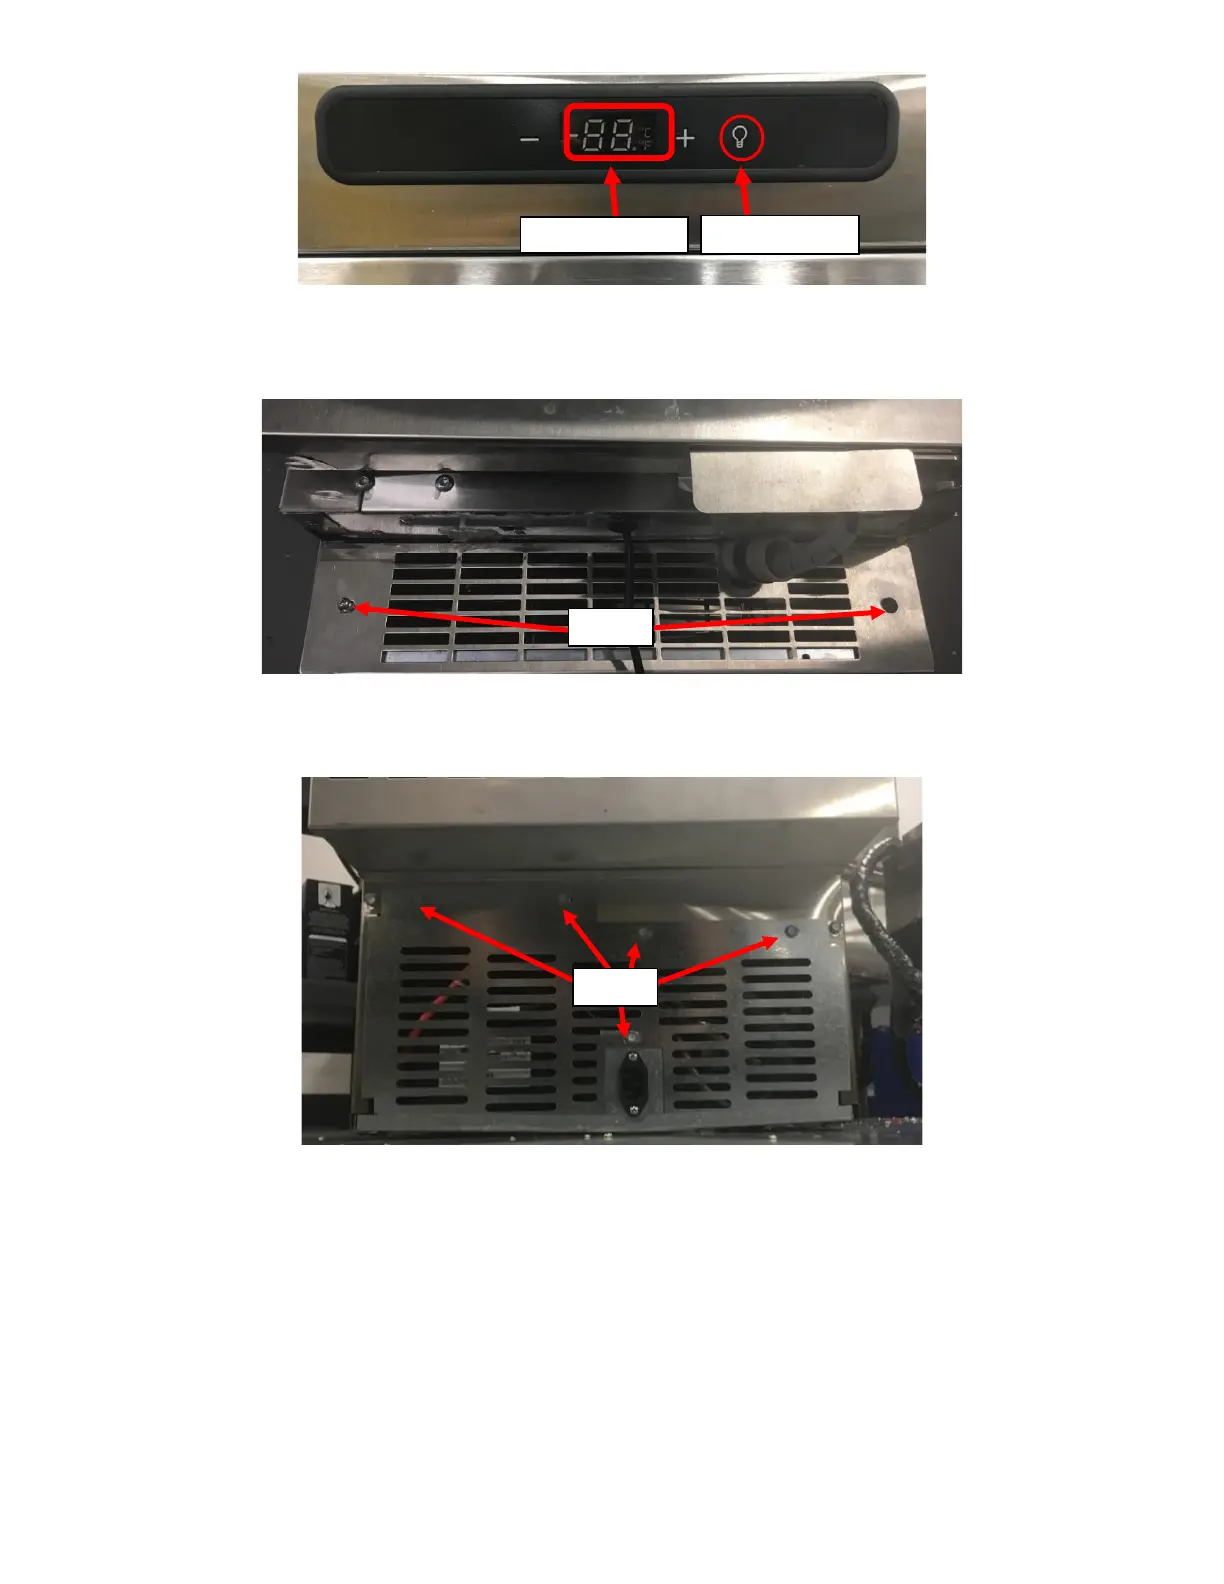
i. Remove the Front Grill by unscrewing the two screws holding it in place. See Figure 111.
ii. Remove the Rear Bottom Grill on the Fridge by removing the five (5) screws holding it in place with a
5/16” Hex Drive Screwdriver. See Figure 112.
iii. Insert the open end of the UI Harness labeled Control Board through the topmost middle vent hole on
the Front Grill. See Figure 113a.
iv. Route the Connecter end of the UI Harness labeled Control Board through the Fridge by inserting it
through the cavity on the right side of the Fridge. See Figure 113b.