Page | 70
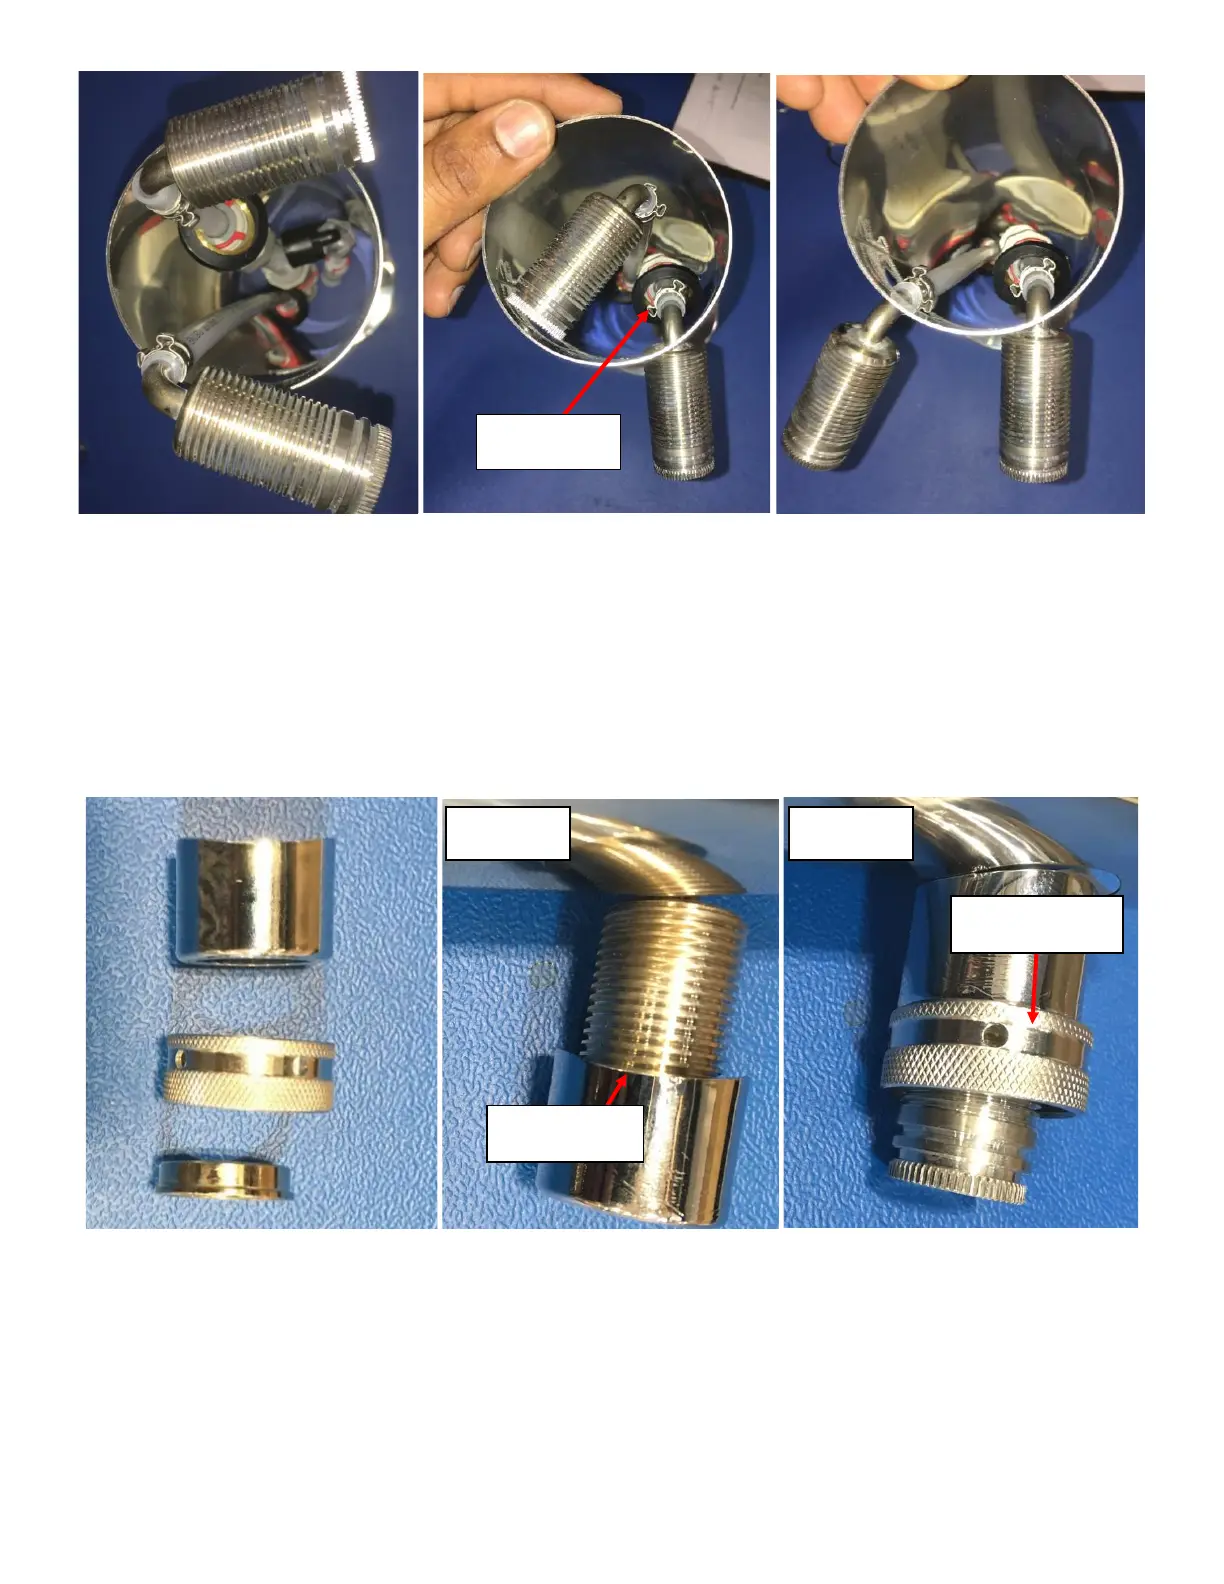
4.3. Reassemble the Elbow Shanks:
4.3.1. The components of the Elbow Shank will go on Curved Spacer first, Elbow Shank Nut second, and the Elbow
Shank Collar third. See Figure H22.
4.3.2. Insert the Curved Spacer over the threaded portion of the Elbow Shank so that the curved end of the
Curved Adaptor is facing towards the Tower Body. See Figure H23.
4.3.3. Insert the Elbow Shank Nut so that the thin layer of texture is towards the tower. This orientation allows
the threaded end of the Elbow Shank Nut to be facing away from the Tower Body. See Figure H24.
4.3.4. Insert the Elbow Shank Collar so that the thin end of the Collar is facing towards the tower body. See Figure
H25.
4.3.5. Insert the Snap Ring over the Elbow Shank into the second groove. Be careful not to stretch the snap ring
during this procedure. See Figure H26.
4.3.6. Pull the Elbow Shank Collar over the Snap Ring. Be careful not to stretch the snap ring during this
procedure. See Figure H27.
Figure H22: Curved Spacer, Elbow Shank
Nut, and the Elbow Shank Collar shown in
order of assembly.