PAPER TRAY OPTIONS
Configuring Dedicated Paper Trays
The system administrator can set trays to Fully Adjustable mode or Dedicated mode. When a paper tray is set to
Fully Adjustable mode, you can change paper settings each time that you load the tray. When a paper tray is set to
Dedicated mode, the control panel prompts you to load a specific paper size, type, and color.
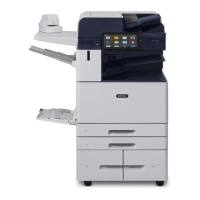
Your printer can have three high-capacity paper trays installed, depending on the configuration.
• High-capacity trays are configured as Fully Adjustable trays.
• Trays 3 and 4 in the Tandem Module, and High-Capacity Tray 6 hold A4-size (210 x 297 mm), Letter-size (8.5 x
11 in.), JIS B5-size (182 x 257 mm), or Executive-size (7.25 x 10.5 in.) paper.
• High-capacity trays are designed to hold larger amounts of paper for fewer printing interruptions.
Note: To configure tray settings, refer to the System Administrator Guide at www.xerox.com/office/
ALB81XXdocs.
Paper Size Confirmation
The system administrator can configure the device response that appears on the control panel touch screen when
paper of the same size is loaded in a tray. For standard adjustable paper trays, select an option:
• AAllwwaayyss SShhooww: This option shows the paper confirmation prompt on the control panel touch screen until the
user dismisses it.
• DDeellaayyeedd CCoonnffiirrmmaattiioonn: This option shows the paper confirmation prompt for a specified time. At the end of
the specified time, the prompt closes, which confirms the paper that is loaded. While the prompt appears on the
control panel touch screen, you can confirm any change to the paper type, color, and size.
• AAuuttoo CCoonnffiirrmmaattiioonn: This option confirms the paper type, color, and size automatically without showing a
confirmation prompt on the control panel touch screen.
Note: Xerox does not recommend using the Auto Confirmation option unless you always load the tray
with paper of the exact same type, color, and size.
Note: To configure the Automatic Tray Confirmation Prompt, refer to RReeqquuiirreedd PPaappeerr PPoolliicciieess in the System
Administrator Guide at www.xerox.com/office/ALB81XXdocs.
32
Xerox
®
AltaLink
®
B8145/B8155/B8170 Series Multifunction Printer User Guide
Getting Started
 Loading...


